Nails DIY: How to Create Marbled Nails
Tori is a 28-year-old, three-time animal mom and DIYer living in Northern Atlanta with her boyfriend.
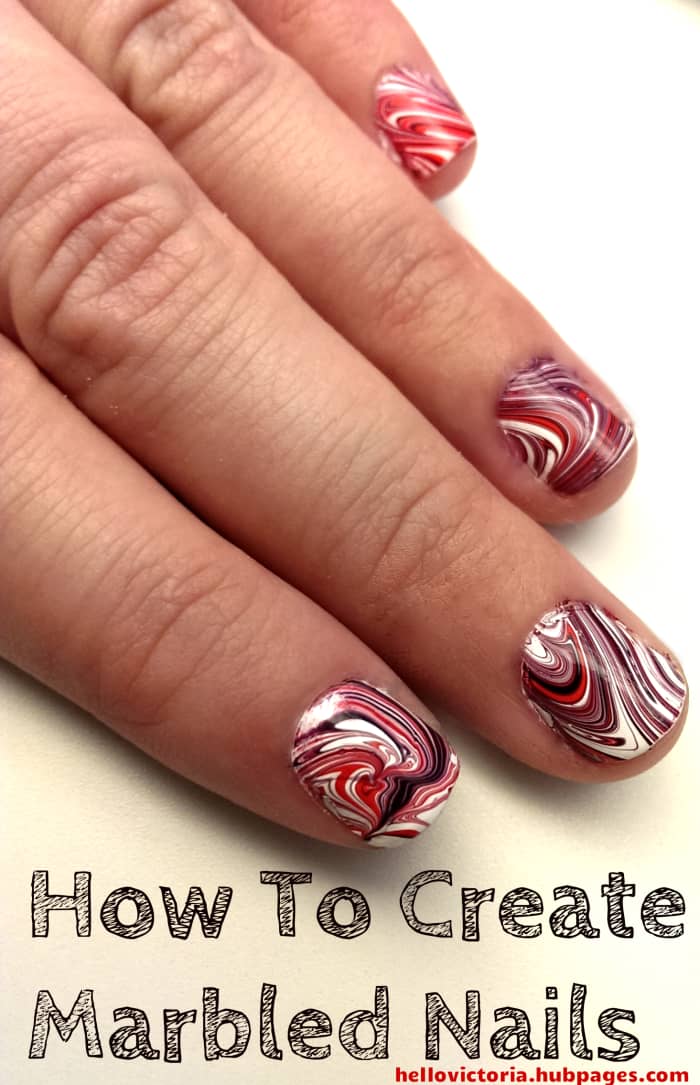
Create this marbled manicure at home!
hellovictoria
DIY Marbled Manicure
Marbled nails look really cool. I used to always see these nails all over the internet and wonder how on Earth people did it. It seriously looks like they took a sticker and put it on their nails (which, apparently, is a thing now).
I learned how to do this from a post on Tumblr. The post in question was just a group of images without any text showing you what to do to create the look. I looked at it and thought, "OK! That's easy enough!" Unfortunately, the graphic tutorial didn't contain any tips and tricks that are useful when trying to do this, and also wasn't very complete in the steps, either. After several tries, I eventually got the look I was going for. Even though some of my nails looked really janky, I was happy with it for the time being. But I did want to get better at it!
I began doing the marbled look more regularly, and have discovered some tips and tricks to accomplish this method of nail art in the cleanest, easiest way possible. Here is an easy DIY guide for creating that marbled look at home!
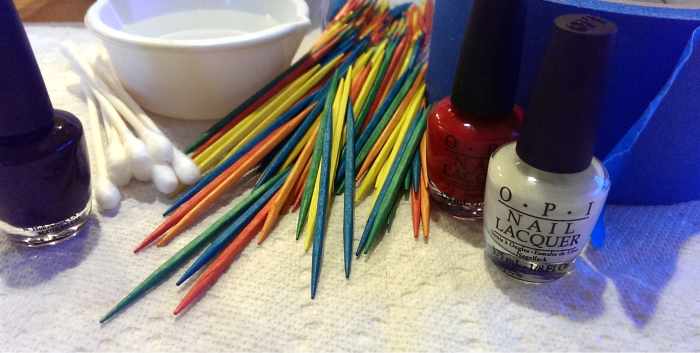
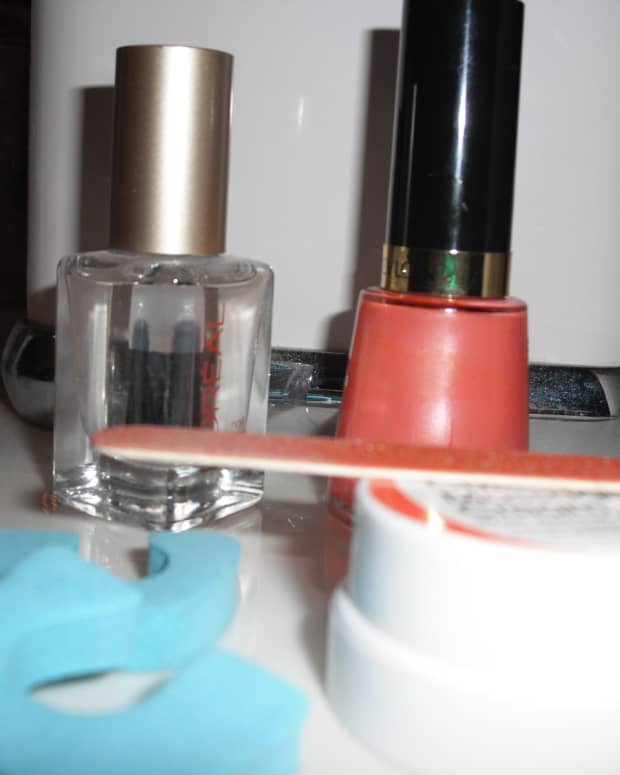
Supplies needed to create marbled nails at home.
hellovictoria
Supplies
This nail art is simple if you are equipped with the right supplies to get the job done the right way.
You will need:
- A small cup that you don't care about. It must be at least an inch deep. I used a quarter measuring cup.
- Room temperature water. It is absolutely imperative that this water is room temperature, and not cold or warm to the touch.
- Q-Tips (for touchups!)
- Wooden toothpicks
- The polish colors you would like to use. OPI nail polishes work great for this style of nail art. For the base coat, you'll want to use a white or a pastel, to ensure the rest of the colors show up. I really like using OPI Alpine Snow as my base coat. Then you'll need to pick two other colors to mix with for the marbled look.
- A paper towel
- Nail Polish remover
- Masking tape or Scotch tape (I prefer blue painters tape or masking tape).
Important Tips Before You Start
- Cup Size: The cup you choose should not have a large surface area for the water. The smaller the cup, the better—so long as it is at least an inch deep. If you have a big surface area for the water in the cup, the nail polish will spread too much, and you will end up wasting a lot of it! I've used the little disposable sauce cups from a restaurant—those are great for this type of project!
- Water Temperature: The water in your cup cannot be too hot or too cold. The temperature of the water will either cause the polish to dry too quickly, or it will cause it not to separate properly. For this reason, it is very important to ensure that the water does not feel hot or cold to your touch.
- Polish Choice: It is very important that your polishes are new or like-new, and cannot be the instant-dry nail polish. Firstly, the polishes must be new or like-new because older polishes tend to be more dried out than when you first purchase them, which affects their ability to spread in the water. Instant dry nail polishes also have the same issue - because they dry so quickly, they will not spread on the surface of the water but will clump and sink. You can test your nail polish to see if it will work for this project by dropping a small bit of it into the water. If the nail polish stays in a clump or sinks to the bottom, it is too old and cannot be used for this project. If it stays on the surface of the water and spreads out across the top without clumping or sinking, it is perfect to use.
- Put Remover in the Cap: The nail polish remover is easiest to deal with when you pour it in the cap. The nail polish remover will come in handy when you are cleaning up the nails and the nail beds after each coat of polish. Since you are working on details and will be using Q-Tips for this, it is very convenient to pour a little nail polish remover into the cap for easier access.
- Change the Water Regularly: Switch your water out if you notice it is getting really dirty. The water will become dirty from all of the nail polish you are dropping into it. If you start having issues getting your nail polish to spread, you will need to switch the water out. I can usually get one hand done before I have to switch it out.
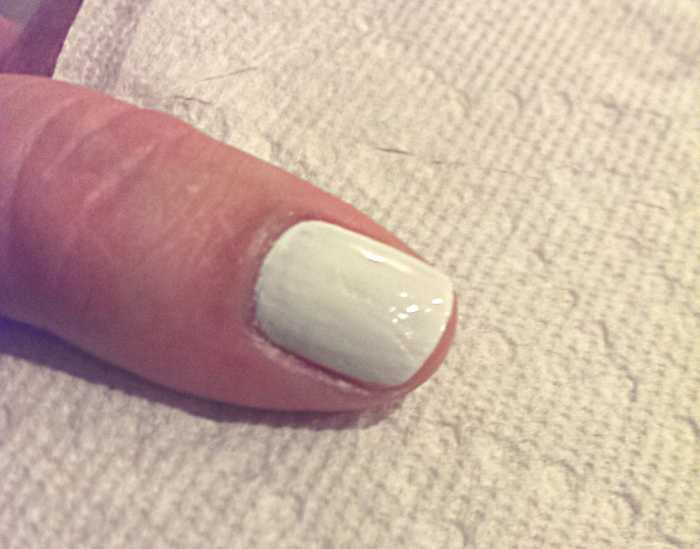
White base coat painted and cuticles clean of any polish.
hellovictoria
1. Paint Your Base Coat and Color
Paint the base coat as smoothly as possible. Use Q-Tips and nail polish remover to touch up around the cuticles. Make sure to let this dry completely before doing the next step!
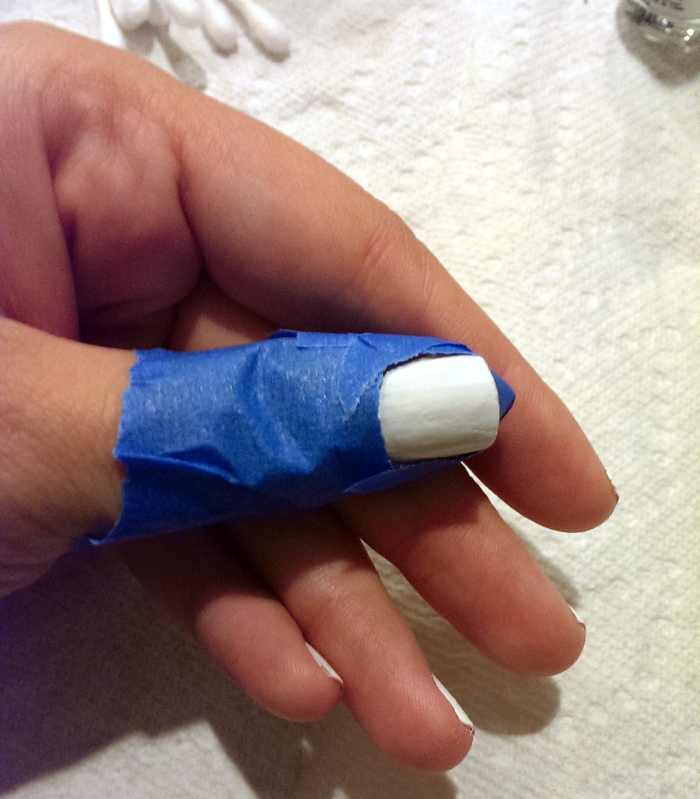
Painter's tape surrounding my nail all the way to my knuckle.
hellovictoria
2. Protect Your Skin
Tape your nail all around so that as little of your skin is visible as possible. Try to surround your nail as well as possible, and extend the tape to about your knuckle.
Alternatively, you can also use liquid latex around your nail. I particularly like Pueen Latex Nail Tape—it dries quickly and peels off easily!
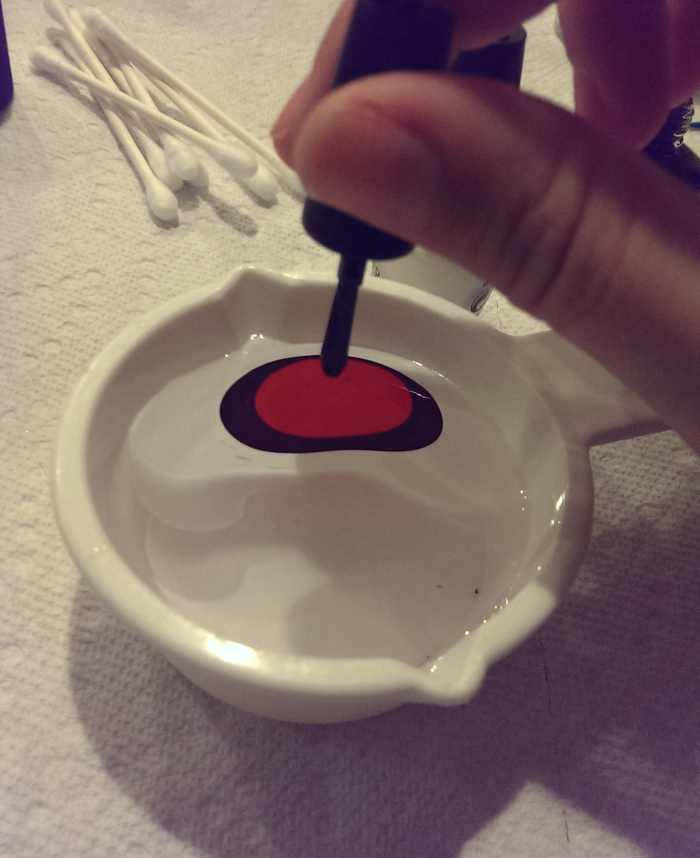
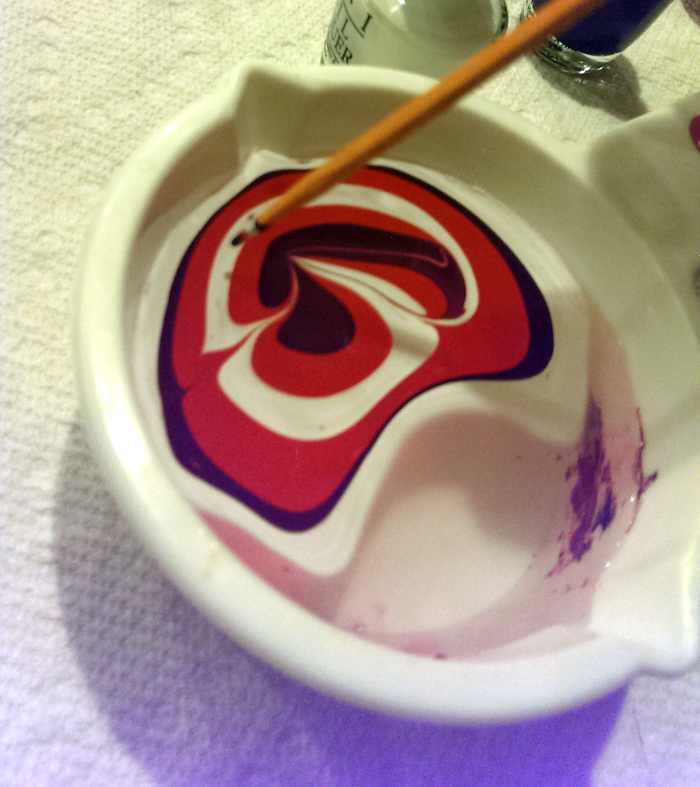
Dropping the colors carefully into the cup of room temperature water.
hellovictoria
3. Add Colors to the Water
Quickly drop the nail colors into the water, alternating colors however you want. I will usually start with the base color (white), then drop the other colors on top of each other. Do this step quickly to prevent the polish from drying too quickly.
Colors swirled together with a toothpick.
hellovictoria
4. Swirl the Colors
Swirl the colors together lightly with a toothpick to your desired design. Do this quickly! If you mess up, blow on the top of the water until the nail polish dries. Then, sweep it up with the Q-Tip and start again.
Read More From Bellatory


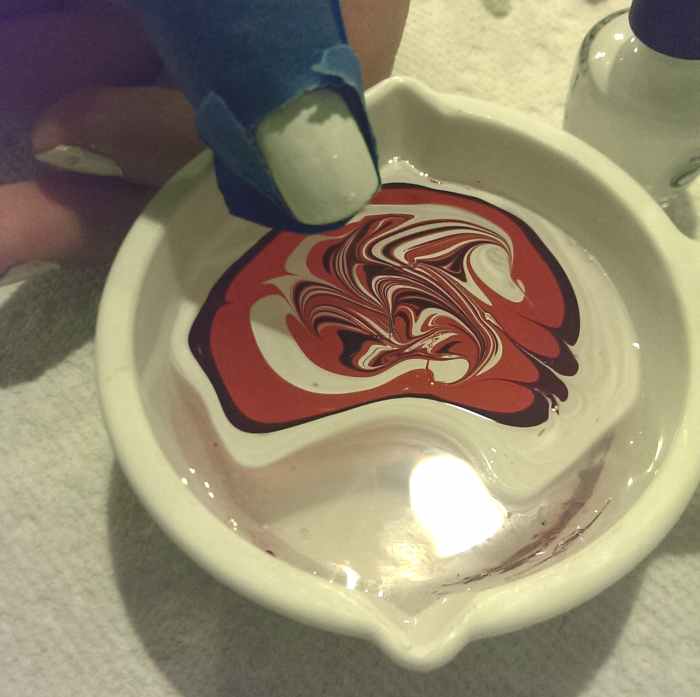
As you can see, I have swirled the nail polish around and have picked a spot to dip my nail in.
hellovictoria
Here, I have dipped my nail into the polish and am holding it in the water. This allows time for the design to bond to my nail. Whatever you do, don't lift your nail back out of the water at this point.
hellovictoria
5. Dip Your Nail Into the Design
Identify the pattern that you would like to show on your nail. Strategically place your nail over the design you want and carefully dip your nail in the water.
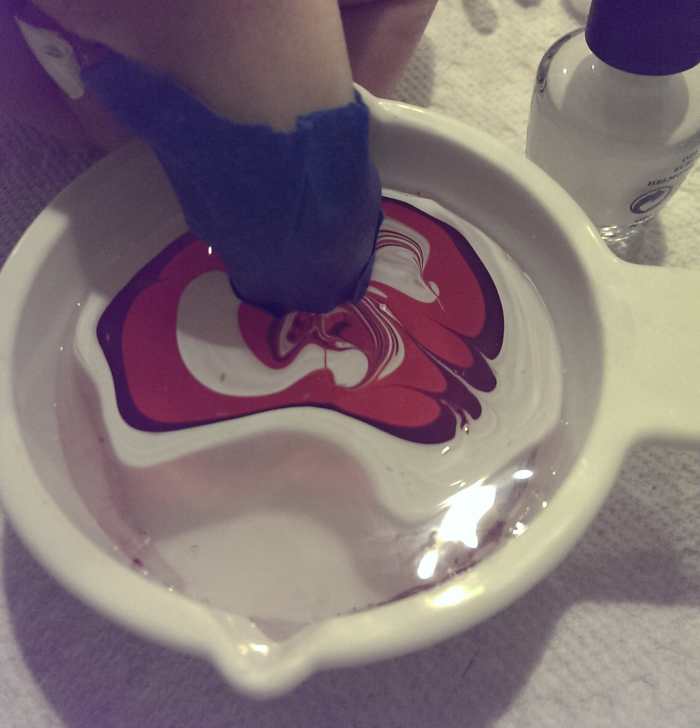
Note: Whatever you do, don't lift your nail back out of the water at this point.
Make sure all of the excess nail polish is taken up from the water before pulling your nail out!
hellovictoria
6. Lightly Blow on the Top of the Water
Lightly blow on the top of the water while keeping your finger submerged. Take a toothpick and pick up the dried nail polish from the water. Make sure all of the excess nail polish is taken up from the water before pulling your nail out!
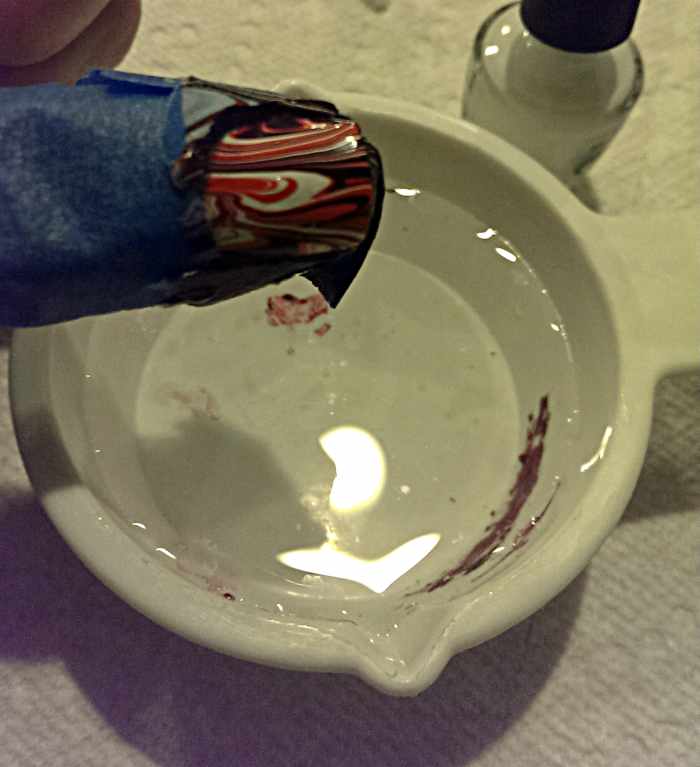
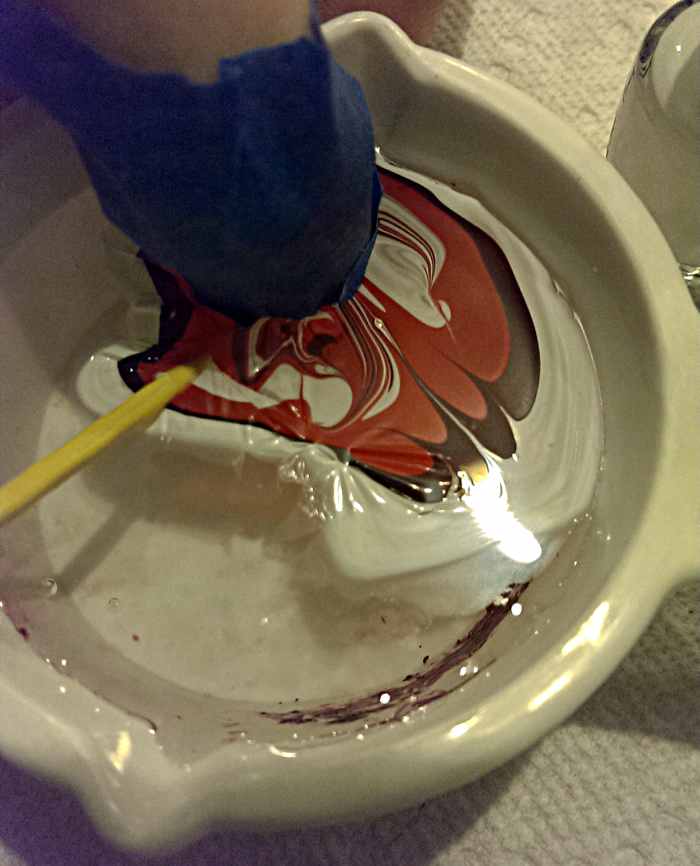
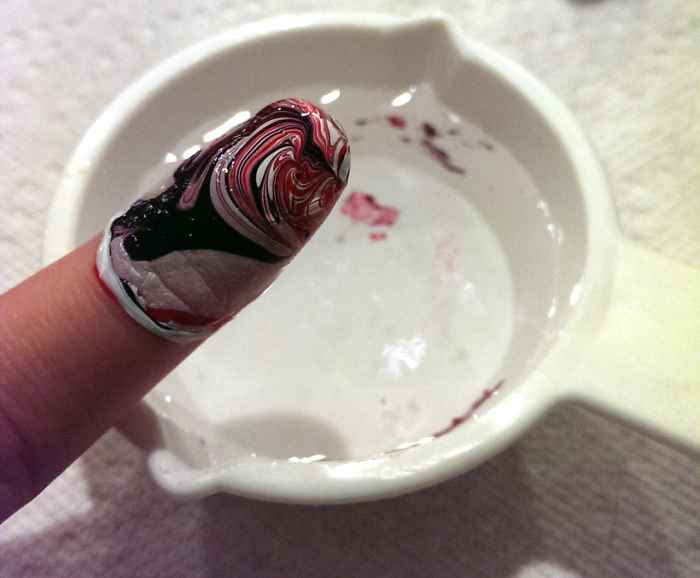
Take your nail out of the water.
hellovictoria
Clean up the edges with a Q-Tip and nail polish remover.
hellovictoria
7. Take Your Nail out of the Water
Take your nail out of the water. Let dry for a minute or two. Peel back the tape, and use a Q-Tip to clean up any polish that may have gotten on your skin.
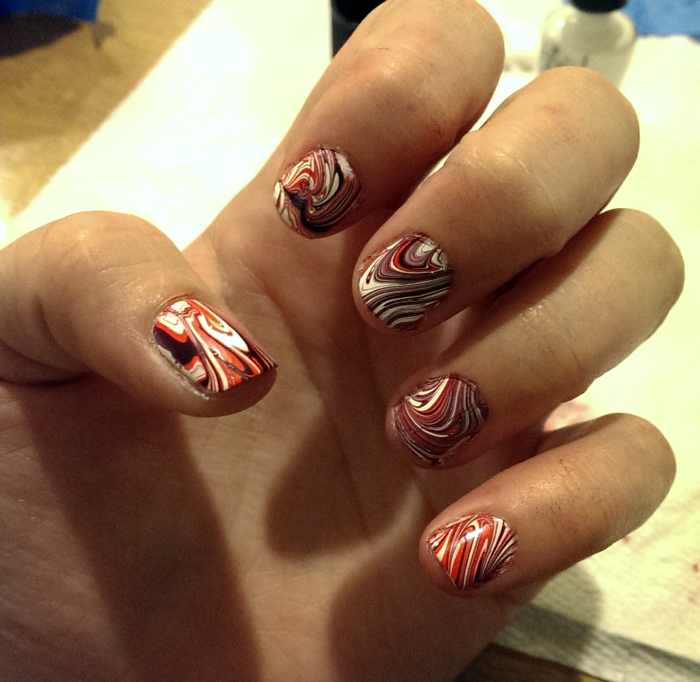
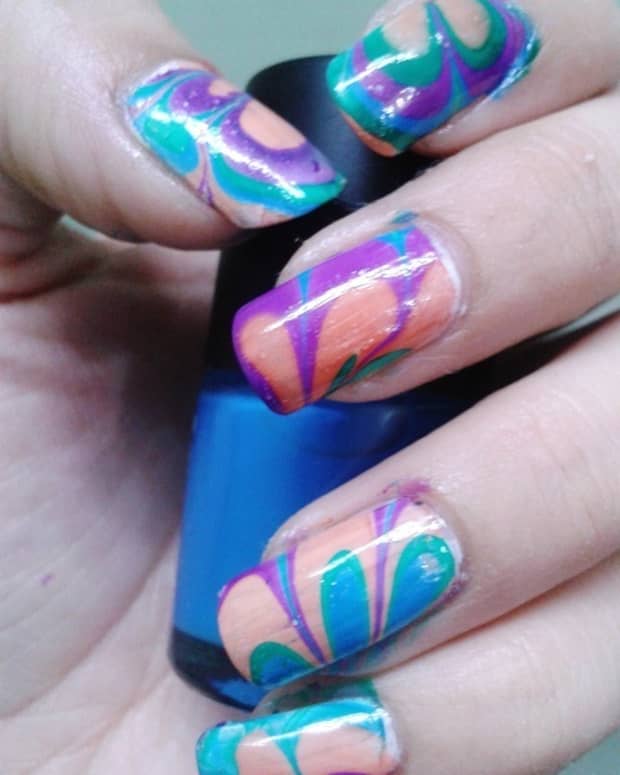
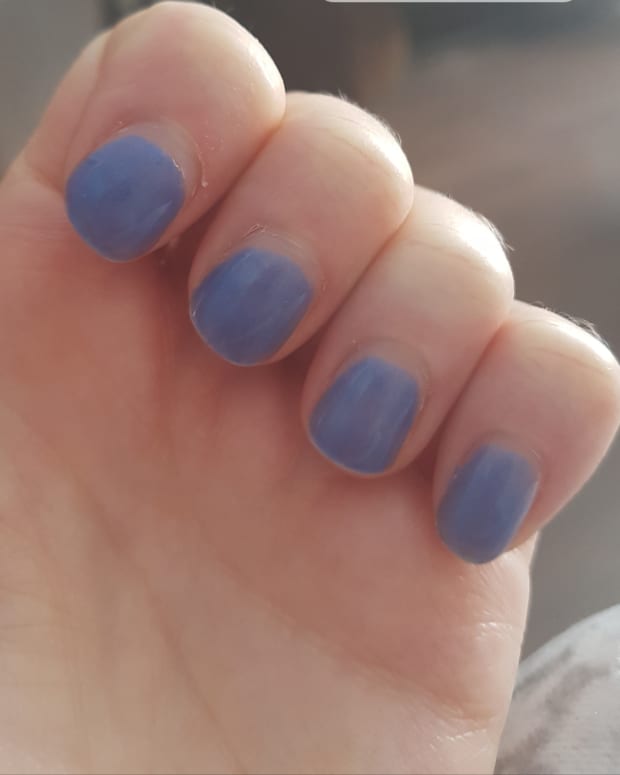
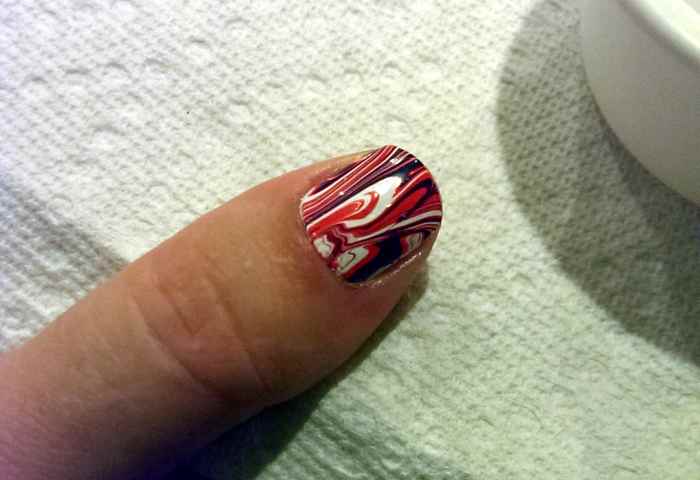
Here's what my nails looked like after I completed the marbling on each finger!
hellovictoria
You Are Done!
Now you know how to create the marbled look on your nails. The marbled nail looks really cool as an accent nail as well. I will paint my nails all one color that I use in the marble and then do the marble only on my ring fingers and it looks really good!
This nail art is super easy and really cool looking when you are done! Don't worry if you don't get it right the first time - you can always take the polish off and try again!
Doing this project without the tape will make it a little harder to clean up. I highly recommend doing this with the tape for that reason and also because darker nail polishes will stain your skin and be more difficult to clean up.
hellovictoria
This content is accurate and true to the best of the author’s knowledge and is not meant to substitute for formal and individualized advice from a qualified professional.
Comments
ToriM (author) from Atlanta on June 26, 2014:
Hi Deborah, Thank you very much! I hope you find it useful - and I hope your nails turn out great :)
Deborah Sexton on June 24, 2014:
Great hub. I'm going to try this, thank you for sharing this information