Nail Art for Beginners
Sam is the mother of two young boys, Juju and Blaze. Their family enjoys going on trips, crafting, learning, and exploring.
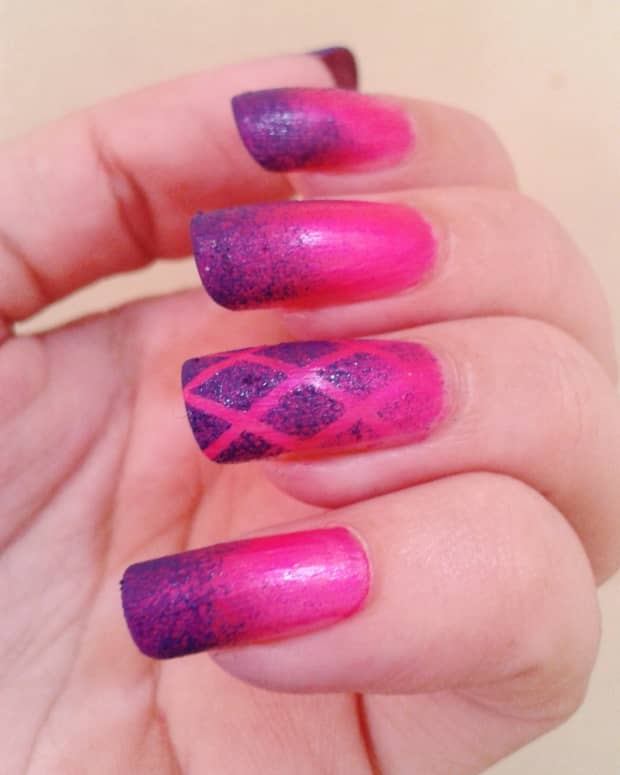
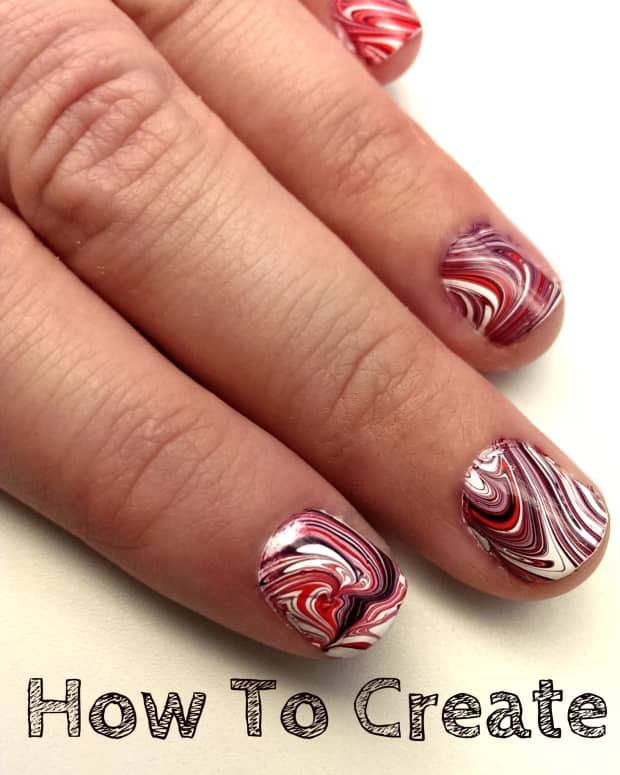
Learn to do simple nail designs like this and soooooo much more.
Nail designs are fun and fashionable ways to show off your favorite things and style without going crazy with your wardrobe. Although many people find nail art appealing, they often fear they lack the ability to create their own nail art designs.
I'm here to tell you that isn't so! Once you have learned the basics of nail design, you too can create amazing fun designs that will amaze others.
When it comes to nail design, there are just a few things you need to have and know to create beautiful art; nail art tools of the trade, how to create circles, how to create lines, taping methods, stencil methods, and where to look for more inspiration.
Combine all of that with patience and plenty of practice and you'll are on your way to being a nail design artist!
Nail Art Design Tools: Where to Find & How to Make Your Own
Essential Tools You Need to Create Nail Art:
- Nail file and buffer
- Nail Polish (and remover)
- Clear enamel or nail strengthening polish
- Dotting tools
- Striping tools
It is highly recommended that you also have:
- Hand moisturizer that you like
- Nail care tools
- Tape
- Q-tips and cotton balls
- Foam makeup sponges
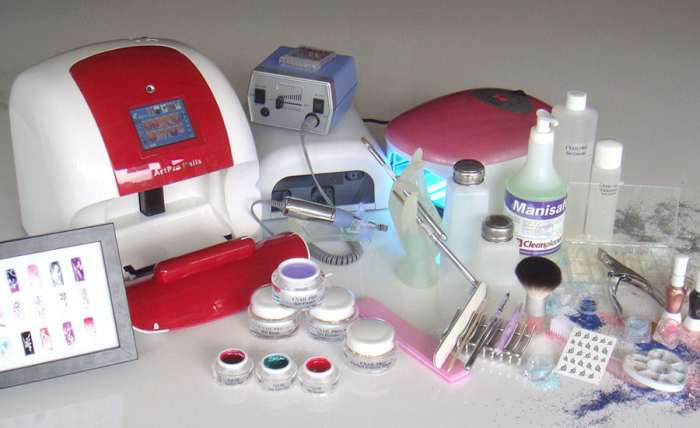
You don't need a home nail salon to create great nail designs!
Nail Care Tools
You can find nail files and nail care tools for very decent prices at dollar stores and beauty supply stores. At the very least, you should have a nail file (I prefer the metal kind because they last a lot longer), one nail buffer (they come in varying grades, a soft-medium one is good to start off with), and a cuticle tool (they come in wood and plastic, either work fine, some nail files actually have cuticle tools attached, so look for that as well).
Nail Strengthening Polish
I strongly recommend using a nail hardening or calcium nail polish as your base coat when painting your nails because it will keep them healthy, strong, and unstained. I just use LA Girl Calcium polish, which works fine for me and is easy (and cheap) to find, but I have heard really great things about OPI Nail Envy Nail Strengthener, which I feel makes it worth checking out and trying as well. Apparently, it not only strengthens the nail, it curves flatter nails which prevents them from breaking as easy. Wild!
Hand Lotion
I suggest using a hand moisturizer/lotion because your nail art is going to draw a lot of attention to your hands. If your skin is dry, that may be something that you may not enjoy very much. I have sensitive skin myself, so I have to be very careful with what I put on my skin. I have found that natural products like the goat's milk and hemp oil lotions work very well for me, but Cetaphil Restoraderm works best. I also have come across some recipes on how to make balms, lotions, and moisturizers.
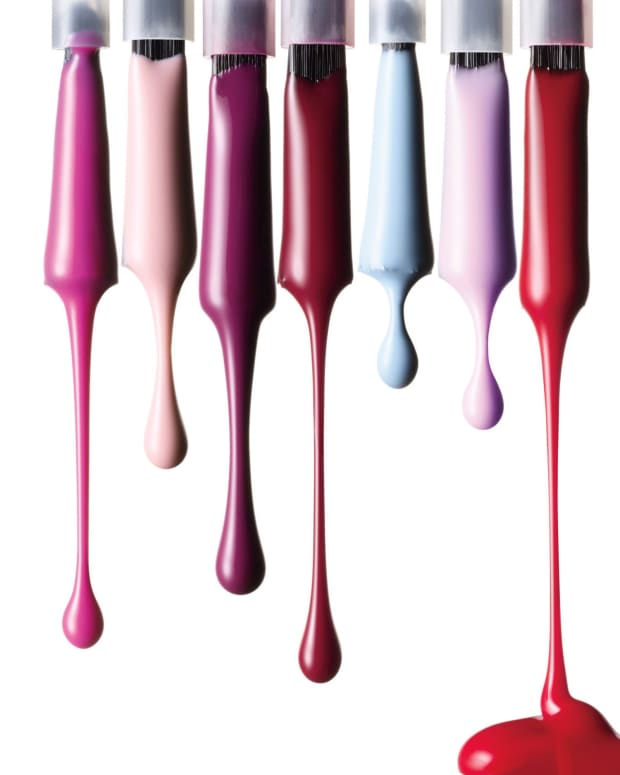
Nail Polish
When starting out, it really isn't necessary to buy the big brand nail polishes that could cost as much as $5 a bottle. Once you have decided that nail design is something you enjoy, you may want to invest in quality polishes once you're comfortable. In the beginning, just look for deals at beauty supply stores, pharmacies, accessory shops, and your favorite clothing stores. A lot of the time you can find nice polishes for $1 each. This is how I first built up my collection and really got started on nail design.
I think of it this way. If you wanted to start painting, but had never painted before and weren't even sure if you would be very good at it, you probably wouldn't go to a professional art supply store and buy the highest quality paints and supplies you could find. You shouldn't do this because you might end up wasting your money if it turns out you don't like painting and you really have no idea what you're looking for and you can't trust the sales people, because obviously they want you to spend the most money.
Same thing goes for nail polish. When you first start out you're not going to be able to tell the difference between a cheap nail polish and a brand name polish—and no one else is going to know what you used, so why waste your money? Wait until you have some experience and can form your own opinions about what you should be looking for before you invest too much.
Q-tips & Cotton balls
I recommend having q-tips and cotton balls on hand, mainly to remove polish and clean up around the nails.
Tape
Painter's tape, masking tape, and even scotch tape can make nail art a lot easier to create. You can use tape to create sharp clean lines in designs, as well as stencils, and all sorts of other tricks. It isn't necessary for every design, but it can definitely make a difference.
Foam Makeup Sponges
These are also not necessary for every design, but they are fantastic for designs that call for gradients and textures. I've tried substituting them for bits of regular sponges and even paper towel, but the results are not as nice as with makeup sponges. I've used scrap fabric as well with varying results.
DIY Dotting Tools
You can find these online or at some beauty supply stores, but they are so easy to make at home that when you're starting out you might as well save your money.
Read More From Bellatory


Household items that can be used as dotting tools:
- Toothpicks (for drawing, lines, and very small dots)
- Bobby pin heads (for small to medium sized dots--most common size)
- Round head straight pins (for large dots)
- Straight pin heads (for small dots)
- Unsharpened pencil or unused pencil eraser (for very large dots)
- Match head (for small to medium dots)
I mostly just use toothpicks and bobby pins.
DIY Striping Tools
- Stencils, nail art pens/markers, and taping methods are great ways to create clean, sharp, lines and stripes.
- String (dip in a little polish and streak across nail).
- Nail art polishes (find for cheap at beauty supply stores, and when it runs out—reuse the brush).
- Thin paint brushes (cheap brushes from the dollar store or a craft store will do).
- Toothpicks (use to draw and create lines).
I like the taping method best, but I have many Art Deco Nail Polishes I bought for $1 at my local beauty supply store and will often use toothpicks for small intricate designs.
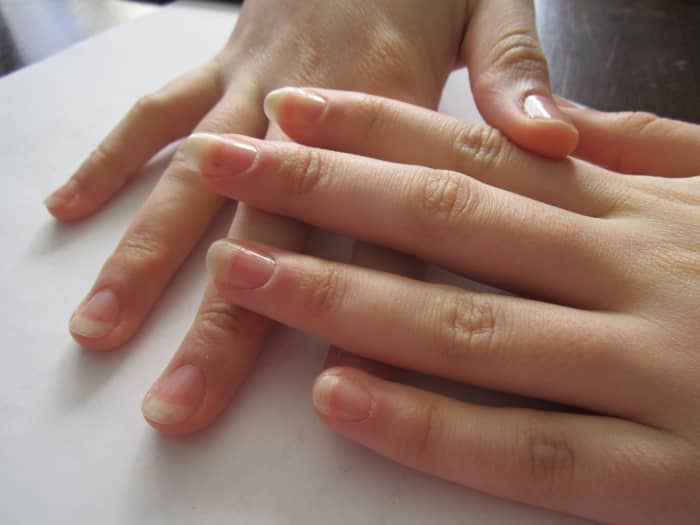
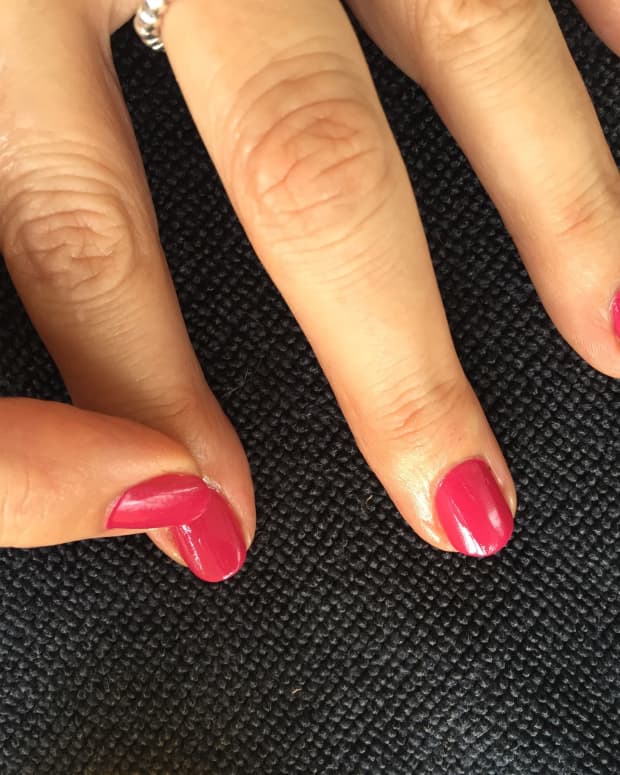
My sister agreed to be my model for this hub. Her fingers are so long and dainty! She wanted to file her own nails though, I probably would have rounded them more, but she likes them this way.
Getting Started: Preparing Your Hands & Nails
If you have any nail polish from your last design, remove that first.
File Your Nails
If you want to clip your nails first, then do that, but I usually go right into filing. It is best to keep your nails rounded rather than squared, or at least round the edges of your nails. This will prevent your nails from breaking. That is because points and corners are weak points, but round objects have no corners or points, so therefore have no weak points. Makes you wonder why we don't have round buildings, doesn't it?
Push Back You Cuticles
Do not cut your cuticles! Cuticles are necessary to protect your body from bacteria. When you cut them, you risk getting an infection. Cuticles are as necessary as your eyelids and gums.
If you are prone to hang nails, drink more water, keep your hands moisturized, and try taking a multivitamin daily to improve the health of your skin, hair, nails, and teeth.
How you shape your cuticles is really up to you. I like to try to keep the sides thin and straight and push the bottom down to make my nails look longer and thinner.
Buffer Your Nails
This isn't entirely necessary, but with a soft nail buffer you can rub your nails down and smooth out any nicks or bumps. I really wouldn't suggest doing this too much or too often though, because it will thin out your nails. Just do it as needed to keep your nails smooth.
Apply Base Coat
If your don't have a nail strengthening polish, then just apply a clear polish. This will protect your nails from being stained by the pigments of the nail enamel.
This is a nice weekly routine to keep, even if you don't plan to do your nails. It just keeps your hands and nails looking very nice. If you don't plan to paint your nails after this routine, finish off with a moisturizer and a nice hand massage. You deserve it.

Quick sketch of some design ideas. My sister had to go to work so we decided to keep it really simple.
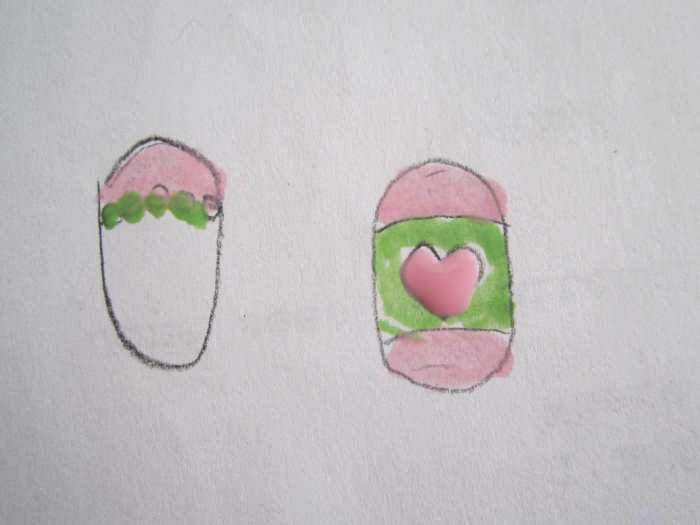
We tested out our design directly on the paper.
Design Tips
- Check out YouTube and Pinterest for nail art design inspiration.
- Practice is the best way to improve painting with your non-dominate hand, but if it makes you really uncomfortable you could consider painting fake nails and applying them instead.
- If you're still worried about not being able to paint your own nails, practice with a friend. Let them practice their designs on you and you can practice your designs on them. I find this way more fun than painting my own nails anyway.
- A lot of the time the most intricate part of a nail design is reserved for the ring finger (and sometimes thumb) and the other nails are painted more simply. This will be less stressful for you and help highlight your design.
Decide Your Nail Art Design
You can go into your nail art design blind, but you may not like what you end up with. It has been my experience that the best designs are ones that have been planned out long before any nail polish hits the nail.
If you aren't sure what you would like your design to be you could go for something abstract or just think about things that you like or make you happy. Your design can reflect your mood, the seasons, a holiday or event that's coming up, something you're excited about (like going to the movie or beach), your pet, or anything really.
One thing I do when I'm really stumped is just pick out the colours I really want to use first and then create a design that will incorporate all of them nicely. Typically these designs are wild and abstract, but they usually make me very happy.
Once you've done some nail art designs a couple of times you may notice yourself wanting to repeat favorites. In this case of course you don't have to redesign it every time because you already know what it looks like and how to do it. I only suggest drawing out designs and planning first when it is a new design you are unfamiliar with.
Draw Your Design
On a scrap piece of paper draw little nail shapes then draw what you'd `like your design to look like. Keep things simple as possible. You don't need a lot of intricate details to have a successful design.
Test Out Your Design
This isn't entirely necessary, but I find it helpful when I'm not sure how certain colours will work together. Once you've decided on your design, redraw it a few times on your scrap piece of paper and apply polish directly to the design to see how it will look. Adjust your design as needed and practice a few times so you will be comfortable enough to apply it to your nail without a drawing to guide you.
If you are concerned that you will only be able to paint your nails on one hand and not the other used this as an opportunity to practice with your non-dominate hand.
Apply Your Nail Art Design
Nail art designs can typically be broken down into shapes, dots, and lines. Once you're able to break your design down into these things, applying your design will be simple.
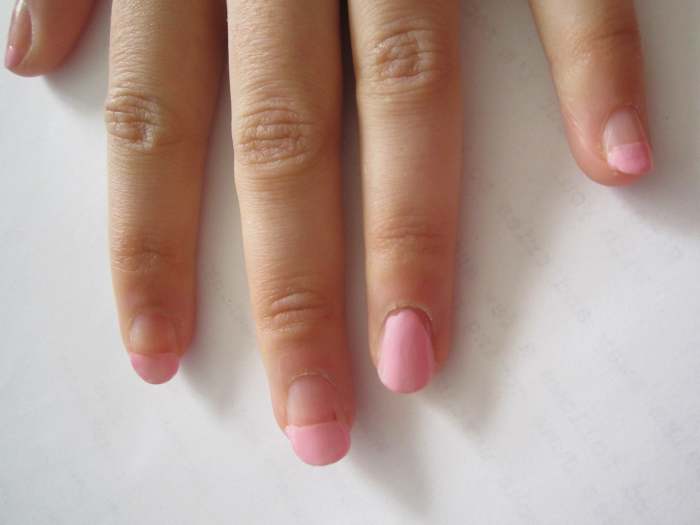
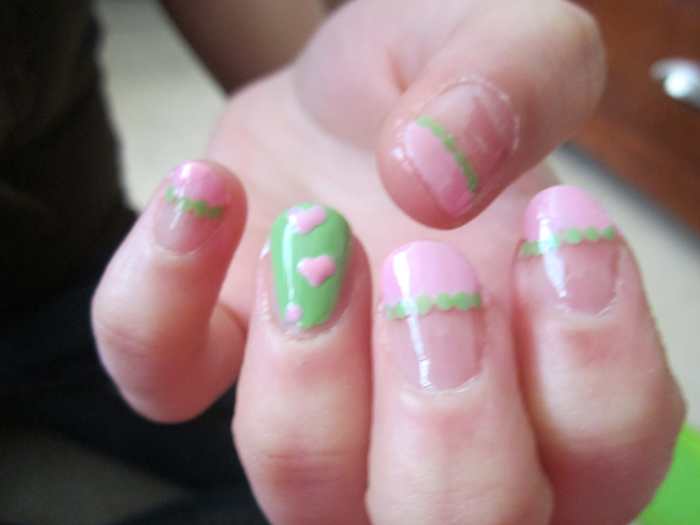
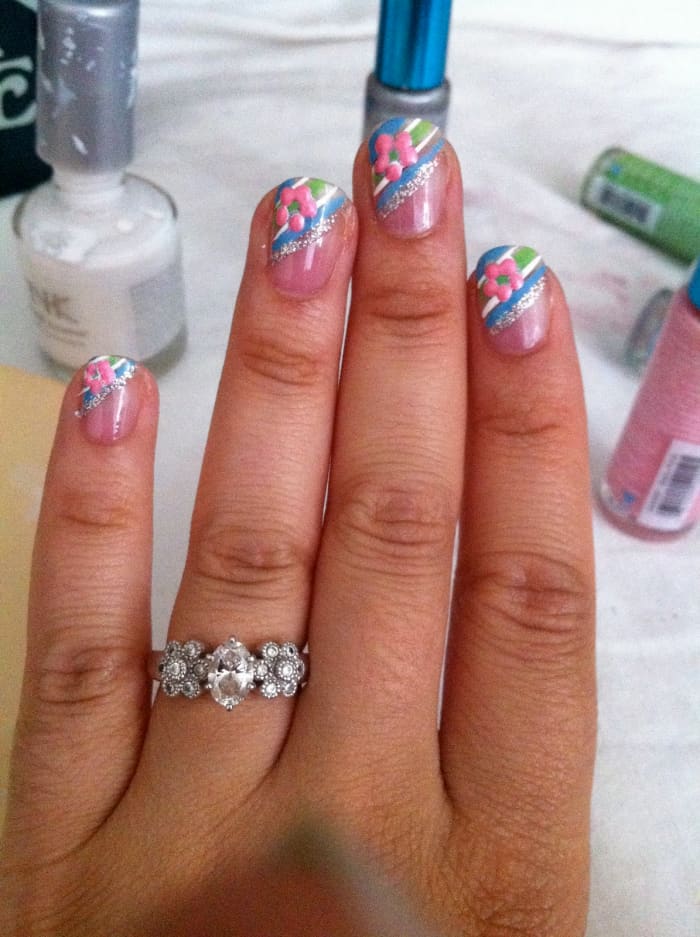
We started with a pink french manicure and painted the ring finger to prep for its design.
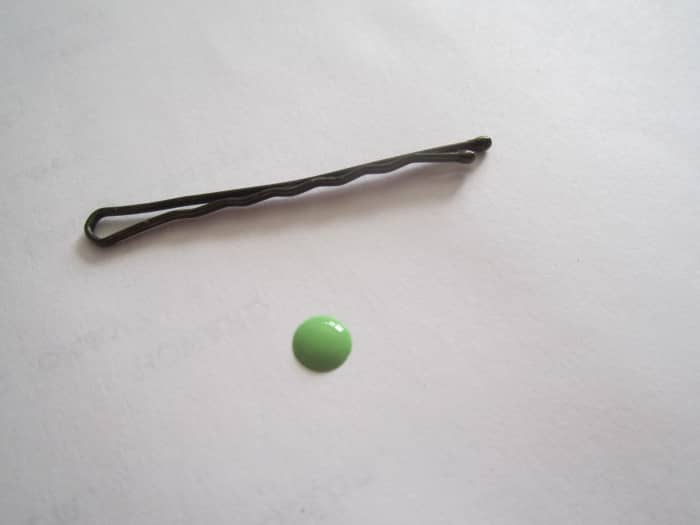
To make the dots on her manicure I dabbed some green polish on paper and used a bobby pin as a dotting tool.
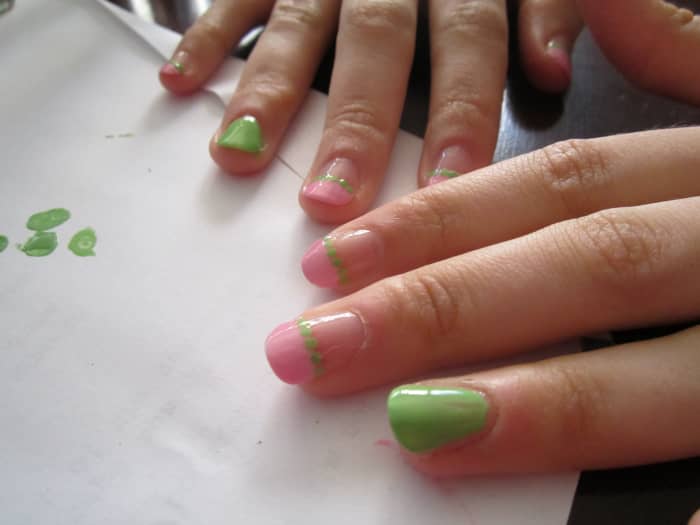
We were impatient and didn't wait for the pink polish on her ring finger to dry so we had to change our design. But here's her manicure with the dots applied.
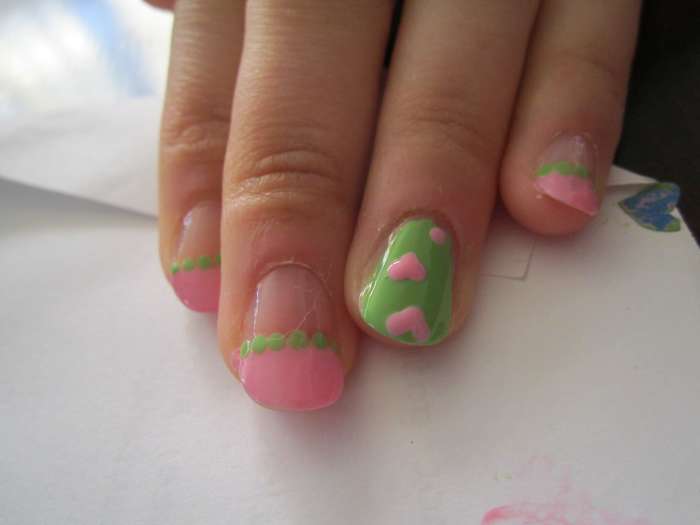
We finished her design by adding tiny pink hearts and then she was off to work!
Creating Nail Art Dots
- Dab some polish on an index card or scrap piece of paper.
- Dip your dotting tool in the polish.
- Apply gently to nail.
Nail Art Designs That Use Dots
Here are some basic and popular designs that use dots. Adjust the designs as needed to create your own nail art designs.
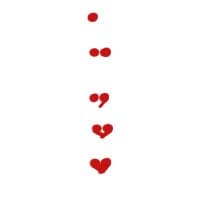


Nail Art Heart
- Make two dots next to each other.
- Use a small dotting tool or toothpick to bring polish to a "V" below dots.
- Fill in to create your heart.
Nail Art Mustache
Nail Art Flower

Create a dot for the middle and add a circle of dots around it. Make two smaller dots for the leaves and use your tool to sweep them out.
You could also skip the dot in the center and just make a circle of dots to represent flower petals.
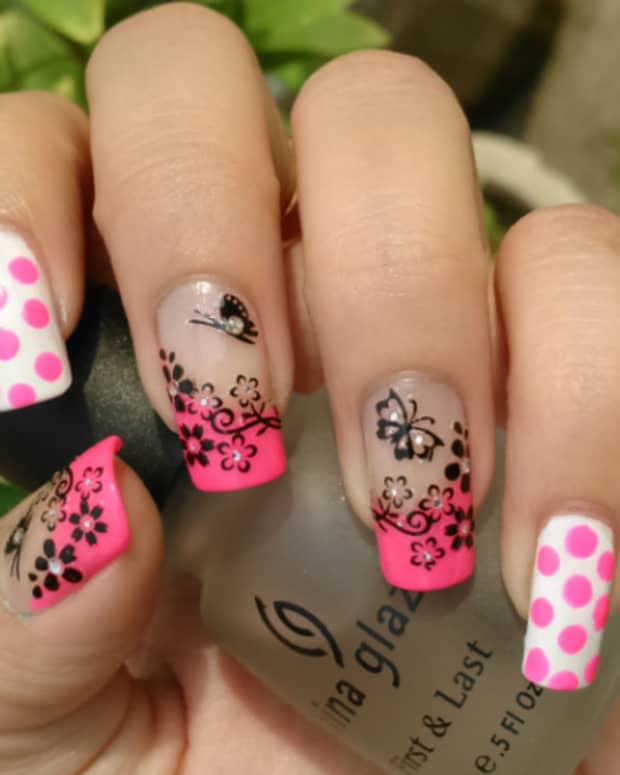
Polka Dot Nail Art
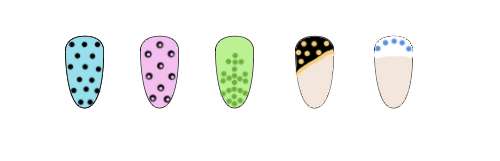
polka dot nail art designs
- Solid Polka Dots - After painting your nails a solid color, use your dotting tool to make a polka dot pattern on your nails.
- Circle Dots - For this you'll need two different sized dotting tools. Make a polka dot pattern with the larger, then go back over them with the smaller tool, using your base color.
- Dot Design - Create an abstract design by dotting a pretty pattern across your nails.
- Diagonal Dots - Give yourself a diagonal french manicure and add some dots.
- French Manicure with Dots - After applying a french manicure dab dots across.
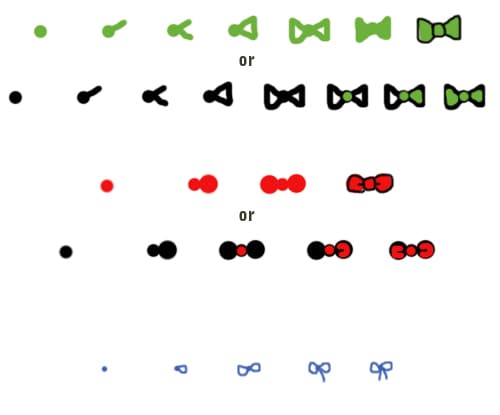
nail art bow designs
Nail Art Bow
Bow Version 1
- Make a dot with the colour you want your bow to be.
- Draw a triangle on either side of your dot, using a small dotting tool or toothpick.
- Fill in triangles.
- With a marker, striper tool, or toothpick, draw an outline in a darker colour around your bow.
Bow Version 2
- Make a dot in the colour of your outline.
- Draw a triangle on either side of your dot.
- Fill in triangle with the colour of your bow.
- Use a dotting tool to add colour to the knot of the bow in the center.
Hello Kitty Bow 1
- Make a medium sized dot.
- Make two large dots on either side of the medium one, overlapping slightly.
- Draw a black outline using a striper, marker, or toothpick.
Hello Kitty Bow 2
- Make a black medium sized dot.
- Make two large black dots on either side of the medium one, overlapping slightly.
- Make a red dot in the center of the first black one.
- Draw a "C" and backwards "C" shape in the large black dots.
String Bow
- Make a small dot.
- Using a toothpick or a very small dotting tool draw a "C" and backwards "C" shape on either side of dot.
- Draw two little tails.
Nail Art Panda
Nail Art Paws & Bone
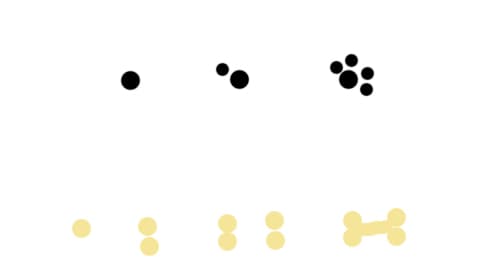
For paws make a big dot, then four smaller dots around one size. For bone make four dots and draw a line across the middle of them.
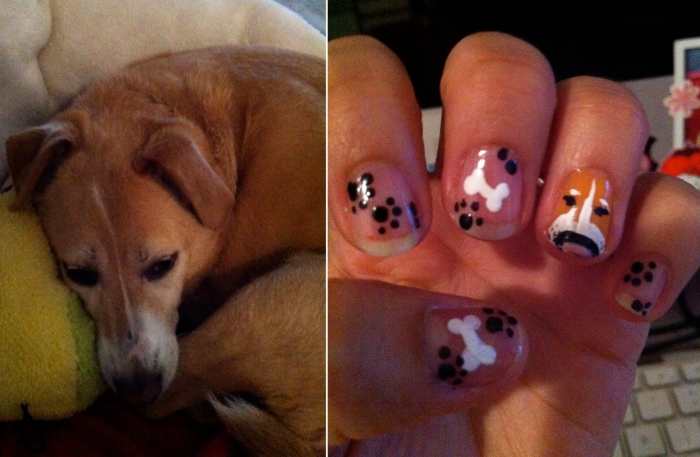
Pet dog nail art design
Using Stripers
Making Stripes in Nail Art
Stripers are great to make drawn designs, stripes, and french manicures.
When painting stripes with paint brushes or art deco polishes, make sure there isn't too much excess nail polish on your brush before you apply to your nails. This will keep lines clean and prevent globs of polish from using your design.
Rather than swiping your brush across your nail, try and keep the hand your painting with very still and move your nail underneath the brush for smooth clean lines that don't wobble.
When using tape to create your designs make sure any nail polish you are taping over is completely dry. Before applying tape stick it on your hand and then to your nail to take away some of the stickiness.
Pull tape off carefully before paint has dried completely but is not too wet.
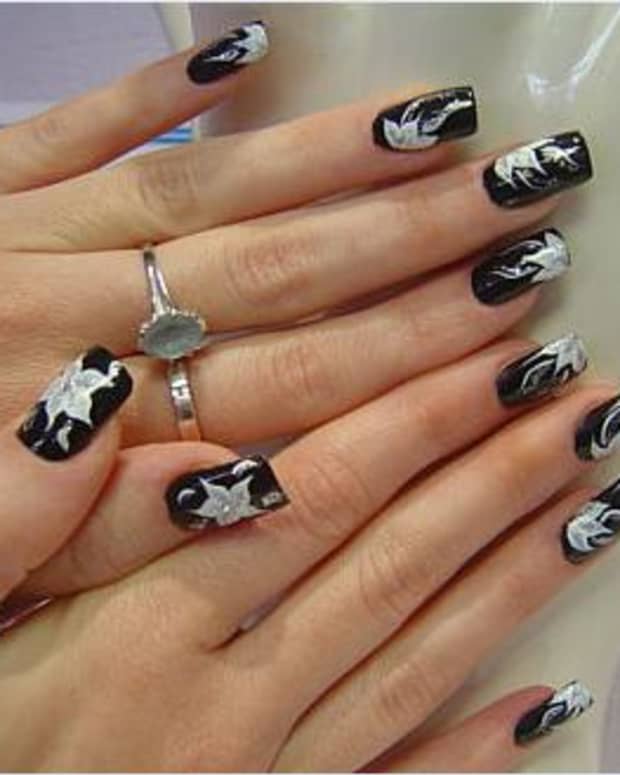
Basic Nail Art Designs
There are just so many great designs you can do on your nails, it was really hard for me to pick out just a few to share. So here are some of my favorite easy nail art designs that I often find myself going back to again and again.
I hope you enjoy these and they inspire you to create some of your own designs.
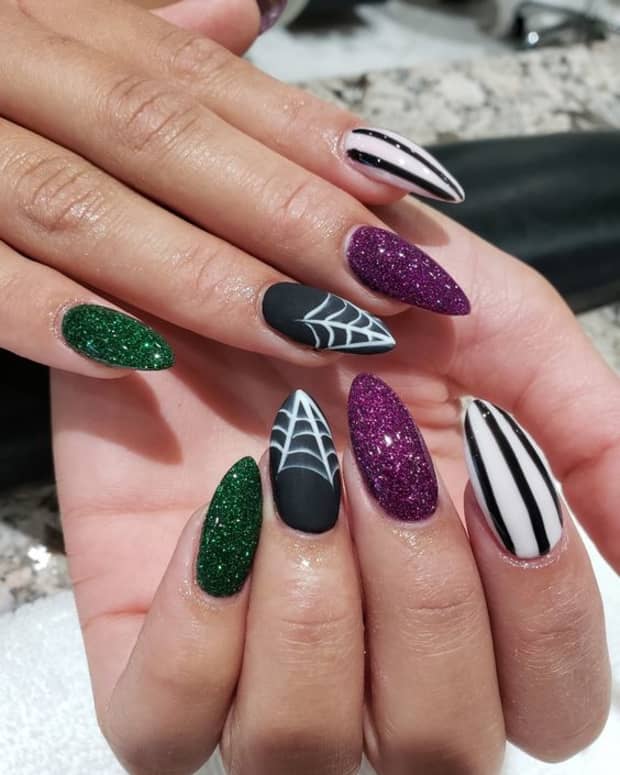
Cheetah/Leopard Print Nail Design
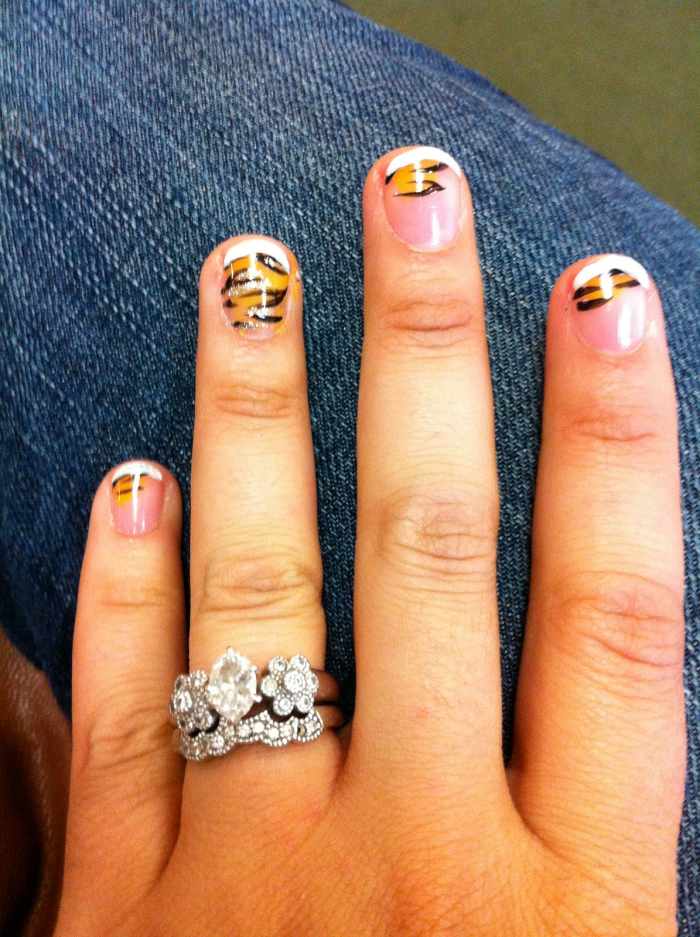
tiger stripe nails
Tiger Stripe or Zebra Nail Design
- Paint nails white, orange, or whatever you want your base colour to be.
- With a striping tool make stripes in varying places across nails, don't worry about them being wobbly!
- Add some glitter stripes for fun.
Kisses Nail Design
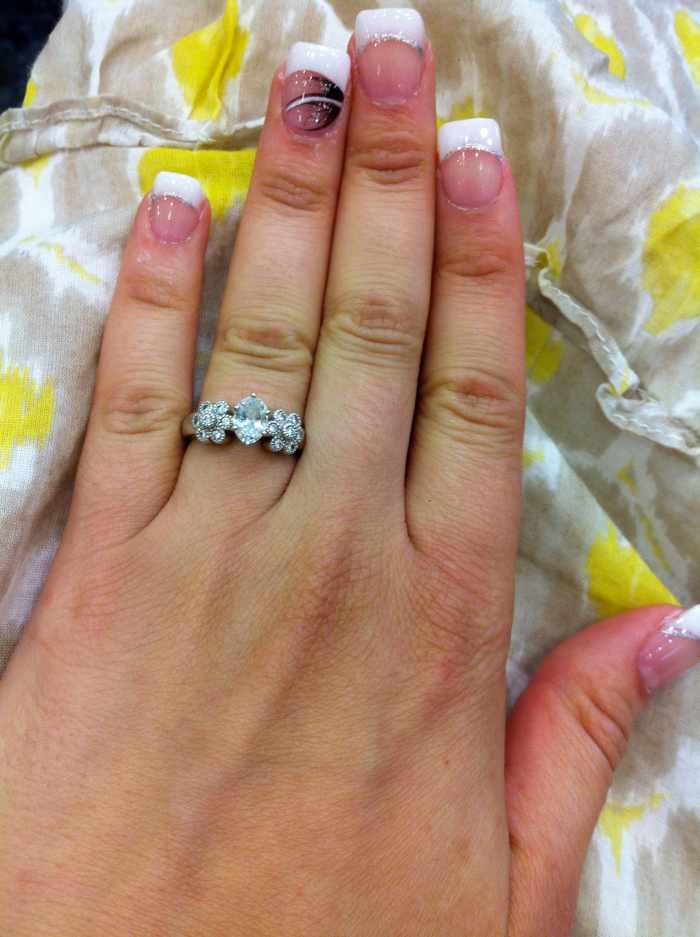
French manicure
French Manicure
- Paint your nails clear, a light sheer colour, or really any colour you choose.
- When the polish has dried paint a white area across the top of your nail. You can either do this by just using your stripers or tape off the area and paint it that way. Either way works beautifully.
- Add glitter stripes and designs if you like.
Cupcake Nail Design
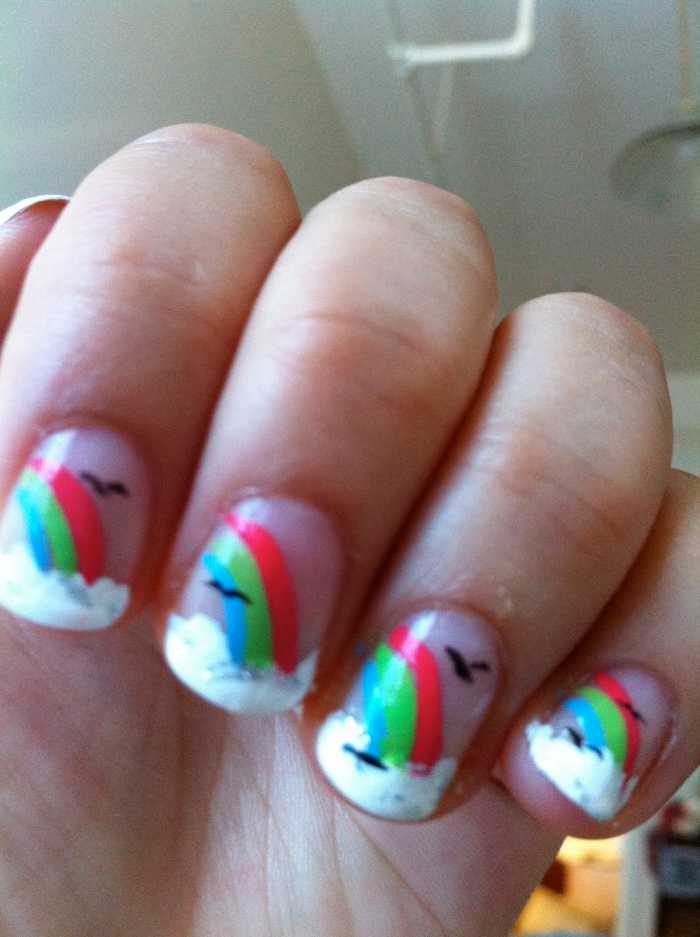
rainbow nails
Rainbow Nail Design
- Using a striper brush paint semi-circle lines across your nails in the colours you want your rainbow to be. You should stick to three or four colours, anymore than that might be too much unless you're making very very thin lines.
- Using a dotting tool make cloud shapes at the tip of your nails.
- If you want to add little birds, take black polish and a toothpick and make an upside down rounded "w."
Hello Kitty Manicure
Just Nail Polish Brush
Sponge to Nail Technique
Dabbing on With Sponge
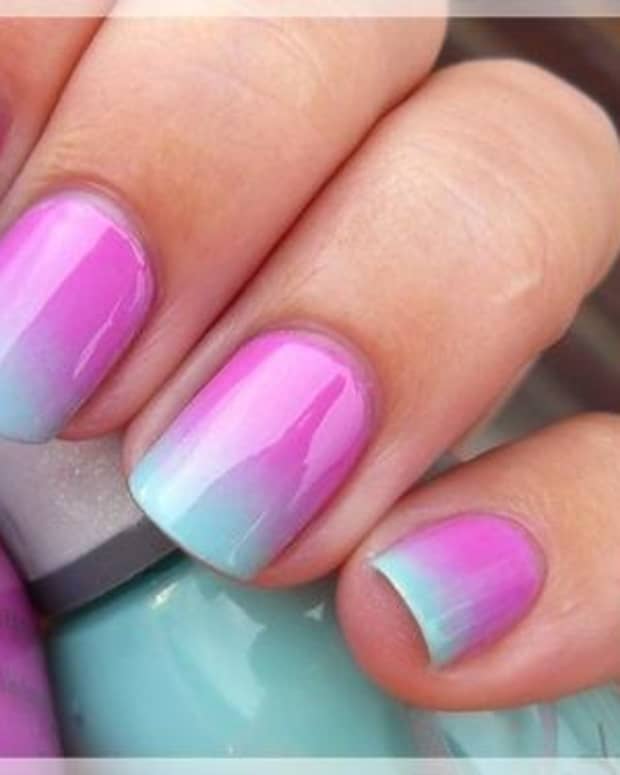
Ombre & Gradient Nails
Gradients are a great way to add a little extra flair to your nail art.
- Apply polishes using brushes. Dab on each colour while the polish is wet to blend the colours together.
- Apply polishes using foam makeup sponge. Paint directly on to your sponge then dab on to your nails. Or paint your base colour and dab on other colours using your sponge.
I know some people also use Q-tips to create gradients. I haven't had the best luck with that method though as little strands of cotton from the Q-tip always end up on my nails. I'm sure there are other methods of creating gradients, but these techniques have worked the best for me and are the most used.
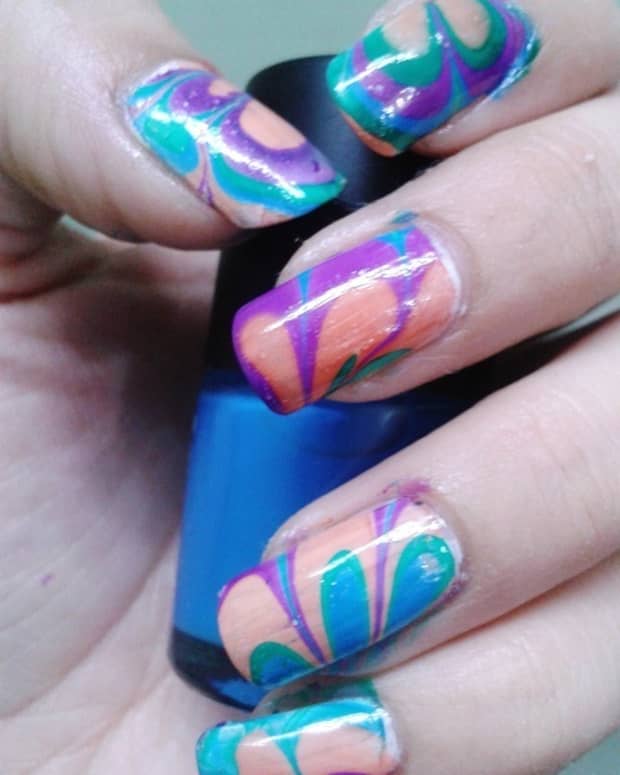
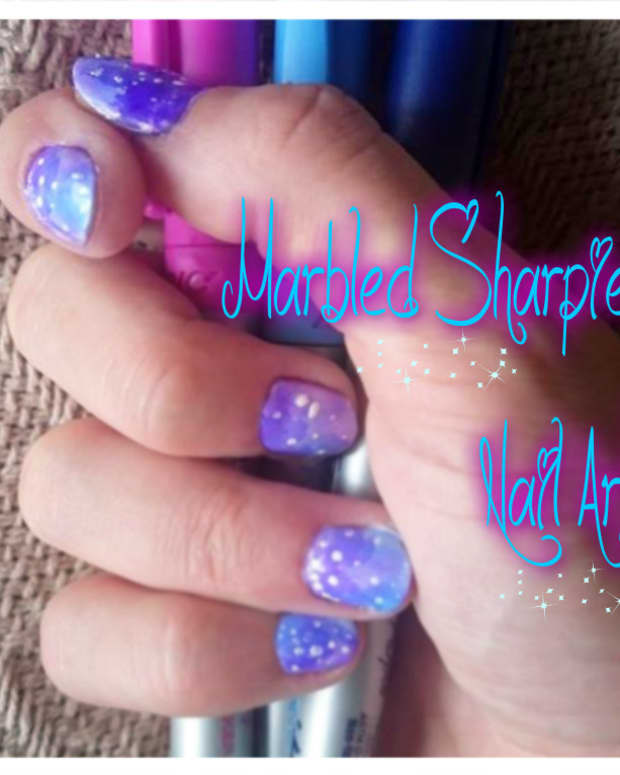
Water Marble Nail Designs
Water marble nail art designs are a quick and easy way to create beautiful nail art. And the best part? You don't have to be ambidextrous to pull it off! Give it a try!
Magnetic Nail Polish
Caviar Nail Polish
Special Nail Polishes
- Glitter Nail Polish - Glitter polishes come in all different types of colours with fine to huge chunks of glitter. I love glitter polish. When I don't really feel like doing much with my nails or just don't have time to, I just apply glitter polish over a fun colour. It instantly makes me happy.
- Crackle Nail Polish - This is an easy way to get nail designs on your nails. Paint your nails a base colour, then apply crackle nail polish on top. As the polish dries it tracks, revealing the colour underneath.
- Magnetic Polish - I have yet to try this, but magnetic polish is another way to get cool designs easily. Apply the polish then hold a magnet over it while wet. Metal particles in the polish will create unique designs.
- Caviar Nail Polish - This is a pretty new trend in nail design that you'll either love or despise--or you'll grow into, like me. If you don't know what I'm talking about, this design consists of little plastic beads glued on to your nails. It creates a textured design that can be very visually interesting, but it doesn't last very long at all. It's probably best for a special event or night out, definitely not every day.
Nail Transfer Foils
Polymer Cane Nail Art
3-D Nail Art
Nail Stamps
Nail Art Pen
Nail Stickers & Decorations
There are lots of great ways to add art to your nails that don't require much art skill. There are so many nail stickers, stamps, pens, tapes, decals, decorations, and gems that you can apply to your nails that if you really can't get the hang of nail art designs, it's ok! With all your options you can still create awesome nail designs!
Since there is so much, I'm going to do my best to remember everything, but I apologize if I forget! If you know of something that isn't listed here, please feel free to remind me in the comments below.
Nail Stickers - These are by far the easiest ways to create great nail art. You can find them at beauty supply stores and all over the web. In the past I've even used tiny stationary stickers. There are also special striper tapes for nails that you can use, or any tape you like really. All you do is stick them on and seal them with a clear top coat.
Alternatively, you can create your own by using a bit of clear nail polish to glue cutouts or tiny drawings on to your nails. Again, seal it with a clear top coat and you're good to go.
Another way to create your own nail stickers is to paint on tape (scotch tape for a more transparent look and painters tape for something more solid). Then you can cut out any shapes you want and apply to your nails.
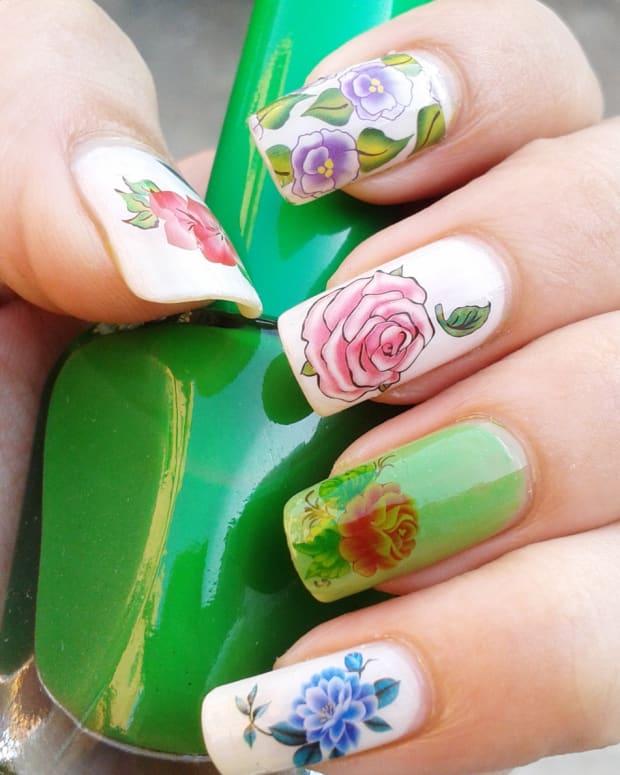
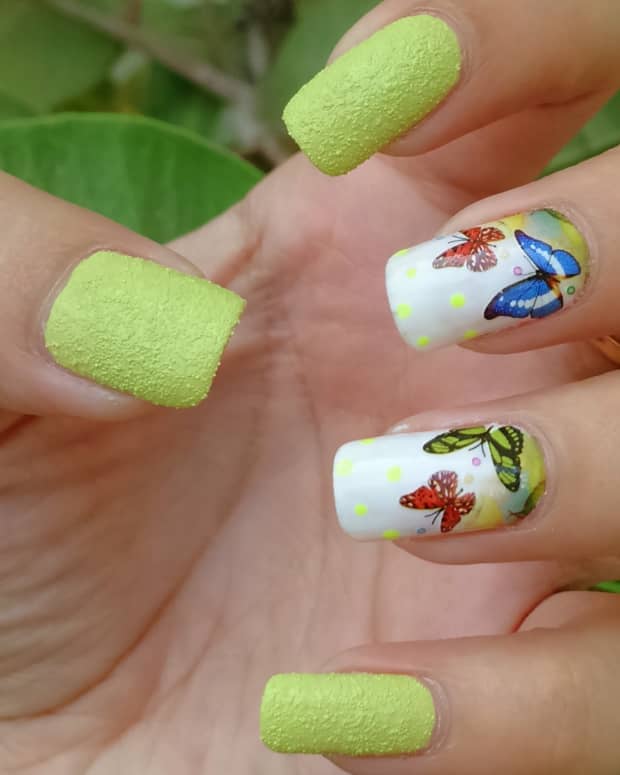
Nail Art Transfer Sheets - These are kind of like stickers, except they are typically an entire texture or design that you apply to your nail. This way you know all of your nails are going to look exactly the same.
You can make your own transfers by applying temporary tattoos to your nails or pressing printed paper (from comic books, newspapers, books, maps, or whatever you like) on to your nails after dipping it in alcohol. Then go over the design with a clear top coat to protect it.
Nail Decals & 3-D Decorations - These are kind of like stickers, except they aren't usually sticky and are typically more 3-Dimensional. I've seen tiny bows, keys, fruit slices, animals, candy, cupcakes, and more. These are typically applied with some nail glue and may or may not be sealed off with a top coat depending on how big it is. There are also special acrylic paints that let you create your own 3-D art.
You can find these at some beauty supply stores or you could use tiny little decals found at craft stores. Polymer clay canes are also extremely popular for these. If you're a crafty person you could make your own, or you could fine canes on eBay, Amazon, and Etsy (Canes on Etsy are typically more unique and sold at lower prices since they aren't marketed as "nail art" so I'd check them out first!).
Nail Stamps - This is another great way to get designs quickly and easily. There are lots of stamping kits found all over the web for any design you could imagine. Regular rubber stamps can be used as well. You could even use the ink from rubber stamps--just make sure to add that top coat before it dries.
Nail Art Markers - These markers or pens make drawing nail designs a lot easier than using a brush or tool. You could also use sharpies, but be warned they can sometimes bleed.
Glitter & Caviar - You don't need to buy glitter and caviar polish to get the effects of these polishes. Just sprinkle glitter on to your nails while wet and you'll get a similar effect. Go over with clear polish to keep it shiny.
Nail Gems - Rhinestones and little gems are another way you can dress up your nails. Use nail glue to stick them down and tweezers to put them in place.
Get creative. If it's small enough to fit on your nail, you could probably stick it on there. Try decoupage or other art techniques to create unique nail designs. Typically, if you can seal whatever you've done with a clear top coat (which you should do anyway to protect your art) you can add almost anything to your nails.
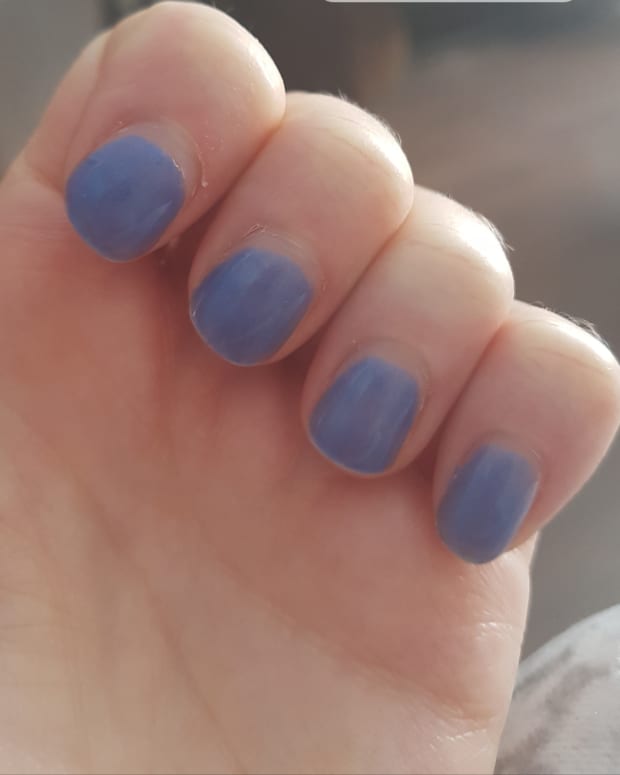
Removing Polish
Here's a neat trick I found on Pinterest.
As you can see from my pictures below, it really works!
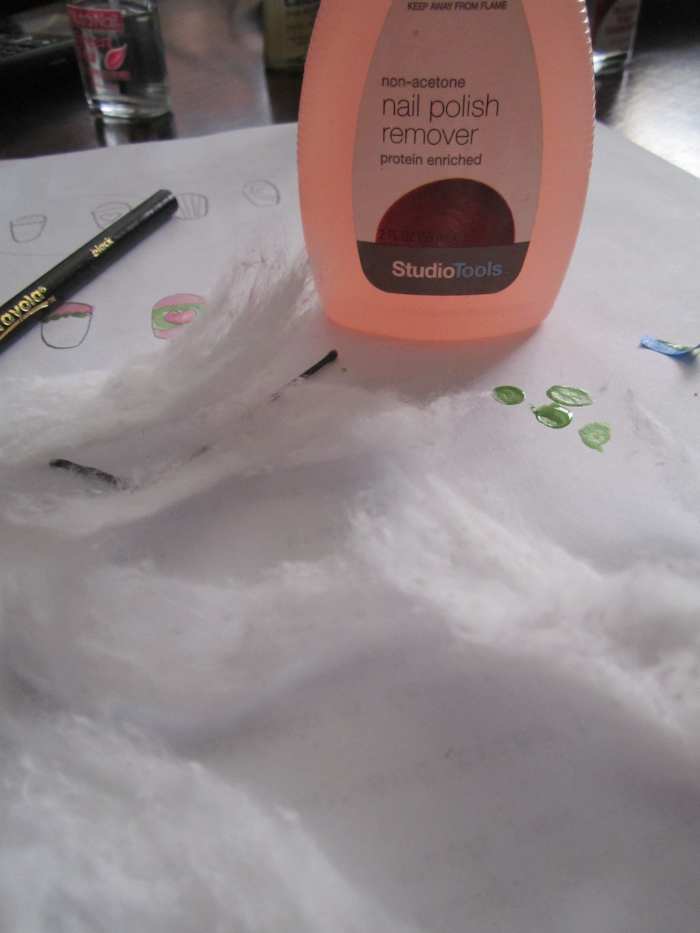
Get your nail polish and break a cotton ball into little pieces.

Dip cotton ball pieces in remover and cover nails with it.
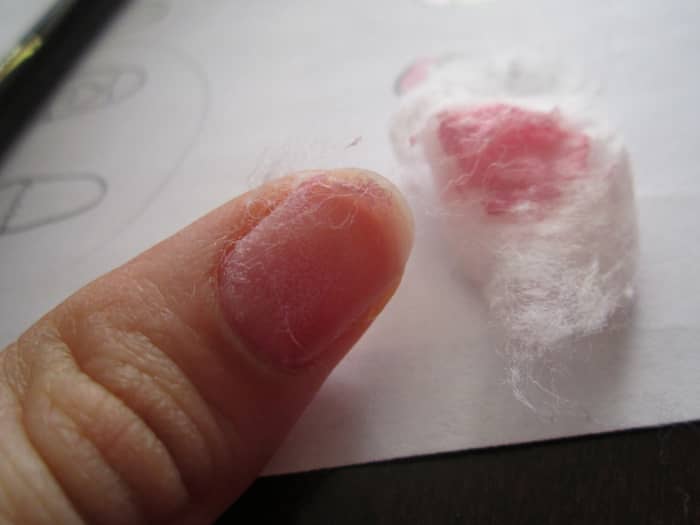
Wait a few minutes then pull off cotton, nail polish will be removed almost completely! Use your bit of cotton to rub off the rest of the polish.
Finishing Touches
Once you've finished your design and your nails have dried apply a clear top coat to preserve your design and help your nail art last longer.
Take a Q-tip dipped in nail polish remover and clean up any nail polish on your cuticles or skin.
When you are all done and everything is totally dry, apply your lotion or moisturizer and enjoy!
Comments
Lubowa from Uganda on September 26, 2015:
Hi samantha,
Your hubpage is not only informative but also interesting. The combination of videos, text and pictures makes reading enjoyable. You know what you write and I wish you could write a guest post for as in the nail desings category of our site at I wrote a http://www.designsauthority.com.
More nail designs ideas and tutorials for beginners at:
http://www.designsauthority.com/easy-nail-designs-...
http://www.designsauthority.com/nail-stamping-famo...
http://www.designsauthority.com/ombre-nails-art/
http://www.designsauthority.com/how-to-do-sharpie-...
http://www.designsauthority.com/how-to-paint-your-...
http://www.designsauthority.com/how-to-do-water-ma...
and more
Kenneth Avery from Hamilton, Alabama on April 26, 2014:
Hi, followthestray (interesting name)
I really had a great time reading this hub. Voted up and away. I like to get right to the point. You have a great talent for writing. I am not trying to embarrass you, but tell you the truth and encourage you to keep on turning out great pieces like this.
I have a granddaughter 13, one 7, and a grandson, 10. My eldest granddaughter is crazy about nail design and yes, a bit biased, she is rather good at this artform.
I left you some fan mail and now following you.
I ask that you read one or two of my hubs and I cordially invite you to become one of my followers.
Sincerely,
Kenneth/ from northwest Alabama.
Thelma Alberts from Germany on February 04, 2014:
Awesome hub! A very detailed one. I love nail art although I only make that on my nails for special occasions. I would love to try some of those nail arts photos above. Thanks for sharing.
Samantha Harris (author) from New York on February 12, 2013:
Oh that makes me so happy to hear! I hope you both have fun giving it a try.
Samantha Harris (author) from New York on February 12, 2013:
All you need is to try it once just to see it really isn't all that scary then you'll be amazed by what you can accomplish.
Samantha Harris (author) from New York on February 12, 2013:
Thank you so much! I'm really happy you enjoyed it and yes I did make the dividers. :) I'd love to hear about what you come up with.
Tammy on February 11, 2013:
I would give this one a vote for Hub Of The Day...you did an awesome job here. I shared it with my daughter who loves to do her nails. I am not much of a nail designer, but this hub makes me want to try a few out. Thanks for sharing!
Chantele Cross-Jones from Cardiff on February 11, 2013:
Awesome hubs! Lots of interesting tips there. My mum bought me a nail art kit for xmas and I have yet to try any of it, as I'm just not brave enough!
Suzanne Ridgeway from Dublin, Ireland on February 11, 2013:
Wow Sam,
This is amazing, what an excellent resource you have written . . .talk about a stellar hub!! Your entire article is fascinating, interesting and the effort you have put in is evident. Gorgeous layout, love your dividers!!! did you make them yourself??
Congrats on an exceptional piece of work, I love nail art and you have certainly covered all the bases here, I can't wait to get going!!!
All the votes,shared and definitely pinned for future use!!!!!