How to Go Ash Blonde at Home Without Damaging Your Hair (Using Olaplex)
Lana is a published writer and editor who helps aspiring authors take their writing to the next level.
My latest visit to the "hot" local hair salon culminated in a $250 charge to my credit card (plus tips), hours of lost time, and less-than-spectacular color result.
So I decided to take matters into my own hands. I wanted luminous ash blonde, and I wanted as little damage to my hair as possible.
This article describes a step-by-step process of how I got ash blonde hair at home for the fraction of the hair salon price.

Pierre Tourigny via Flickr.com, CC-BY
The Risky Business of Dyeing Your Own Hair
Lets get one thing straight: dyeing your hair at home is a risky business. It's like a box of chocolates: "you never what what you're gonna get." I don't recommend it unless you know your hair really well.
I've experimented with hairstyles and colors my whole life, I worked at a hair salon, and I've done a ton of research. But I'm not a professional hairdresser.
This step-by-step guide is the result of research and my own experience applying that research. It shows how I've been able to go blonde at home with minimal damage to my hair, the products I used, and other tips.
However, if you decide to follow my instructions and go through the same process, understand that I don't guarantee the same results. Everyone's hair is different. When in doubt, consult a professional.
What Is Olaplex and How Does It Work?
I have fairly fine hair, and it's been through a lot, so my main concern about going blonde was keeping my hair from turning into rice noodles.
It takes a lot of processing to get and to maintain the right shade of blonde. So I set out to find the minimally invasive way to do it. My noble search led me to Olaplex.
Olaplex is a patented hair treatment tool that created a revolution in the beauty industry. The claim is that it reconnects broken hair bonds, reverses damage, and protects the hair during bleaching, coloring, perming, and other harsh chemical treatments. Some even say that the hair is healthier after bleaching with Olaplex than before the bleaching! The science behind Olaplex stands up to scrutiny, and there's a lot of incredible before and after pics floating around, but it's always scary to try something for the first time.
Another thing is, they make a point to dissuade you from using it at home by claiming they only sell to professional hair salons. But like most things in this universe, it can be found on Amazon. That's where I got my kit, and proceeded with my plan.
This is the process, broken down into three parts: bleaching, toning, conditioning, and re-applying as needed.
Phase I: Bleaching
1. First, I wrapped an old towel around my shoulders and put on disposable gloves.
2. Then I mixed 2 scoops of lighting powder with creme developer until the consistency was smooth but not runny. Although I usually use 20 volume developer, I'm using 30 volume because Olaplex dilutes the strength of the peroxide a bit, so 40 becomes 30, 30 becomes 20 etc.
3. Then I added 3.75 ml of Olaplex #1 (you'll find detailed instructions on dosage in the Olaplex box), and mixed it all together.
4. Next, I sectioned my hair into 4 parts and applied the bleach, starting with the ends. You want to do the scalp last, so there's minimal burning, if any.
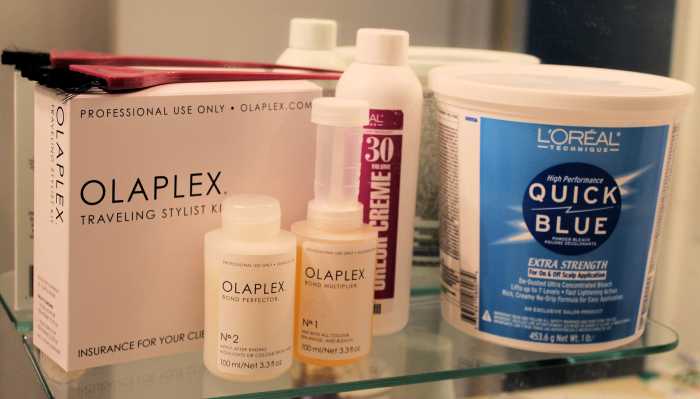
Phase I (from left to right): Olaplex #1 and #2, L'Oreal 30 developer, and L'Oreal powder bleach "Quick Blue."
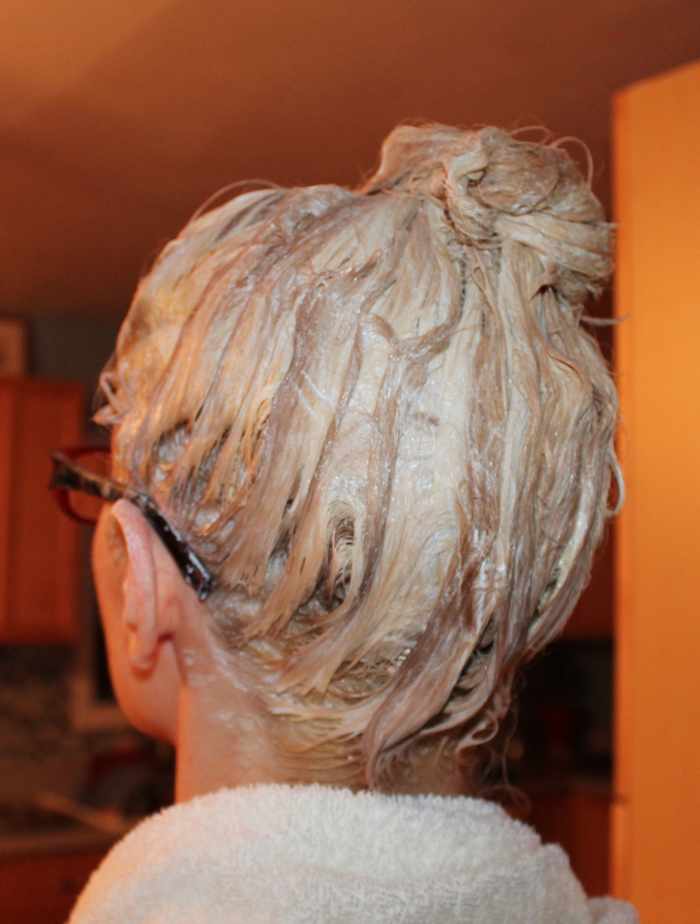
Hair bleaching in progress.
Read More From Bellatory


5. Pretty soon, in fact, while I was still putting the bleach on, my hair started getting lighter. Even though I was using Olaplex, I was afraid to damage my hair, so I panicked and rinsed out the bleach after 15 minutes.
6. After I rinsed out the bleach (if you're using Olaplex, just rinse it out, don't shampoo it yet) my hair was a scary mixture of yellow and orange. It was beyond brassy. And obviously, it didn't get light enough. My hair usually takes color in quickly, but because it was previously colored, it was more resistant to the bleach. Lesson learned.
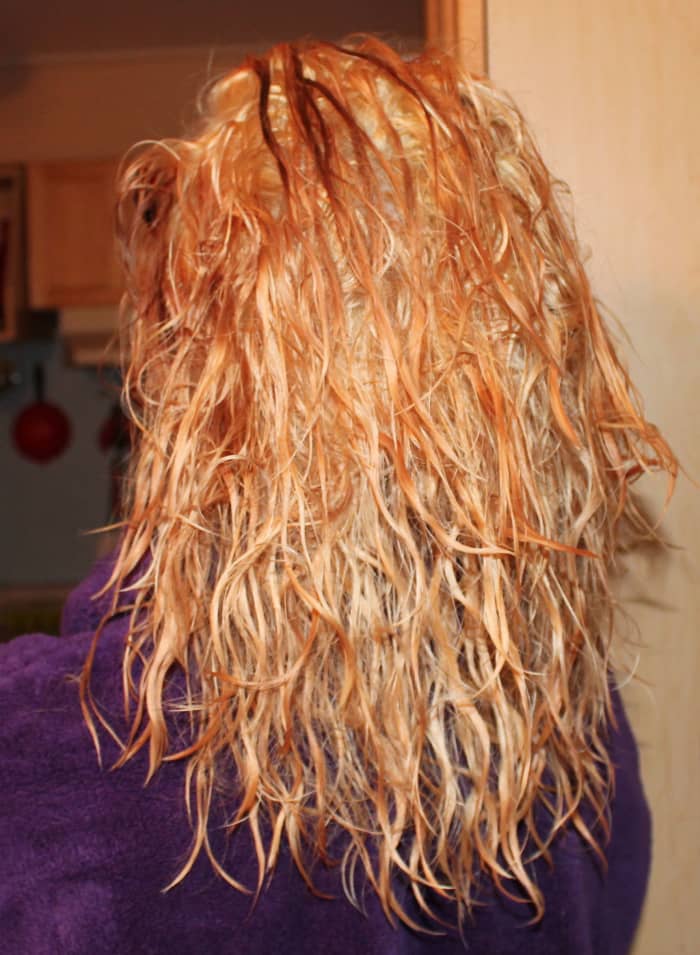
This is what it looked like after I rinsed out the bleach. Lighter, but still very orange.
Phase II: Toning and Conditioning
7. I can't overstate the importance of toning in this whole process.
I remember the first time I went blonde, many moons ago. I used a store-bought color from the box, and there I was, yellow hair and dark eyebrows, thinking I was the hottest thing on the planet. Oh the humanity!
Thank god those days are gone. If you want to go blonde, toner is your best friend. It's color, but it's gentle enough on your hair, and you only leave it on for 5 to 15 minutes at most.
I mixed a bottle of Redken 09V Platinum Ice with a processing solution (1:1 ratio) and slathered it all over my hair. It was a texture of a raw egg white - liquid but not runny, easy to apply. I massaged it into my hair, covering every strand.
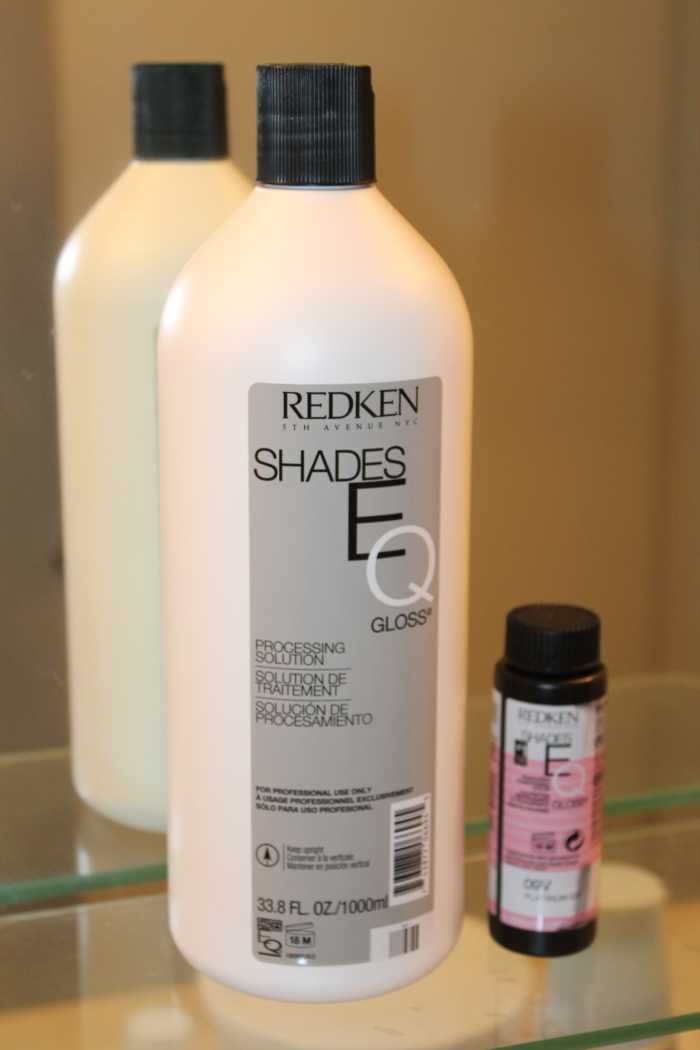
Phase II: Redken processing solution and Redken Shades toner 09V "Platinum Ice."
8. I washed it off in 10 minutes (still no shampooing) and applied Olaplex #2 "Bond Perfector". You're supposed to leave it on for at least 10 minutes, it restores the hair bonds.
9. After the Olaplex treatment I finally shampooed and conditioned my hair. Then I blow dried it to see the color more clearly.
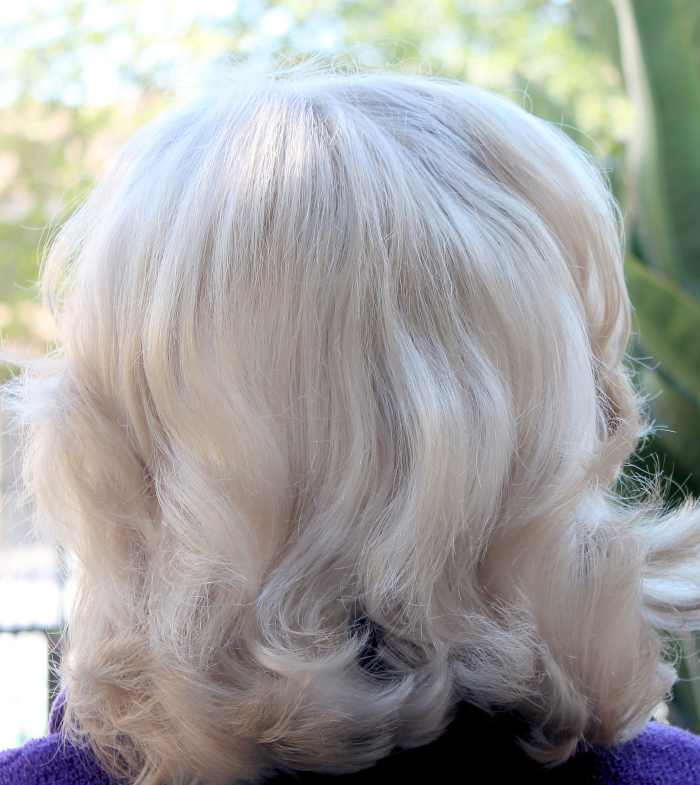
Although it wasn't as light as I'd wanted it to be, I was actually pleasantly surprised. My hair turned a creamy strawberry blonde color, and it felt full, soft and silky to the touch. It didn't seem to be damaged at all.
Not bad for the first application, but I definitely needed a second bleaching session.
The toner really helped counteracting the orange, but the hair just wasn't light enough for it to work 100%.
Phase III: Re-Application
Next week, after giving my hair some rest, I started phase 3, which is basically repeating phases 1 and 2.
10. This time I've mixed enough bleach and made sure it wasn't too thick. Then I applied the mixture to the hair, section by section, and left it on for 45 minutes.
I never left the bleach on for so long before, but encouraged by my first Olaplex experience and the fact that my scalp wasn't burning at all, I let it do its thing without being impatient.
After rinsing it off, I could tell that the bleach took care of the orange, but my hair was still very yellow.
11. Again, like the week before, I mixed Redken "Platinum Ice" toner with Redken processing solution, in the 1:1 ratio. I used the scoop from the bleach to measure it out precisely, and left it on for 10 minutes.
12. While my toner was taking care of the yellow, I also applied face cream bleach on my eyebrows.
13. Then I rinsed off the face bleach and the toner at the same time, and applied Olaplex #2 "Bond Perfector" for 10 minutes.
14. Finally, I shampooed and conditioned as usual.
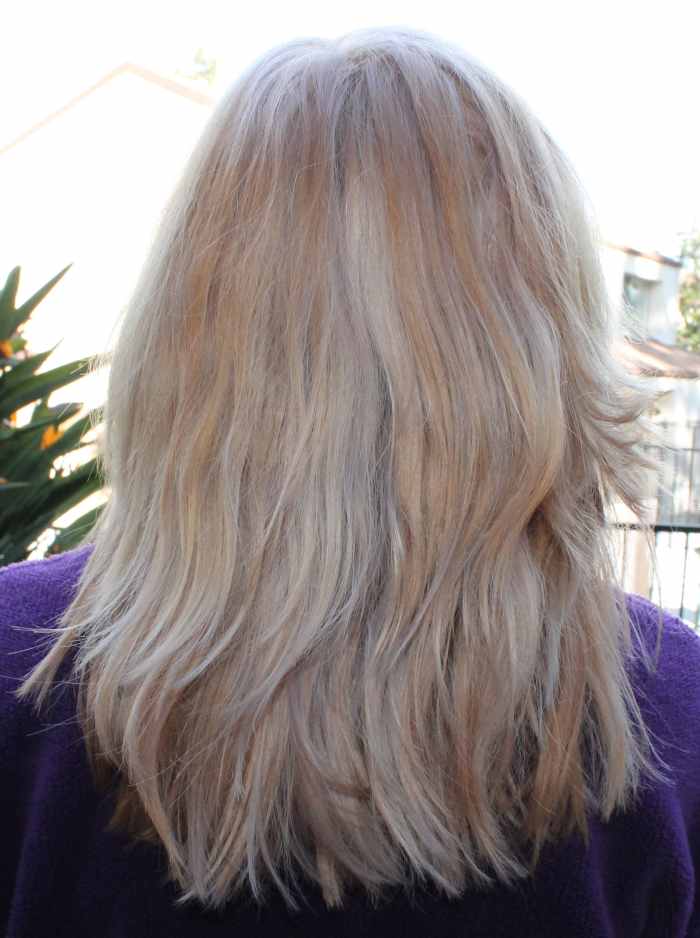
My hair felt incredibly soft and silky, nothing like after your typical bleach treatment. I love how it feels and looks. My hair transformation was complete.
Final result, after a haircut.
Aftercare
About once a week I use purple shampoo to keep the brassiness out, and I apply Olaplex #3 "Hair Perfector" to condition and repair.
How To Use Olaplex + Professional Review and Experience
The Products I Used
- Olaplex Traveling Stylist Kit - Steps 1, 2 & 3 ($120)
- L'Oreal Quick Blue Powder Bleach, 16 Ounce ($17.98)
- L'Oreal Oreor 30 Volume Creme Developer, 8 Ounce ($4.78)
- Redken Shades EQ 9V Platinum Ice 2oz ($11.71)
- Redken Shades EQ Gloss Processing Solution 33.8 Oz ($16.50)
- Diane 718 Processing Cap 30-Count ($4.80)
- Salon Hair Coloring Dyeing Kit ($6.43)
- Jolen Creme Bleach, Mild Plus Aloe Vera, 1 Ounce ($6.11)
Grand total: $175.51. Even with Olaplex which is the most expensive part, it's still cheaper than my salon visit, and keep in mind that most of these products are not single use, so I'll be able to use them again and again to maintain my new hair color.
Disclaimer: I am not promoting any of the aforementioned products, they're just the ones I used after conducting my research. You're welcome to use different ones if you believe they are better. I'll be interested to know about your results.
Good luck!
This content is accurate and true to the best of the author’s knowledge and is not meant to substitute for formal and individualized advice from a qualified professional.
© 2016 Lana Adler
Comments
Lana Adler (author) from California on April 01, 2020:
No problem!
You won't need Redken gloss processing solution, your hair color box will contain everything you need. That gloss is specifically to be mixed with a Redken toner, which you won't use.
Let me know how it turns out :) Good luck!
Clara Cole on March 30, 2020:
Oh don't worry! I am definitely still going to use the olaplex, I don't want to damage my hair like it would with other bleaching solutions! I was just thinking of using all your suggestions:
L'Oreal Quick Blue Powder Bleach, 16 Ounce ($17.98)
L'Oreal Oreor 30 Volume Creme Developer, 8 Ounce ($4.78)
Redken Shades EQ 9V Platinum Ice 2oz ($11.71)
Redken Shades EQ Gloss Processing Solution 33.8 Oz ($16.50)
Diane 718 Processing Cap 30-Count ($4.80)
Salon Hair Coloring Dyeing Kit ($6.43)
Jolen Creme Bleach, Mild Plus Aloe Vera, 1 Ounce ($6.11)
EXCEPT for the Redken Shades EQ 9V Platinum Ice 2oz. I was going to switch that with the Derma 10 Silver Grey hair dye.
would I need the Redken gloss with it? or would I be okay without it...
Sorry if I'm asking so many questions by the way! I just don't want to mess up.
Lana Adler (author) from California on March 30, 2020:
Hi Clara!
Yeah, the quarantine is the perfect time for the hair transformation!
So this is the box hair color? I'm not familiar with the brand. Yeah, I guess you wouldn't need most of the products mentioned here but the process is basically the same. My main thing was making sure I don't damage my hair in the process, that's why I went with Olaplex. But the other stuff - bleach and processing solution - can totally be replaced by whatever you prefer.
Yes, I bought an application brush, it was included in the hair coloring kit.
Good luck!!!! I hope it turns out the way you want to. And if it doesn't, you can always repeat, just give your hair a little break in between the applications.
Stay healthy :)
Lana
Clara Cole on March 30, 2020:
Hey Lana!
I've been really looking forward to doing this for a while now and then we had the whole quarantine situation come up and everything kinda fell into place haha.
I had a question about the items that you used. Did you have to buy the application brush? or did you already have it? Also, I'm planning on using a different hair dye solution and I'm hoping it works out: (Derma V10 permanent hair colour dye No 12 Silver Grey Salon Fashion) if you copy this and paste it onto the url you'll see what I'm talking about! I was wondering if this would be okay to use?
Thank you for posting this amazing and detailed article!
Lana Adler (author) from California on March 24, 2020:
Yesss!!! It's the perfect time! You go girl :)
Lana Adler (author) from California on November 08, 2017:
I'm not familiar with that product. I used Olaplex to protect my hair whilst bleaching, that's all. It took a few times before i could get it light enough to get the color I wanted. Hope that answers your question. Good luck!
Joy on November 07, 2017:
Is there a huge difference in taking the color out of your hair using the product, Opps as opposed to Olaplex?
..
Lana Adler (author) from California on September 28, 2017:
Hi ACP1020,
Thank you so much! I'm glad my article is helpful to you. To answer your question, I used the Jolen cream to bleach my eyebrows, or rather make them a few shades lighter. It comes with its own developing powder to be mixed with the cream. If you hair isn't too dark, leave it on for a few minutes. Then check. It lightens pretty fast. Good luck! May take you a few tries before you get the desired shade, that's how it was with me, but it's totally doable!
ACP1020 on September 02, 2017:
Such a great article! Thank you for the level of detail. I have been going to the salon to bleach my dark brown hair for over 12 years, one can only imagine how much I have spent in that time (and could have saved!). At this point I just bleach my roots as the rest of my head is already ash blonde but even so, each salon visit is $150 (before tip) and included in that is mixing Olaplex into my bleach (adds $20/visit).
My question to you is what did you use the Jolen Creme Bleach, Mild Plus Aloe Vera for? Did you add that into the powder bleach/developer mix?
Again, I cannot thank you enough for this great article, I am taking the plunge and going to try this at home.
Amy on February 28, 2017:
Thank you for the article, I have olaplex and used it in my bleach and lifted my hair from a 6NA to 12A...My hair was bleached recently and it didn't look good, very gold and brassy...I used your steps plus olapex and my hair looks great!! The color is perfect. I followed your toner instructions as well. I didn't have redkin, but I had salon color and mixed pearl blond and extra light ash blonde. Mixed the two and added developer was a great toner!!
Cali Kelly on October 24, 2016:
WOW! You did such a beautiful job! Seriously, I have been butchered by so many stylists over the years trying to keep/obtain the blonde I want. Was your hair one color before this? Did you have any old blonde/color as well and virgin roots, or just virgin roots? I don't know how to handle my virgin roots and the multi-shade blonde that I have :(
Lana Adler (author) from California on February 01, 2016:
Thank you MizBejabbers! Using just the toner would certainly simplify the process, but I'm not there yet...Something to look forward to!
Thank you, Larry. I'm glad this was of interest to you :)
Lana Adler (author) from California on February 01, 2016:
Farawaytree, white is the easiest base for any shade of blonde! If you're doing strictly color (as opposed to highlights or balayage) you can definitely do it yourself, although an extra pair of eyes (in the back) helps!
Larry Rankin from Oklahoma on January 29, 2016:
Very informative.
Doris James MizBejabbers from Beautiful South on January 29, 2016:
Your hair looks absolutely lovely, Lana. So soft, and such a soft color. Great instructions that anyone should be able to follow. I bleached my dark ash brown hair when I was young, then one day I woke up and realized that I didn't have to bleach it anymore. Now I just use a toner, LOL.
Farawaytree on January 29, 2016:
Hmmm, I may have to try this! Since I am going WHITE, I have been keeping my hair blonde and it is quite expensive... ;)