How to Get Mermaid Galaxy Hair With Infuse My. Colour Washes
I am a writer, graphic designer, and editor for Sex & London City. If I'm not scrawling words, I'm drinking gin.

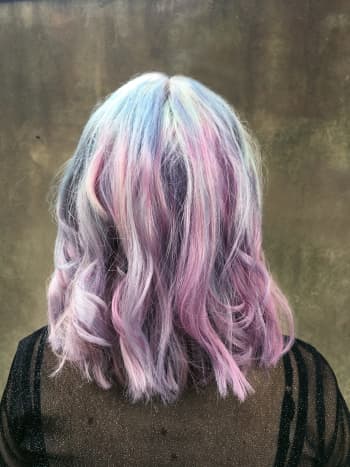
The results I got from Infuse My. Colour washes.
I’m so excited to share this with you all I could BURST. I’ve been wanting to post about these for weeks whilst painstakingly waiting for my pink to fade back to blonde, and finally the time is nigh. I’m on about Infuse My. Colour washes; they’re essentially a cross between a shampoo and a dye, and I am in love.
You might have seen them in the hair care aisle of Boots already. They look a lot darker than the pastel tones that brands like L'Oréal and Bleach London have brought out, but don’t let this put you off!! They can be used on dark hair to give a ‘refresh’ on any lighter hues, but on a bleach blonde base they’re beyond magical—and, best of all, kind to your hair and vegan.
Because I’m a scaredy-cat and occasionally sensible, I caught up with Rob, one of the Directors at Infuse My. Colour, before I started. He gave me some insider tips on how to use this product.
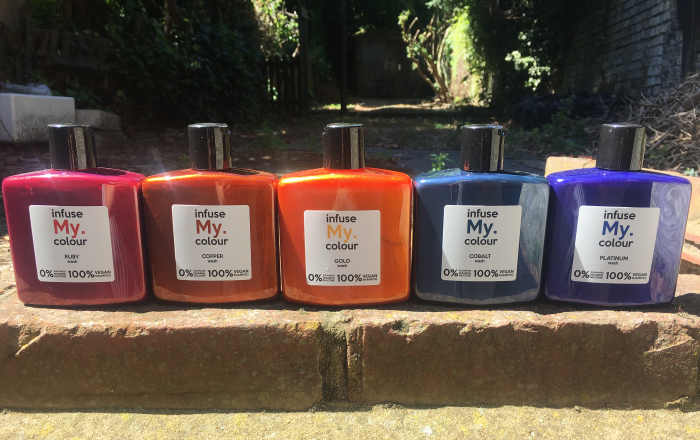
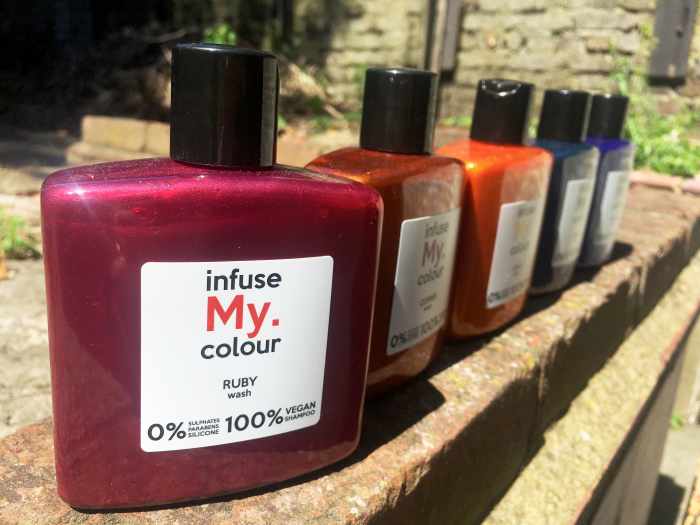
L-R: Ruby, Copper, Gold, Cobalt, Platinum
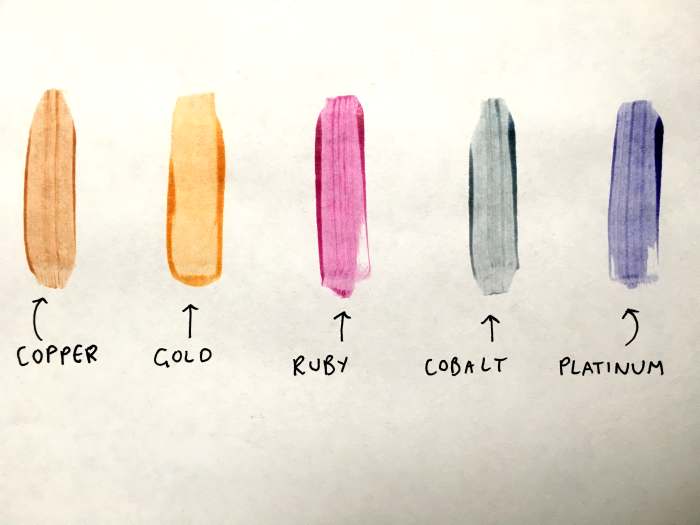
Colour wash swatches
Director Tips
1. It's all about that base. So tone it.
It turns out that Meghan Trainor must know a thing or two about the colour wheel. If you’ve got more yellow-blonde tones, this is essentially the same as adding yellow to your colours, so a blue (like Cobalt) would turn out more green, and a pink (like Ruby) more peach. I wanted more pure, icy results, so I toned my yellow-blonde to a white-blonde first using the platinum wash, but more on that later.
2. Test the colour on white tissue or paper.
This will show you the shade you can expect to achieve on a pure white base, so there won’t be any surprises when you come to apply. Rob explained how he always applies the colours on a test strand at the back of the head, so you can see how it comes out before going ahead with the full application.

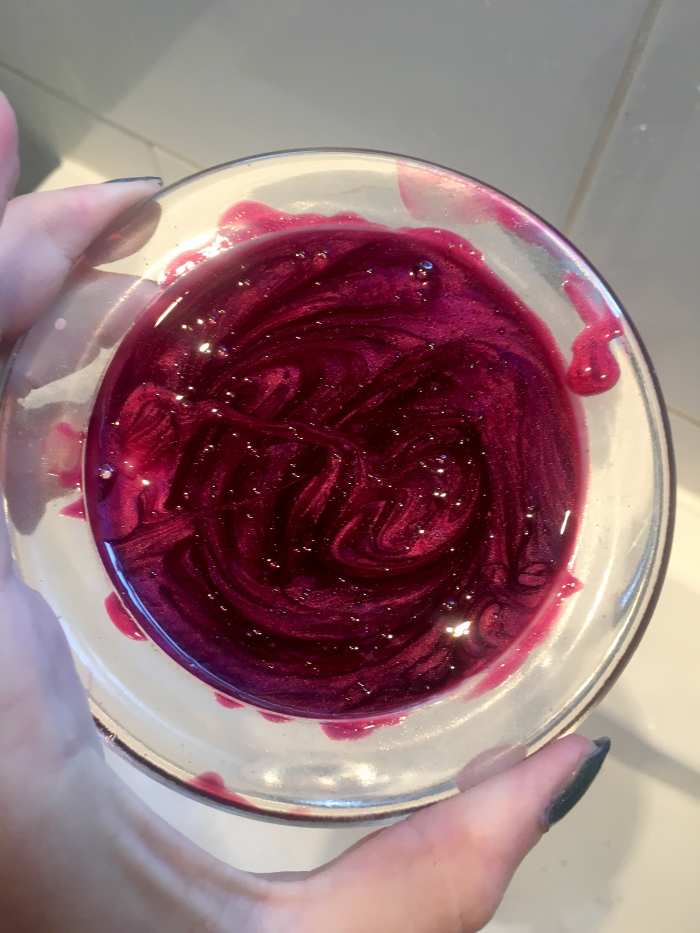
Mixing to the proper shade.
3. Mix to make the exact shades you want.
This can be done in the palm of your hand, which takes approximately 3 seconds, or in a small bowl if you want to be more precise. Or if you’re running low on equipment like me, use a glass candle holder, which definitely shows that you’re creative, not juvenile.
4. Use it like a shampoo for a pastel wash or like a dye for more vivid colours.
For a light wash of colour, just apply like a normal shampoo, wait 2-5 mins depending on how vivid you want the colour, then rinse. Or, treat it like you would a normal dye (like I did) and section out hair, apply with a brush and wait for 30-60 mins before rinsing and conditioning.
5. Refresh the colour as needed.
If you’ve mixed to make new colours, get a couple of squeezy plastic bottles (you know, like those ketchup ones you get in the pub), and fill these so you can use these when washing to refresh the colour.
So with all that in mind, let's get started!
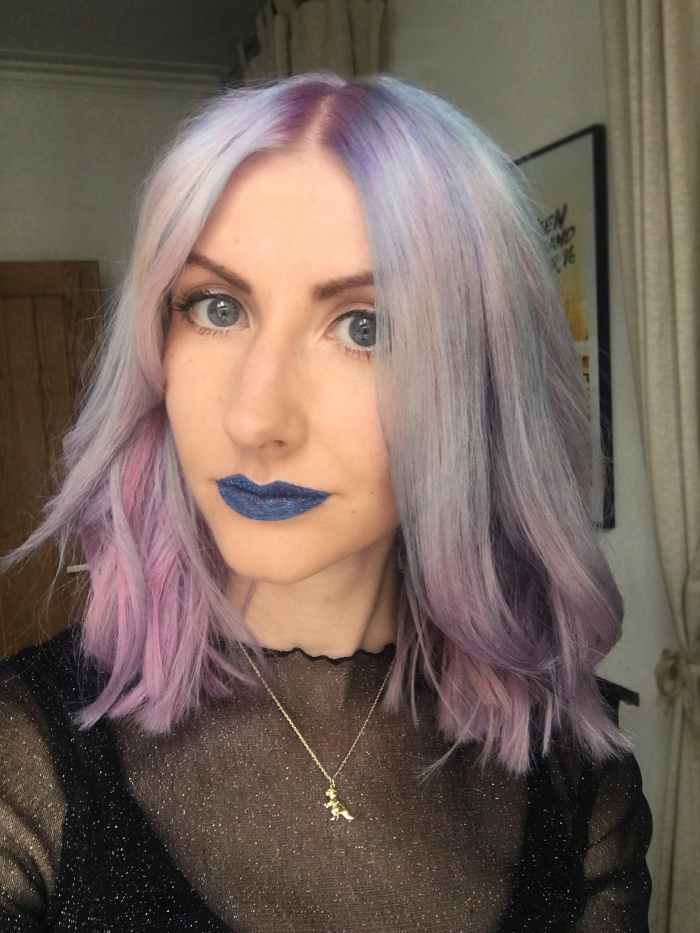
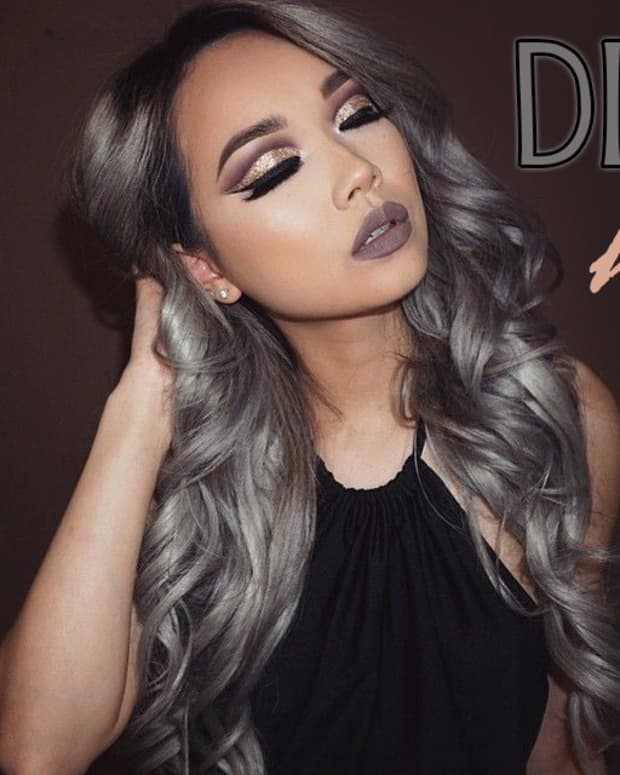
"Mermaid Galaxy" hair on bleach blonde hair.
Disclaimer: This isn’t the official colour name; I have no idea what to call this, I just like the idea of being a majestic intergalactic being who occasionally lives under the sea.
To do this, treat the shampoo as you would a dye.

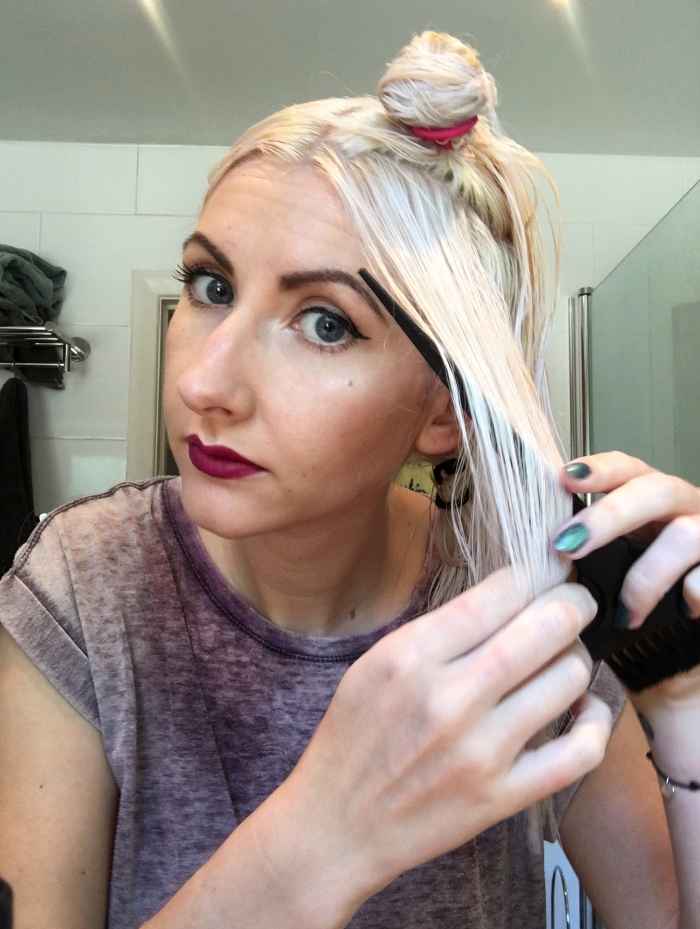
Tone your base.
1. Tone Your Base
I wanted to get as close to an ice-white as possible, so I rinsed my hair then left on Infuse My. Colour Platinum for 10 minutes before rinsing off again.
Mix your colours.
Read More From Bellatory


2. Mix Your Colours
I wanted some blue, purple and pink tones, so used Cobalt and Ruby to create 4 shades in total. I then tested these on white paper and tweaked until I got the shades I wanted, which were:
- Pure Cobalt
- Pure Ruby
- Purple Mix (2 parts Cobalt to 2 parts Ruby)
- Pink Purple Mix (1 part Cobalt to 4 parts Ruby)
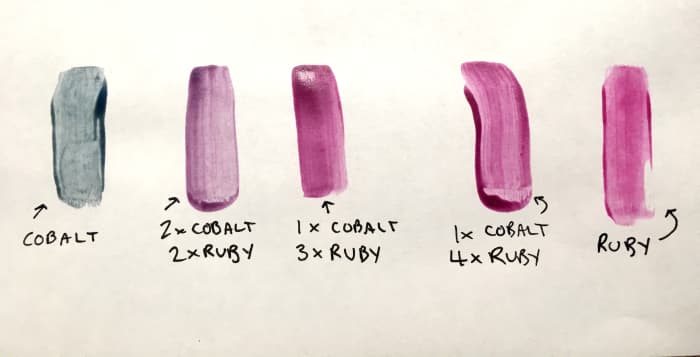
The shades I wanted.
3. Section Hair
I *tried* to create angled sections at 45 degrees to avoid having straight blocks of different colours. Hands up, I could done this a lot better, but I was despairing over the location of my comb, which I eventually gave up trying to find, so just used my hands instead.
First I created two main sections to separate the top and bottom. I did this by taking the hair just above the ear, all the way round to the other side and pinning it on top, and tying a band around the bottom section.
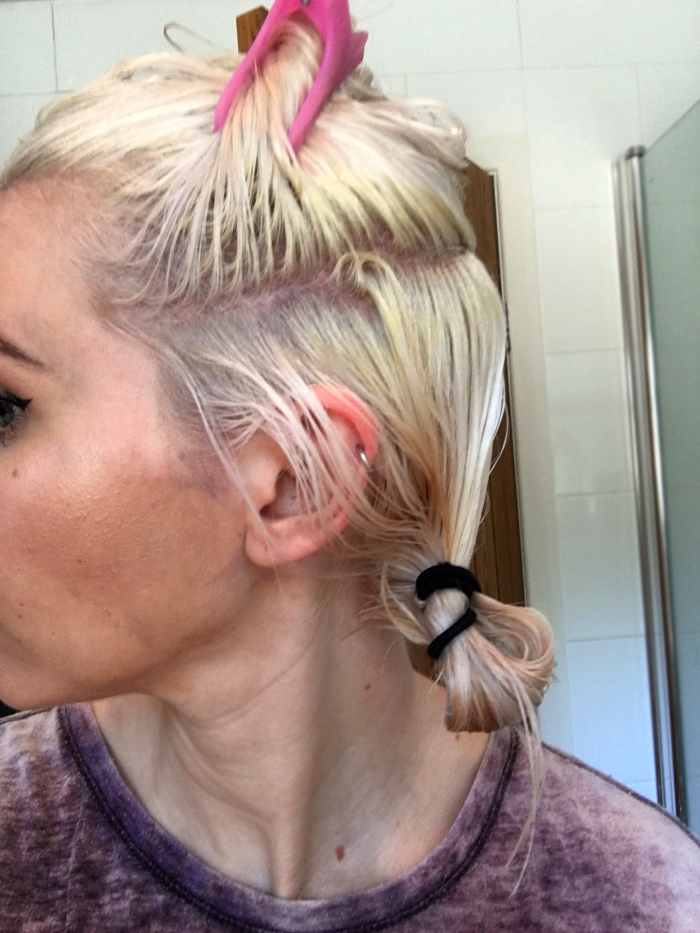
Like so.
Then I created three new sections at a 45 degree angle using the upper section, and another 3 with the bottom section. Ideally I’d have used hair clips, but again, my flat decided to hide the other 11 from me.
WHERE ARE ALL MY THINGS
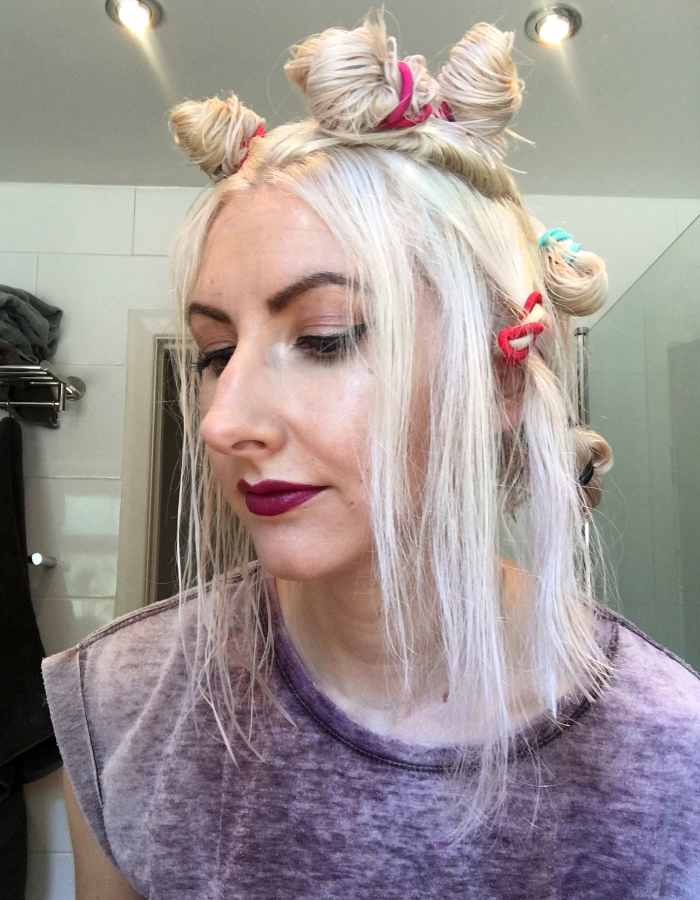
UPDATE: 2 days later. Still no comb. Still no clips. The saga continues.
4. Apply
Using a brush (really important to get right into the roots) and gloves, I applied the mixture generously from root to tip. I wanted random flashes of colour, so used 2 shades on each section, using my fingers to blend where they meet.
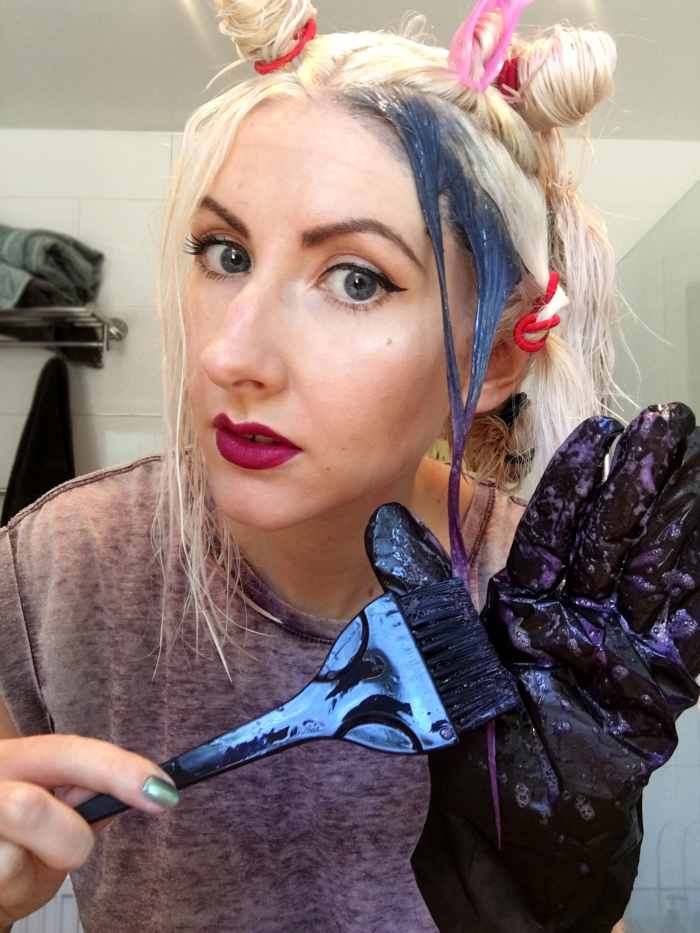
iPhone self-timer, before you ask.
Some I made Cobalt to a Cobalt/Ruby mix, then I’d switch it up and do Ruby/Cobalt mix to Cobalt. I also added in some pure Ruby flashes in a couple of the back sections (which I wish I’d done more of because they look aaaace).
5. Wait 30–60 Minutes
Once you’ve applied it all around, you’ll end up with something like the photo below. Attractive blue forehead optional.
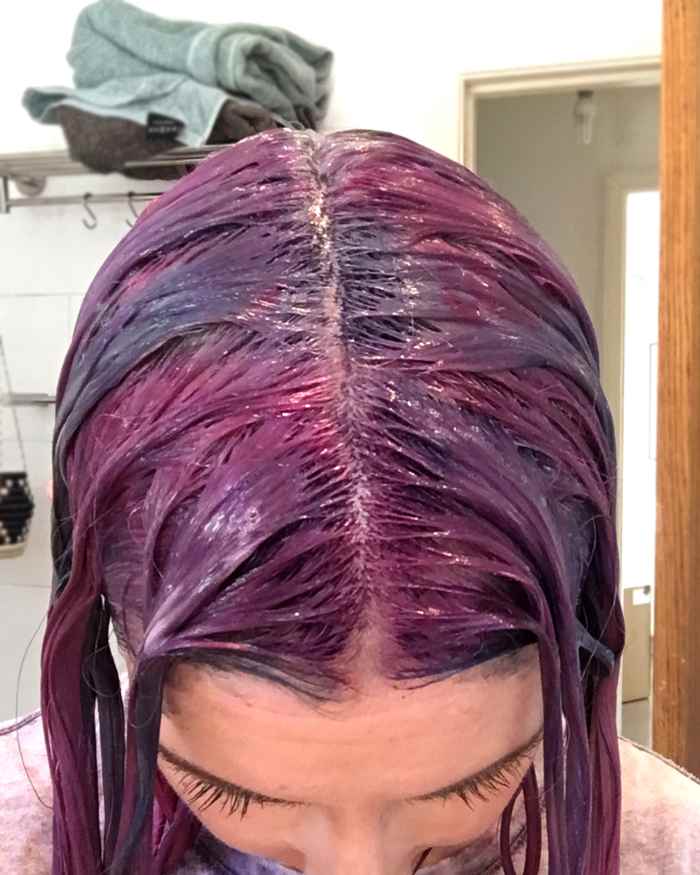
Waiting, waiting . . .
The longer you leave the mixture on, the more vivid it’ll be, so I braved it and left it all on for 1 hour.
6. Rinse Out With Lukewarm Water and Condition
Make sure not to use water that’s too hot as it’ll strip the colour out more. My hair felt strong and soft once I’d finished, but as I’d recently bleached it I also used a leave-in hair conditioning mask for 3 mins. Can’t ever have too much moisture.
7. Dry and Style
Based on my white paper test, I knew deep down I’d end up with more pastel tones, but when it’s on your head it’s easy to get scared by how dark it looks. My biggest piece of advice would be to not worry about this, it’ll never go very dark on bleached hair and looks completely different once rinsed out.
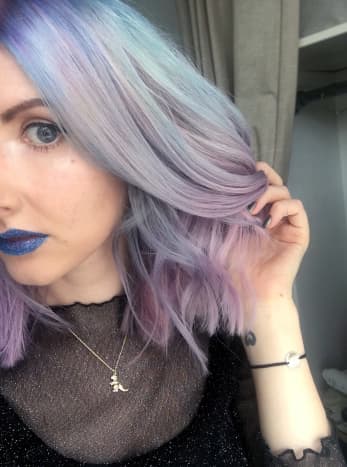
Here's the finished result!


One thing I really love about the colours is how different they look in different light. In bright sunlight like above they reflect to give almost icy pastels, and indoors they look darker and more saturated. There are more pics below so you can see what I mean.


Before and After
Here are the final before and after shots:


There’s some more info on what colours you can expect from each wash on the Infuse My. Colour website, but if you need any advice or have any questions, just pop them below and I’ll do my best to answer! All Infuse My. Colour washes are available to buy from Boots.
Fun washes.
This content is accurate and true to the best of the author’s knowledge and is not meant to substitute for formal and individualized advice from a qualified professional.
Comments
Holly Earp (author) from London on August 17, 2017:
Hey Louise! Yep I washed and toned it with the platinum shampoo first, so it was just towel-dried when I applied the Ruby. If I wasn't toning it first I would have applied it to dry hair...So if I were you, I'd apply the Ruby to dry hair and leave it on like a dye. Then keep it in the shower so you can use it like a shampoo when you wash your hair. That'll keep the colour nice and fresh. Hope that helps?
Louise Thomas on August 17, 2017:
Hi,
I've just seen these whilst looking for hair dye. I'm interested in your article and I need to cover my roots, was going to buy the ruby. You say to treat it like a hair dye, so my question to you is did you wash your hair first for your outcome?
Thanks
Louise