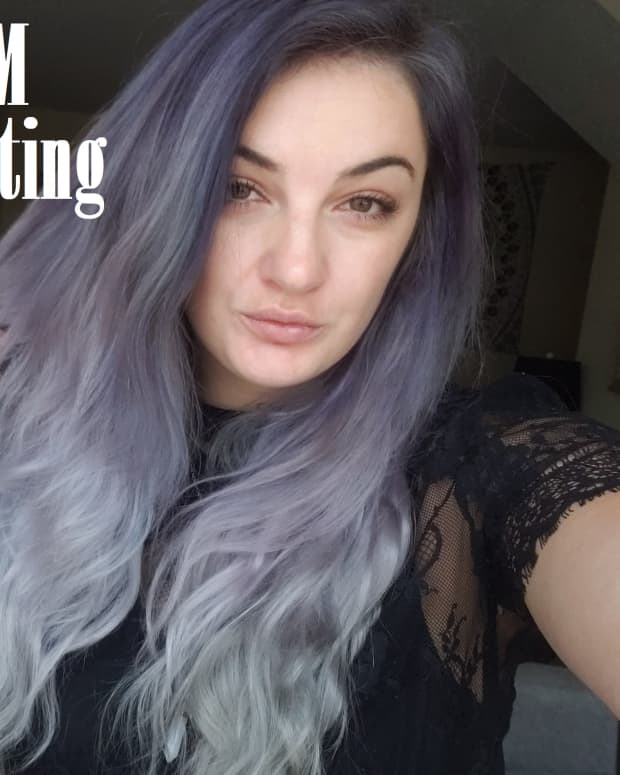
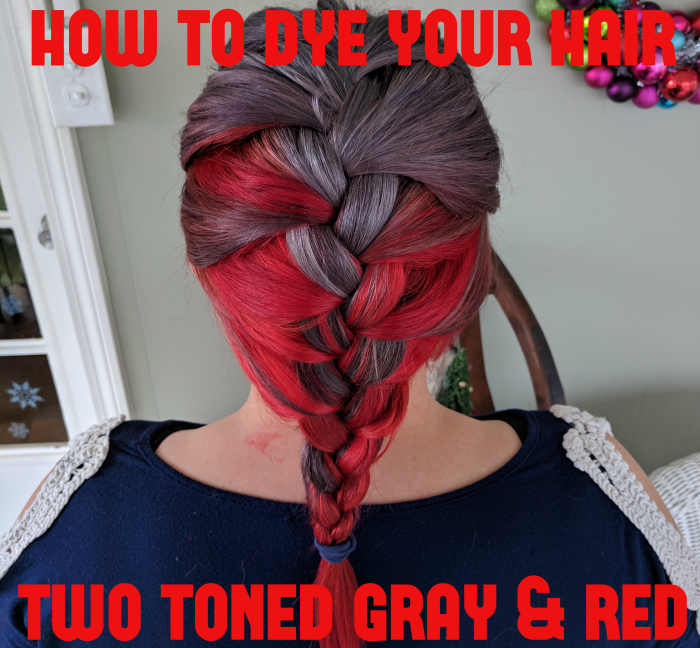
How to Dye Your Hair Two-Toned Gray and Red: Review of Ion Color Brilliance Titanium and Manic Panic Wildfire
Tori is a 28-year-old, three-time animal mom and DIYer living in Northern Atlanta with her boyfriend.
hellovictoria
How I Got Started
Shortly before Thanksgiving last year, I was enthralled with gray hair and wanted to try it myself. However, I was torn because I wanted to do a bright color again too. I decided not to choose and ended up doing both.
I chose gray and red because I thought they would look pretty together, and that's pretty much it. There's not a whole lot of reference material on the internet for these two colors together, so I knew I was going in blind, but I had trust that it would work out just fine.
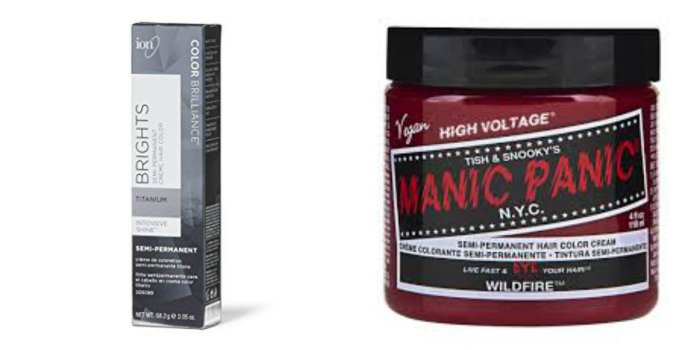
Ion Color Brilliance Titanium and Manic Panic Wildfire
For my gray, I chose to use Ion Color Brilliance Semi-Permanent Hair Color in Titanium mixed with just a touch of Ion Color Brilliance Semi-Permanent Hair Color in Black. The photos of the titanium were just a hair lighter than I wanted mine to be, so adding just a tiny bit of black adjusted the shade to the darkness I wanted.
For my red, I chose Manic Panic Semi-Permanent Cream Color in Wildfire. This red online looked to be the vibrant red with a touch of orange tone that I wanted. If I do this hair again, I also think that Manic Panic's Rock 'N' Roll red would look absolutely stunning with the Titanium. Rock 'N' Roll red is more on the pinker toned side of red.
I found all of these colors and supplies at Sally Beauty Supply, but you can order everything you need from Amazon as well.
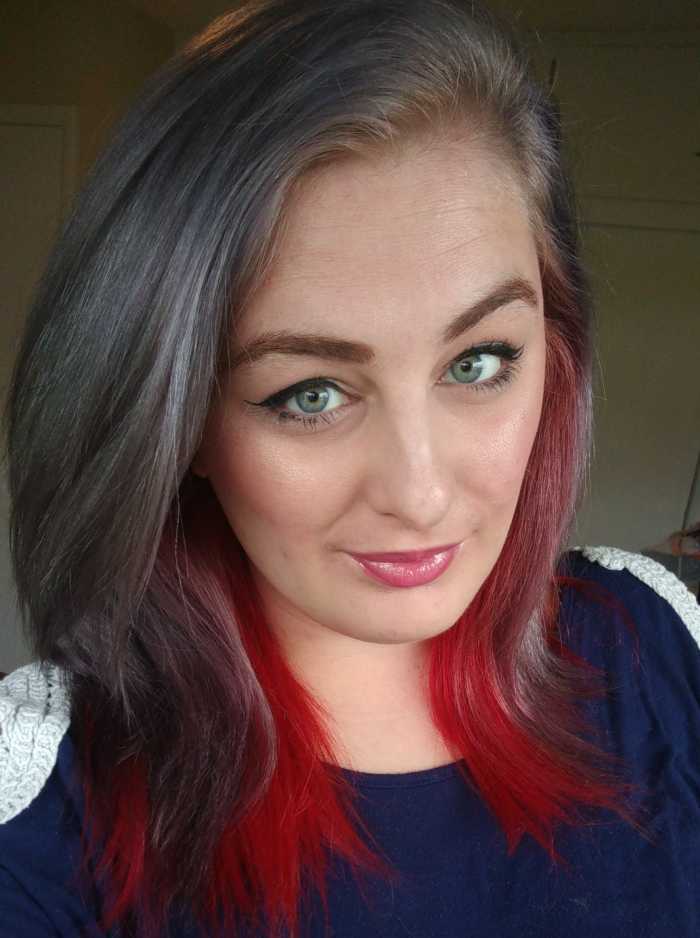
Here are the results of my dyeing experiment!
hellovictoria
Supplies You'll Need
| Product | Price |
|---|---|
Ion Color Brilliance Bright White Creme Lightener | $11.79 |
Ion Color Brilliance Sensitive Scalp Volume 20 Developer | $2.19 |
Tint Brush | $.99 |
Tint Bowls (2) | $5.00 |
Manic Panic Semi Permanent Hair Color in Wildfire (1 tub) | $9.99 |
Ion Color Brilliance Brights Semi Permanent Hair Color in Titanium (2 tubes) | $11.58 |
Ion Color Brilliance Semi Permanent Hair Color in Black (1 tube) | $5.59 |
Nitrile Gloves | $4.29 for 10 |
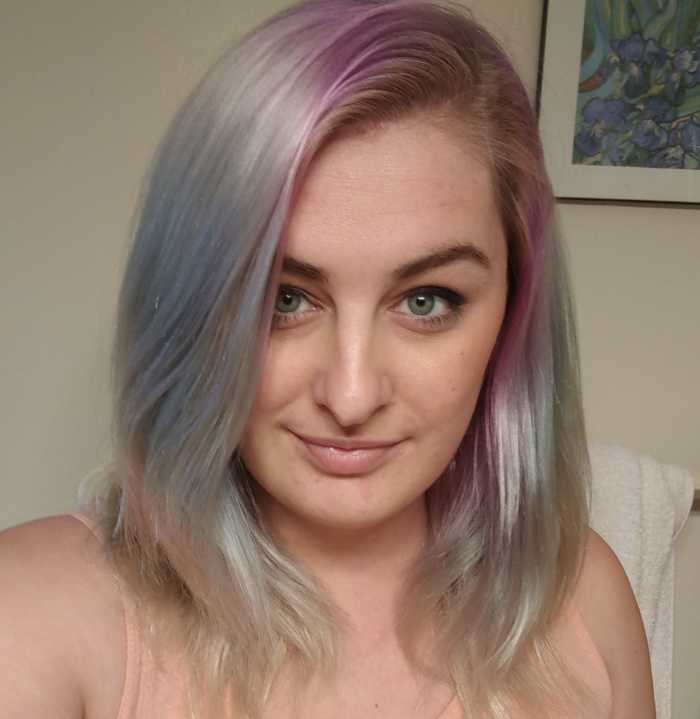
This is what I had to work with before going gray and red.
hellovictoria
Step 1: Lighten Your Hair
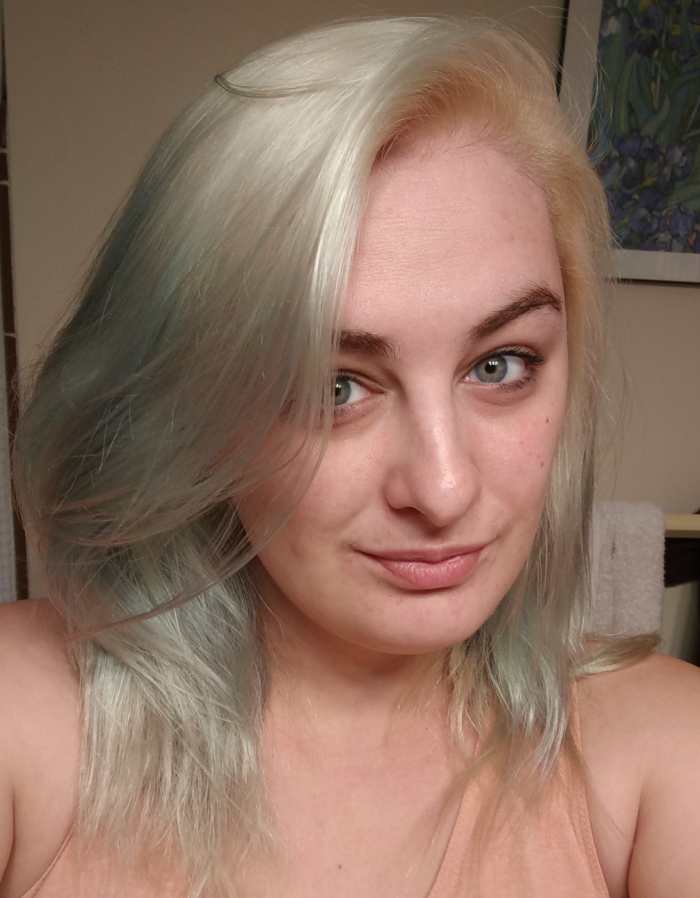
The above picture is what I had right before I lightened my roots and began applying my dye. To give you a better idea, my hair was bright red with violet roots prior to this picture, so I'd say it faded pretty well.
Here's What I Do To Remove Color:
- I work at a pool and teach swim lessons three days of the week. Normally I wear a cap, but when I'm ready to re-color my hair, I take it off and let the chlorine do the heavy lifting. It works pretty well most of the time.
- I use a clarifying shampoo to remove a large portion of color deposits. Normally, I only wash my hair twice a week, but for two weeks before I dye my hair, I wash it three to four times a week (especially since I'm letting my hair get all chlorine-filled at the pool).
- If I think there will be additional detrimental show-through color, I will use volume 10 developer and the lightener I mentioned in the supplies list above to remove some of it. I try not to do this on a regular basis since my hair has already been lightened a lot.
The remaining color deposits did not affect the final color at all, so if your hair is as faded as mine was in the picture above, don't worry. Generally speaking, if you're going darker than your faded color, you will not see any color show through, and that was the case here. If you are trying to go lighter, however, you may notice some issues. If you're concerned, you can use a toner such as Wella T-18 to even out your hair a bit.
Read More From Bellatory


Here's What I Do To Lighten My Roots:
Nowadays, when I lighten my hair, I only lighten my roots, because the rest of my hair has been hit with lightener enough that I don't want to damage it further. If you need more direction on lightening your entire head, take a look at the review and tutorial I wrote about Ion Color Brilliance Bright White Creme Lightener. These are the steps I follow to lighten my roots using this product.
- Mix lightener and developer at 1:1 ratio in a tint bowl. Wear gloves while applying.
- Section hair out into sections about 2x2 inch squares.
- Starting on one side of the square, apply lightener with a tint brush. Be careful not to overlap the new lightener with any previously lightened hair by more than a quarter-inch to prevent breakage.
- Using the pointy end of the tint brush, thinly part and flip the sectioned hair that you just painted to one side. Apply to the other side of the hair.
- Repeat steps 3 and 4 moving your way through the square as quickly as possible until the whole square has been saturated with lightener.
- Repeat steps 3-5 for each square of hair.
- Let sit until your hair has lightened the desired amount, or for 20 minutes—whichever comes first.
- Rinse lightener out in the shower and apply conditioner.
- If your hair is not the desired lightness, wait a day or two to give your hair time to rest, then repeat the process.
The video below from Ellebangs on Youtube is a great resource if you need help figuring out how to section and apply lightener or hair dye to your roots without missing any spots!
Here's what it looked like after I lightened my roots!
hellovictoria
Step 2: Apply Color
The next step in the process after lightening your hair is to apply the color. To prepare for the color, I followed the following steps:
- Part your hair across the back of your head in a straight line. I started my line at the top of one ear and drew straight across the back of my head to the top of my other ear. You may need a buddy to help you make sure the line is straight.
- Pull back the bottom section so it's not in the way. You will first apply dye to the top section of hair.
- Mix just a tiny bit of black dye, I would say no more than a teaspoon, with the Titanium color to make it just a bit darker.
- Using the hair sectioning method shown above, apply the dye to your roots. If you are not confident in your ability to not get dye on the bottom section of hair, lay a piece of foil or saran wrap flat on the section that is not getting dyed to catch any dye that might drip on it.
- Once your roots are finished, go back and apply dye down to the tips of your hair until it is fully saturated.
- Pin the hair into a bun on top of your head within the gray section.
- Take down the bottom part of your hair and prepare to add dye to it. A buddy may need to help you. My boyfriend helped me with this step.
- Repeat steps 4 and 5 until your hair is saturated. Pin hair into a bun on the back of your head within the red section.
- Allow the dye to process for 45 minutes to 1 hour.
Step 3: Rinsing and Washing Your Hair
Because these colors are so different, I had to be very careful not to allow the red to bleed into the gray. Because of this, I was cautious while washing the dye out. In subsequent washes, I washed and rinsed the sections separately to ensure that minimal color bled.
- Section your hair out into the respective color zones and tie back the gray section. You're going to rinse/wash the red section first.
- Rinse or Shampoo and condition the red section. Once finished, tie back out of the way.
- Tip your head over and rinse or shampoo and condition the gray section.
- Once you're finished, you can towel dry the sections together. There is less likelihood of color bleed once the conditioner has been applied and rinsed out in the shower.
I washed my hair following these steps for the six weeks that my hair was this color. Thanks to this washing procedure, I was able to extend the life of both the gray and the red for the entire six weeks, and they faded beautifully.
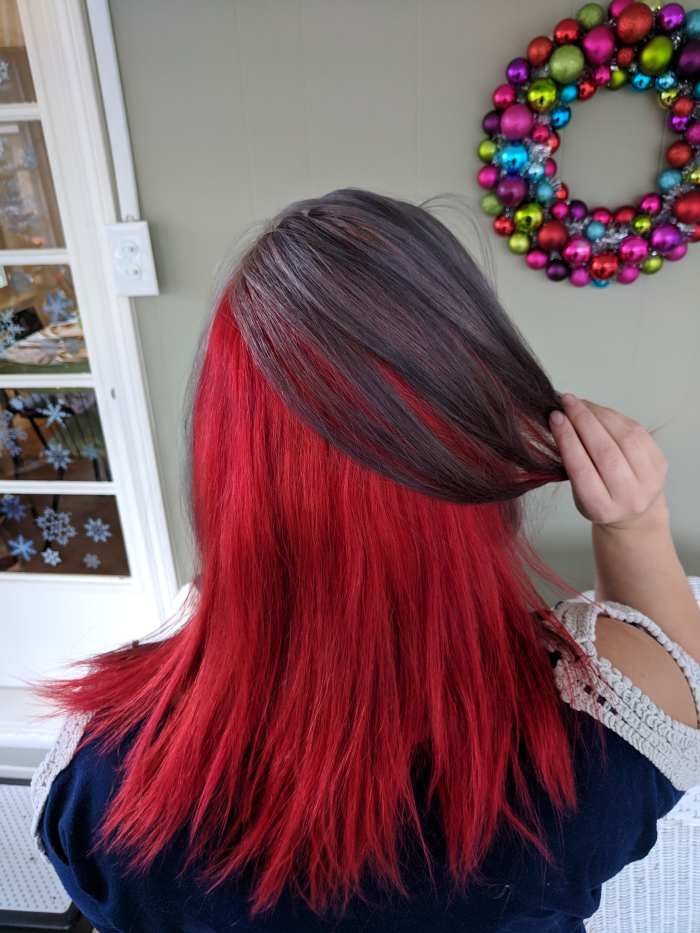
This is my gray and red hair from the back.
hellovictoria
Final Thoughts
Overall, I very much enjoyed using these two colors together. They worked well together and ended up looking incredibly vivid. I've always had good experiences with both Manic Panic and Ion Color Brilliance, and using these two colors together just showed how well these brands can work together despite being competitors.
I appreciate both brands' approach to package design. The Manic Panic tubs can be reused to store things or to plant tiny plants in, which I've done in the past. Both the Manic Panic tubs and the Ion Color Brilliance tubes allow me to get every last bit of color out of them, which helps me get the bang for my buck that I look for out of hair color.
Both colors lasted reasonably well (about six weeks), and I did not have any issues with colors bleeding onto my skin and clothes, although they did bleed into each other ever so slightly.
Overall, I would recommend both of these brands and these specific colors, especially together. I think they deliver an interesting, not-normally-seen visual, and it's definitely worth trying if you like to experiment!