How to Design Henna
Bushra is Indian and is well-acquainted with henna application. She is self-taught with influences from Hyderabadi and Arabic henna styles.
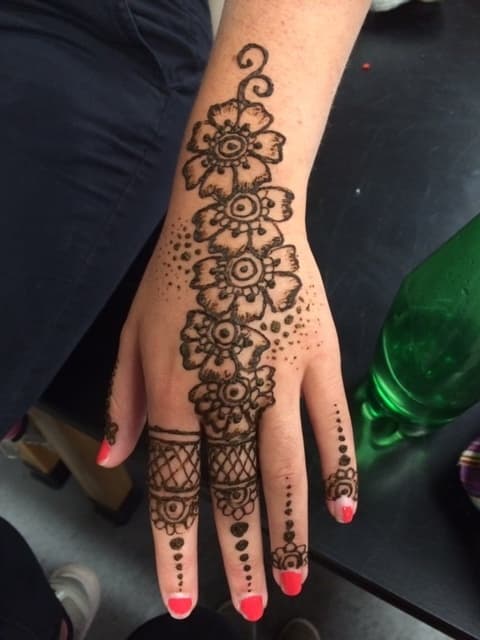
Designing Henna With Traditional Shapes
If you know all the details about where to get henna, henna application and storage, then great! You’re in the right place! If not, start by learning how to make henna and a henna cone, and how to apply and store henna.
The design of the art of henna is what makes it so beautiful and is the reason for its popularity. There are multiple facets to the design, and I’m going to address the shapes, the different styles, and some useful tips to bring it all together.
All of the design elements that I mention below, I highly suggest you draw them on paper first to practice and to see how much work you have ahead of you. Also, you can trace back on your practice drawings with a henna cone to build muscle memory and imprint in your mind those basic designs that will help you as you progress.
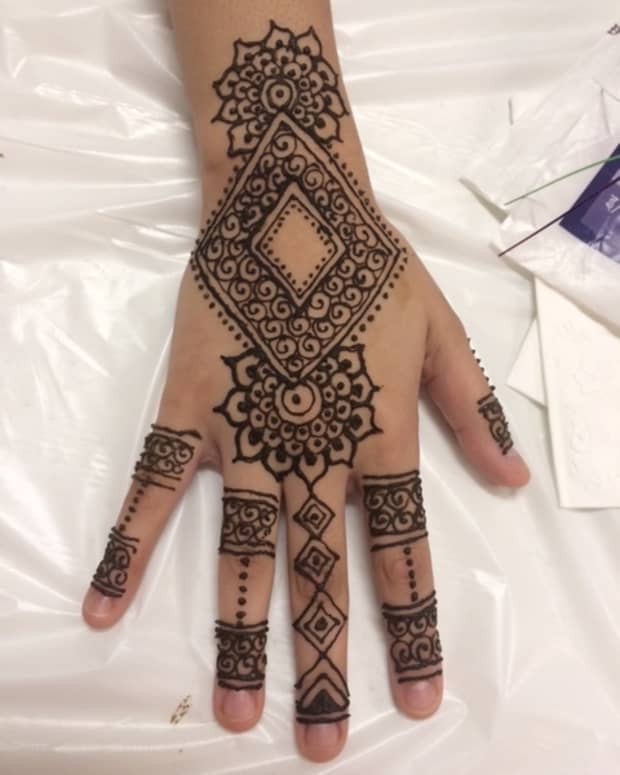
A classic floral design
The Line
- Straight lines are usually used to section off the skin that you are applying henna on to fill with more designs later. Often, lines are also used to create a classic checkerboard designed, with every other square filled, or even just a criss-cross pattern.
- A popular design that I call the bracelet uses a line that wraps around the back side of the wrist, similar to a bracelet. This line usually encompasses a small rectangular area on the wrist that can be filled with designs.
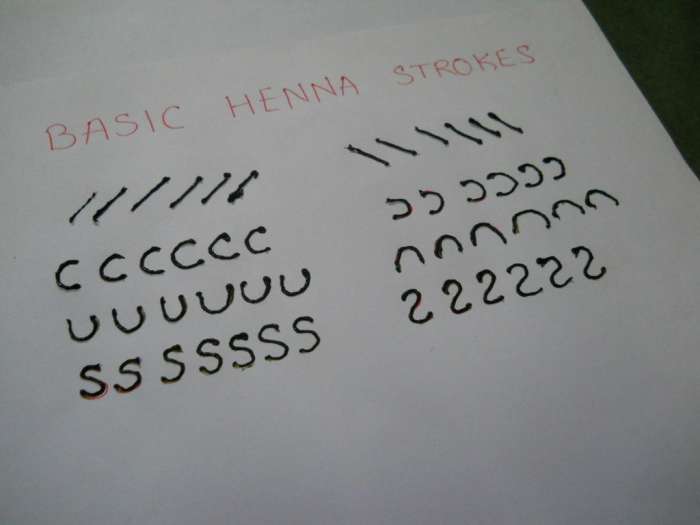
- When you go to practice this on paper or with a cone, I recommend that you practice short, quick lines, long, slow lines, and vertical, horizontal, and diagonal lines. All this practice will give you the initial skills you need to start creating your own designs.
Practice designs on paper
Geometric Shapes
- Triangles, squares, rectangles, hearts, (and technically circles), and all the other geometric shapes are absolutely okay to use in henna. They are rarely used, however, because henna designs are mainly based on organic shapes and swift, curvy, flowing designs rather than rigid, exact shapes. I have used them in the past, and you can experiment with them as much as you like.
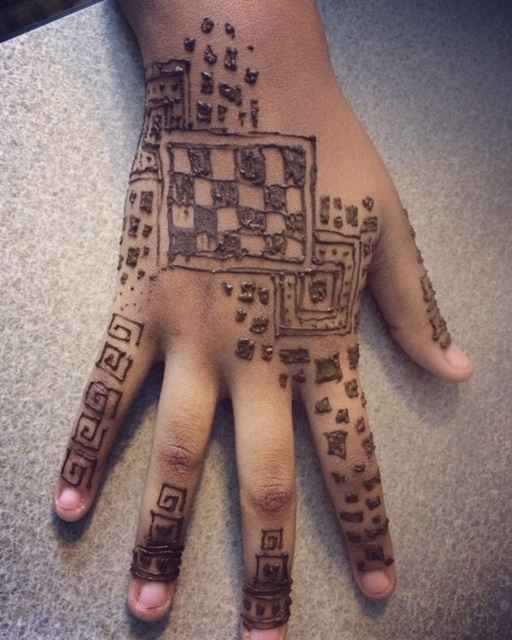
Quadrilateral design with checkerboard filling
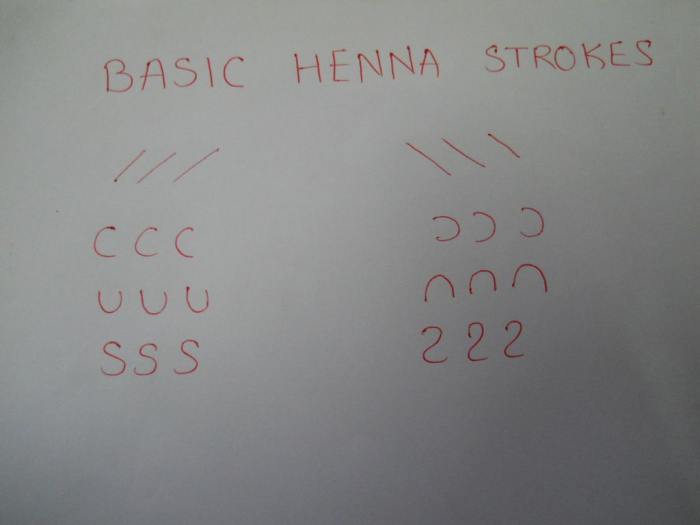
The Curve
- This is a versatile piece of design that I don’t like to confine to a certain set of things. There are so many different curves to do, and I will get to some specific ones further down in the article, but some basic curvy shapes that you should know are what I call the letters.
- The “c” shape, the “u” shape, and the “s” shape are what I am referring to. To practice these, simply write these letters on a piece of paper in varying sizes and practice them with a cone as well. These letters are generally used in smaller designs to fill in areas or to outline other shapes. They are seldom used as a shape in and of themselves.
The Circle
- This is one of the most important “curves” you need to know. You could base an entire design on just a single circle, and in fact, the classic and ancient henna design is nothing but a circle in the center of your palm.
- Practice these similar to the “letters” by drawing them in various sizes and thicknesses, then tracing them with a cone. If you want, try doing ovals and multiple circles bunched together and more.
The Petal (Also Known as the “Leaf”)
- This is a broader section of shapes because petals can be any shape at all basically. Usually, though, they are organic and not geometric shapes, but you can have whatever kind of petals you like.
- Common shapes for petals are the teardrop shape, the heart shape, a rectangular-sort-of shape with two bumps at the top, a brace shape that’s been elongated, an oval kind of shape, and even circles. Experiment with different petals and do whatever you like, but definitely practice these on paper and with a cone before going in for an actual design, because petals are easily messed up if you’re not watching the size of them.
- Petals are usually placed around a circle or a dot to imply a flower, but you can use them on a line and on any other shape you like.
The Mango (Paisley)
- This is a classic Indian shape that most people could recognize. It’s unique and authentic, and you can make it your own by playing with the size, what you put at the end of the “stem”, what you fill it with, and so on.
- To do this, base your practices on the teardrop shape, but curved. Another great way to practice these shapes is to use a yin-yang symbol because essentially, that symbol is two mangos put together.
Read More From Bellatory


The Spiral
- This is an excellent design to fill in areas or to add flair to a curved line, or just to add a little something to a finished design. A simple and small spiral is effective for most things unless you really want to do a large, intense spiral. In my experience, a large spiral like that is not very pleasing to the eye, and it is easy to make a mistake.
The Curved Teardrop
- I know this seems redundant because I mentioned it under “The Mango”, but the one I’m referring to here is to layer on top of itself to fill an area, or to finish a design when you don’t know what to add. This is very common to add on top of a spiral or a curve. Look up some examples to see what I’m talking about.
The Dot
- The dot is an important part of a complex design because oftentimes, henna artists will begin an entire hand of henna from a dot (or a circle). A dot is different from a circle in that it is used to outline designs, fill in areas, add flair to a design, and is not part of the main structure of a design. You can use it in varying sizes to create a sort of sparkly or smoky effect in henna.
Unify
- Make a cohesive and beautiful henna design by putting all these skills together. If you’re a beginner, draw it all out first to help you in actual application.
- Sketch out the structure with a thin stream of henna first with the major shapes. I suggest you begin with a dot, a line, or a circle because they are the most simple designs that you can stem into a bigger design from. Add petals, mangos (if you want them), spirals, and so on to take your designs to the next level.
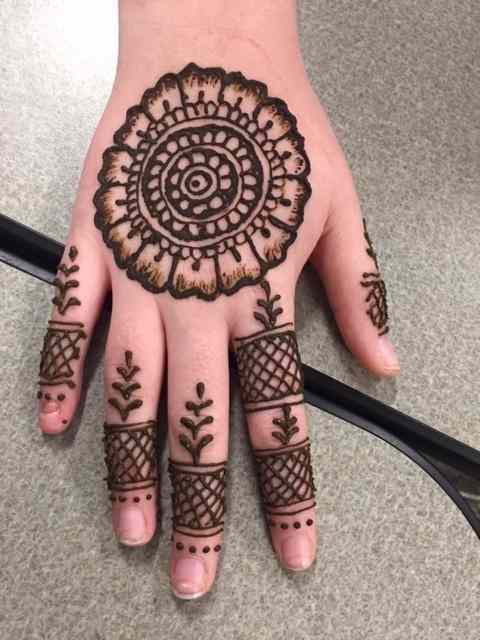
- Add filler designs, like the spirals, like layers, lines, checkerboards, and so on to fill in areas. Make sure to leave some negative space for aesthetic. Another common thing to do, which will enhance your henna abilities, is to lay design on the fingers of the hand that follows the same theme as the rest of the design to really unify it.
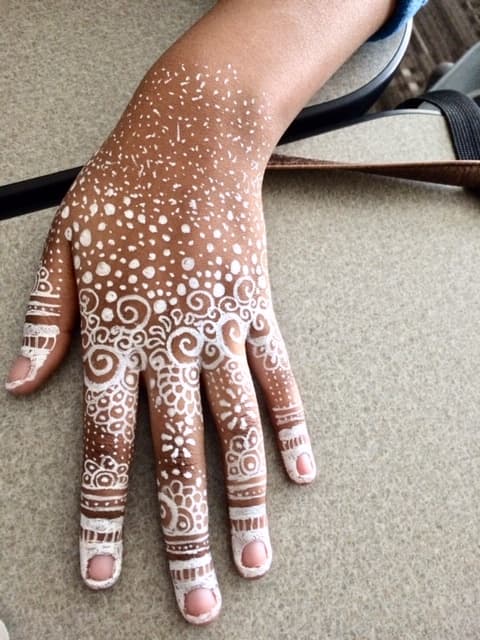
This is a white ink version of henna, but as you can see, the design is concentrated on the fingers.
Styles
There are a couple of different origins to henna, and I’m going to show you the two major ones.
Indian Style: This henna consists of thin strokes, highly detailed designs, depictions of humans and peacocks, the shape of the paisley, and so on. Indian henna tends to cover the entire hand or most of it and is used for weddings and baby showers and other generally female-oriented occasions. You can take inspiration from this when you go to create your own designs, but it is a tad more difficult than the other style of henna.
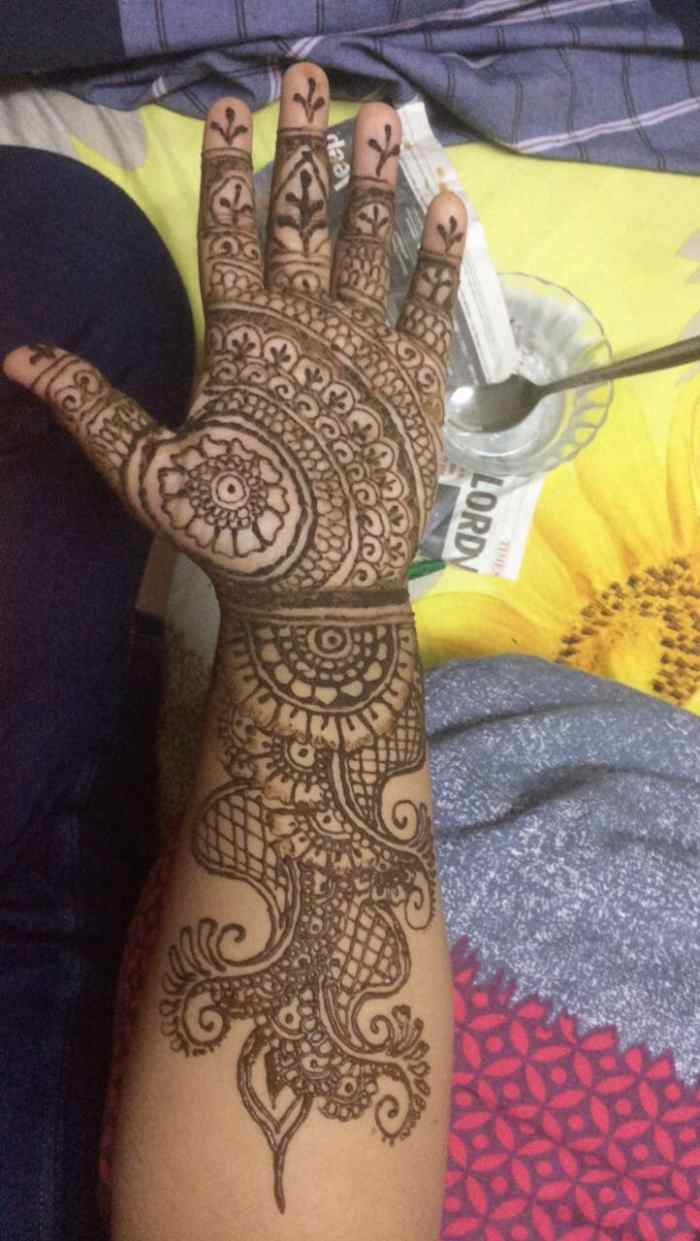
This is an Indian design I did while in India
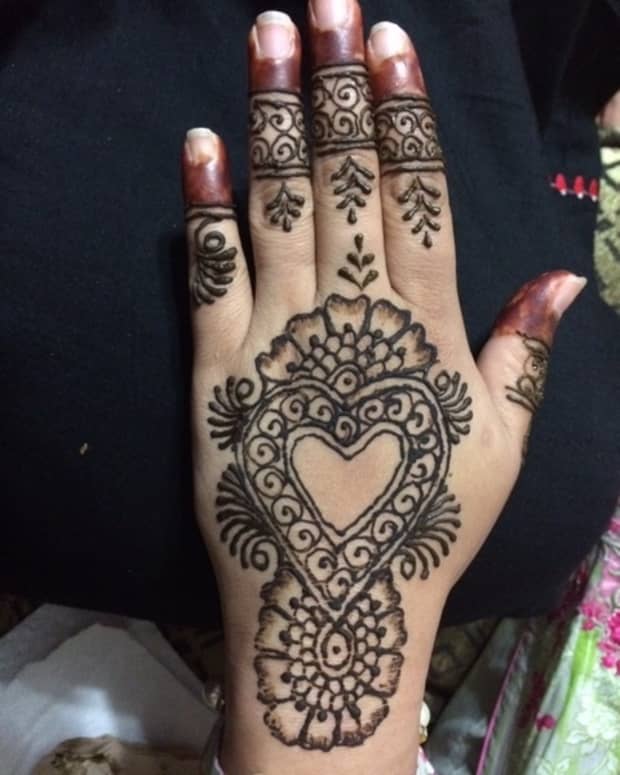
Arabic/Gulf Style: This type focuses on patterns and larger shapes, generally consisting of floral designs and a rather thick stroke. The henna tends to show more skin than Indian henna and typically follows a linear structure from the bottom of the hand/palm to the tip of a finger. Arabic designs are also used for weddings and such and are arguably the more modern and popular type of henna. They are easier to come up with and are a good starting point for beginners.
- My own henna style reflects both of these styles. I am Indian by birth, but I was raised in a highly diverse community where there were people from the Middle East, Africa, India, Pakistan, and so on. I learned henna in person from these people which is what influenced my style, as well as a hint of Westernism, which can be seen in the additions of words/letters, and hearts in the design.
This is an example of Gulf style, with thicker application and the design growing up on one finger in one direction.
Extra Tips
There are some extra things you can do to accentuate your henna and make it just a little more advanced.
- Shading: Add a dark to light gradient in certain shapes, like petals, for example, to create a nice effect when the henna is off. It will look nice before and after drying.
- Layers: Add multiple layers of designs, like a line of dots, then two lines, then some spirals, then some lines, then some “u” shapes, and so on. Layering this way will help fill in areas quickly and make your design look complex. Also, you can layer in that let a layer of henna dry first, then go back and fill in areas, like for a checkerboard, for example, and that will help reduce smudging and messiness.
- Experiment: Try different types of designs together and try different thicknesses and levels of complexities with your design to create new and exciting ideas and make the henna unique to yourself. There is nothing wrong with looking to other henna designs to copy or take inspiration from towards the beginning, but as you progress, create your own designs.
This content is accurate and true to the best of the author’s knowledge and is not meant to substitute for formal and individualized advice from a qualified professional.