How to Do a Spa Pedicure at Home
Tori is a 28-year-old, three-time animal mom and DIYer living in Northern Atlanta with her boyfriend.
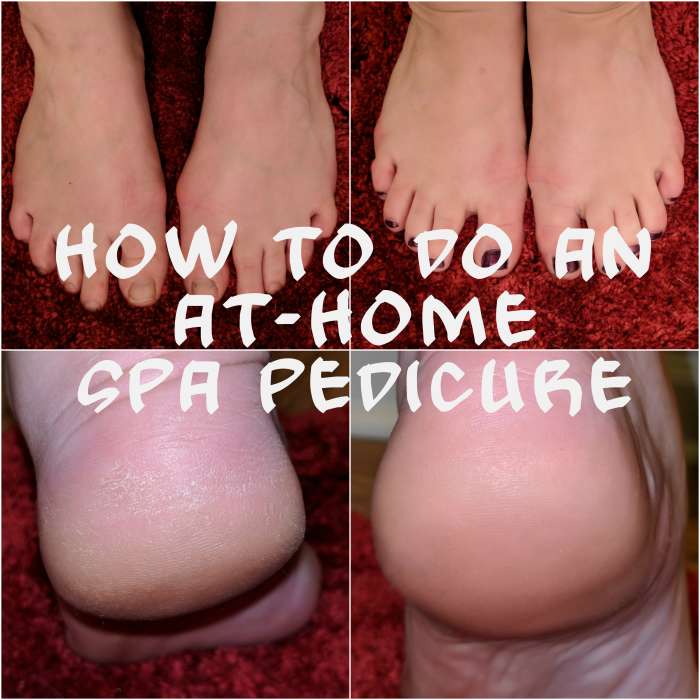
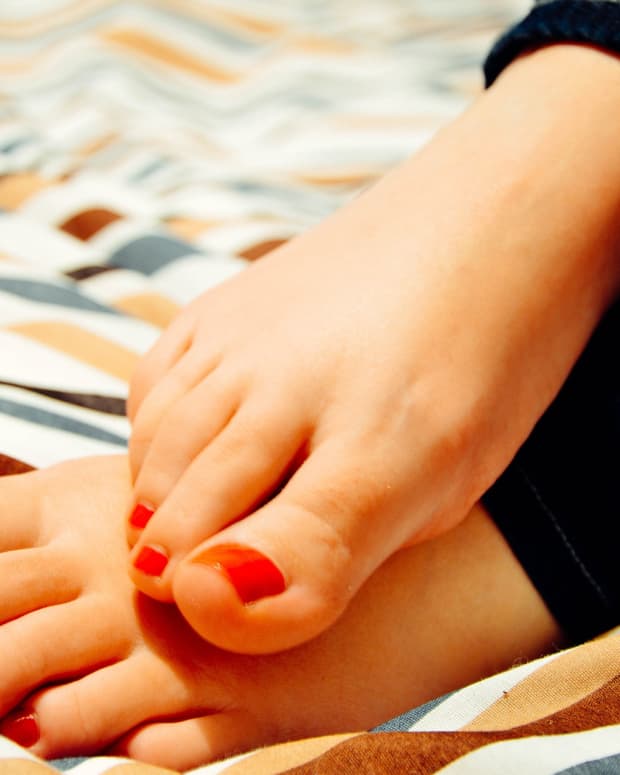
Before and after photos of my DIY spa pedicure.
hellovictoria
Why Do a Spa Pedicure at Home?
If you're like me, you love going to the nail salon and getting a spa pedicure, but you don't love the price tag. For me, going to the nail salon and having my fingers and toes professionally done is a treat, not something I can pay for every couple of weeks. But here's the problem: what do you do when you are broke and your feet are starting to look like Frodo's?
I started doing my own pedicures about two years ago. With the purchase of some simple tools to keep in the shower, I am able to keep my feet flip-flop ready and free of uncomfortable and scratchy calluses all the time. All you need to do is follow this routine every couple of weeks when your feet start to feel a little scratchy again, and you're in the clear!
As a precursor, for me, this takes a few hours because I like to be extra moisturized. So if I were you I would set aside a few hours on a Sunday afternoon to do your pedicure!
Step 1: Apply Lotion or Oil
My feet get extra dry and super callus-y, so the first step I do before I do anything else is apply lotion or oil to clean feet and put socks on for at least 30 minutes before soaking my feet to prepare for callus removal. The softer your feet are, the easier it is to remove calluses.
If I'm using oil, I will use either coconut oil or argan oil. If I use lotion, I will use an unscented one. Slather on a thick layer and then put socks on for thirty minutes before starting your foot soak and scrub!
Step 2: Soak and Scrub Your Feet
I'm on my feet all day at work, so my feet are very callused and rough after a couple of weeks without treatment. Calluses aren't something you can slough off dry. It's uncomfortable to do so. The first thing you have to do is soak your feet. There are a couple of different soaks you can do depending on what your foot problems are.
First off, no matter what you decide to put in your foot soak, you should always put in Epsom salts. Epsom salts are made with magnesium and sulfate, two minerals that are essential in human body processes that we don't get enough of. Magnesium and sulfate can be absorbed through your skin and can help with muscle aches and pains, too. (Source)
My favorite foot soak is warm water with peppermint oil, Epsom salt, and a little bit of vinegar. I know the vinegar piece sounds a little weird, but vinegar acts as a disinfectant which can help prevent or manage fungal problems (Source, Source). You can do this soak in your bathtub or in an extra-large plastic bin. I typically do it in my bathtub with the water-filled up to my ankles. I eyeball the measurements, but it is about two cups of Epsom salt, a cup of vinegar, and several drops of peppermint oil.
If you used coconut oil in the previous step to help soften your feet a little bit, you may have to rinse your feet off before placing them in the soak. Argan oil or lotion should have fully absorbed. I like to let my feet sit for 15 minutes before I start using my tools to get those calluses off.
While my feet are soaking, I have a scrub that I absolutely love that I will apply to my feet and calves. Mix equal parts coffee grounds and sugar with just enough olive oil to make a paste. Coffee grounds have caffeine, which is proven to tighten skin and minimize the visibility of cellulite (Source). The grounds plus the sugar also act as an exfoliant, which is why I apply it to my feet too. And the olive oil, of course, acts as a moisturizer.
Rinse off the scrub when you're ready for the next step!
Read More From Bellatory


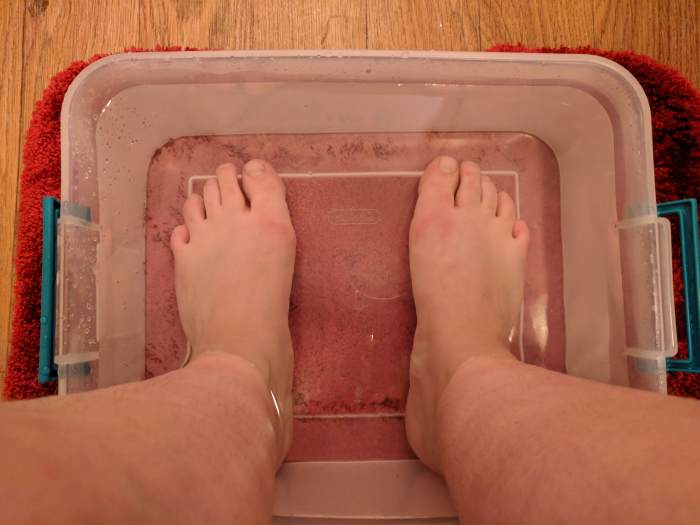
Letting my feet soak!
hellovictoria
Step 3: Slough Off Those Calluses
Calluses are the most annoying part of keeping up your feet, especially if you are a little ticklish, but here's an easy way to think about taking them off. It's just like sanding wood. The coarser the grit that you use, the more that will come off, but the surface will still be rough, so you follow with finer and finer sandpaper until the surface is smooth.
Start with a metal foot file that resembles a cheese grater. File away on all of the roughest parts of your foot—heel, big toe, and big toe joint—to remove as much of the callus as possible. This is possibly the most important tool you will need and you will see immediate results from using it.
The next important step, as I mentioned, is using a finer file to remove the rest of the calluses and smooth the skin. I love using the Earth Therapeutics Diamond Foot File because it is double-sided and has an extra file in the handle to help with smaller hard to reach places. One side of the file is a little bit coarser and the other side is super fine.
These files work best when your feet are wet. Don't drain your foot soak solution, as you can continue to use it while you are filing. You will also be able to use the soak to rinse your feet when you are done and ready to move on to the next step.
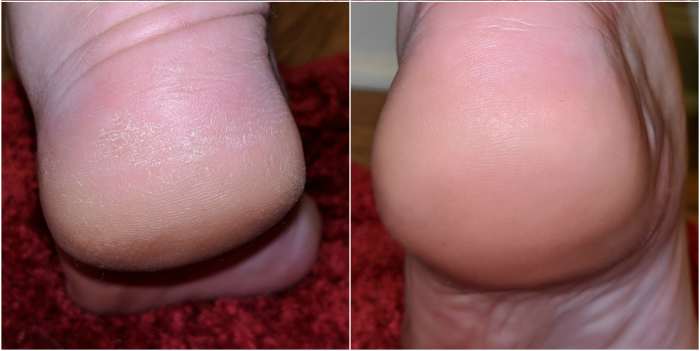
This step makes a seriously HUGE difference! See my before an after? My feet are smooth and feel great. Since there's no dry skin left, I don't feel like my skin catches on certain fabrics anymore.
hellovictoria
Step 4: Lotion Up
After I get the calluses off and my feet are dry and smooth, I always take unscented alcohol-free lotion and slather it on once more under a pair of socks. This is always a good followup to a soak to lock in moisture and keep your feet softer for a little longer.
I usually will let my feet rest in the socks and absorb the lotion for about 30 minutes before starting the next step, which is painting my toes!
Step 5: Beautify Your Toes
After you've finished the grunt work, you can continue on to the actual pedicure part of the process if you like. If you don't care or don't want nail polish on your toes, you can skip most of this step!
Start by clipping your toenails to the desired length. If you are keeping them a little bit longer, use a nail brush to clean the undersides of your nail. I personally prefer my toes clipped down as short as they will go.
After your toes are clipped, you can use a cuticle trimmer to trim extra cuticle if you need it. I don't usually have to do that because I don't have a lot of extra cuticle on my toenails to worry about.
Next, you can paint your toes. Start with a clear base coat. If you don't apply a base coat, you risk the nail polish bleeding through your nail. When you go to remove it, your nail will have a tinge of whatever color the nail polish was. I really like using ORLY Rubberized Base Coat because it has the best staying power out of every other non-gel nail polish I've ever used. After your base coat, apply the color and a top coat to seal it in. Use a Q-Tip dipped in acetone to correct any mistakes.
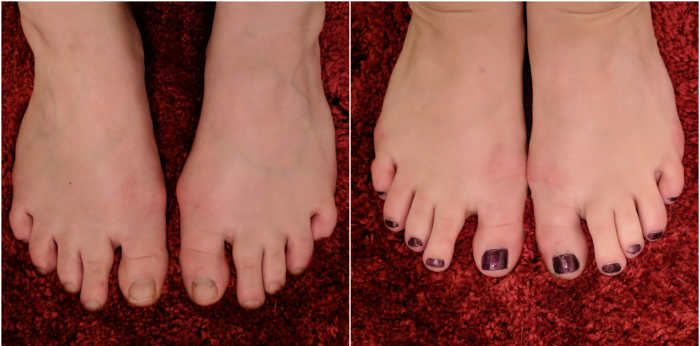
And here we have the finished product—an at-home spa pedicure that saves you some cash!
hellovictoria
This content is accurate and true to the best of the author’s knowledge and is not meant to substitute for formal and individualized advice from a qualified professional.