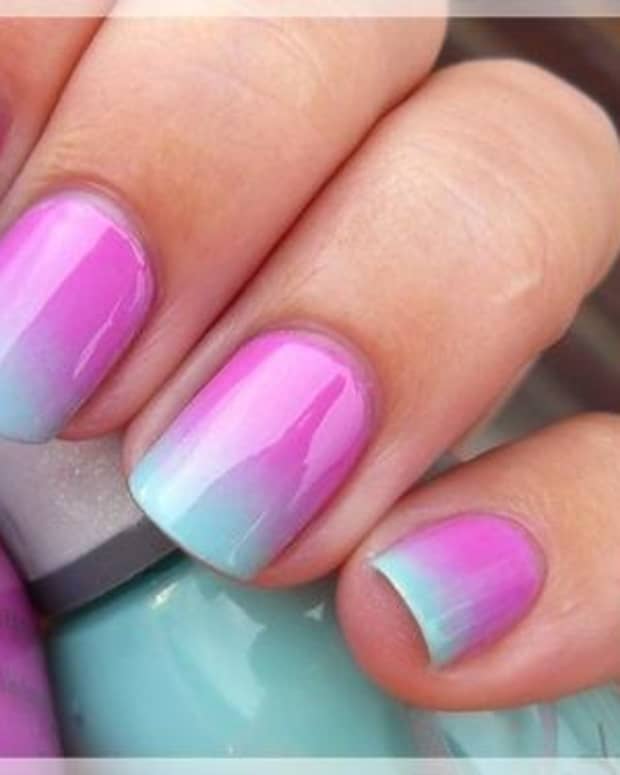
How to Do Ombre Nail Art at Home
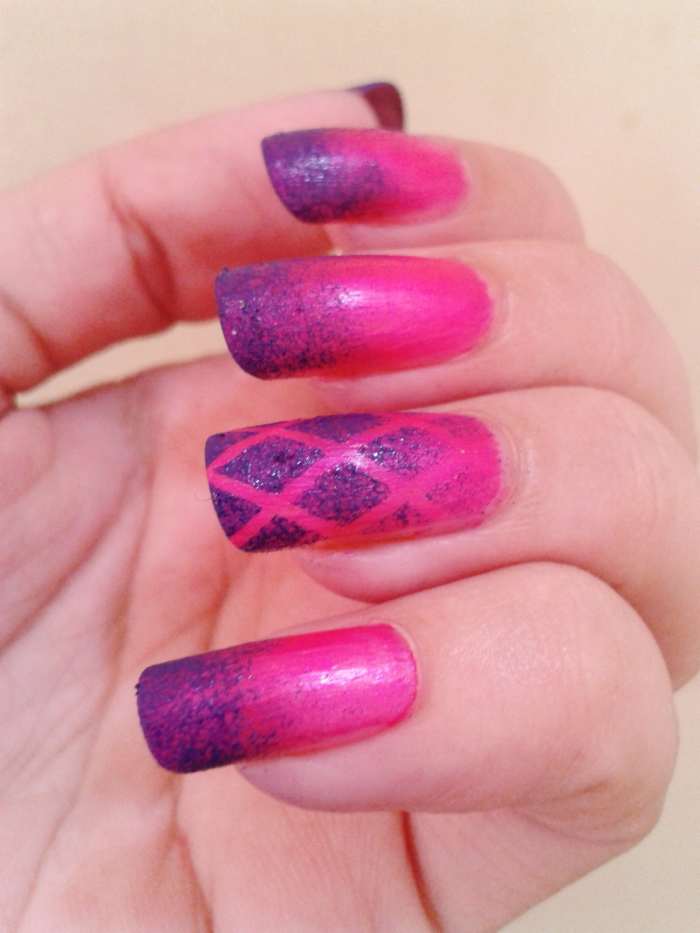
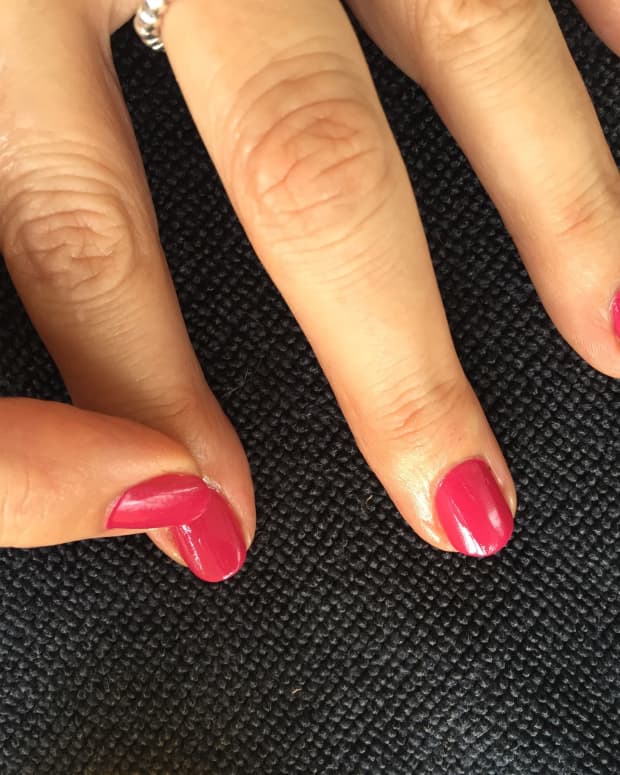
Pink to purple ombre with a checkered pattern
Jasmeet Kaur
Do you love art? Do you like to play with colorful nail polish? Use your nails as your canvas with this ombre tutorial.
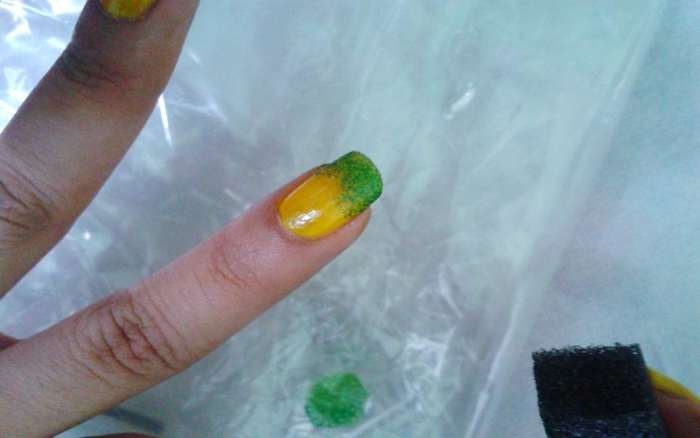
Yellow Green Ombre Nail art
Jasmeet Kaur
Basic Two-Tone Ombre
Materials:
- Two different colors of nail polish
- A clear topcoat
- A piece of sponge
- Nail polish remover
- Cotton swabs
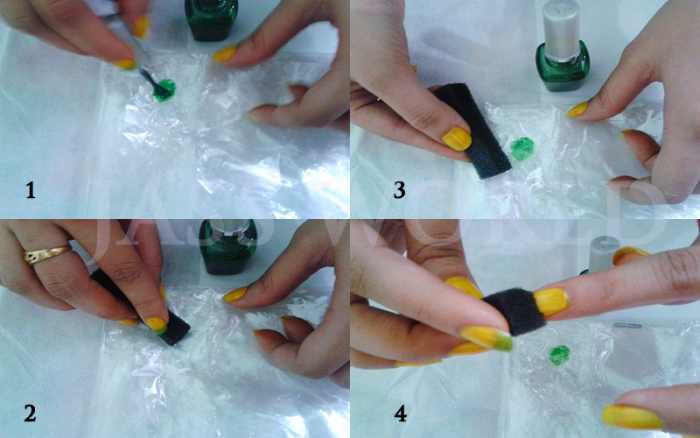
Step by step Yellow Green Ombre Nail art
Jasmeet Kaur
Instructions:
- Gather all of your materials. You can use any nail polish colors; just remember you want one light and one dark color. As you can see in the images above, here I used yellow and green.
- First of all, clean off any old polish with nail polish remover and cotton swabs.
- Next, apply your lighter color as the base coat for every nail (in my case, yellow). You can apply a double coat if required. Let it dry completely.
- Now, here is where the ombre comes in. Transfer some of your darker nail polish onto a plastic sheet or any other smooth, disposable surface. Then dab your sponge in the nail polish and press it onto the ends of your nails. Repeat it on every nail.
- Let it dry and cover your nail art with a clear topcoat.
Tip
If you're in a hurry, dry your nail polish quickly by placing your fingers in ice-cold water for 30 to 60 seconds. Wondrously, the polish will come out completely dry.
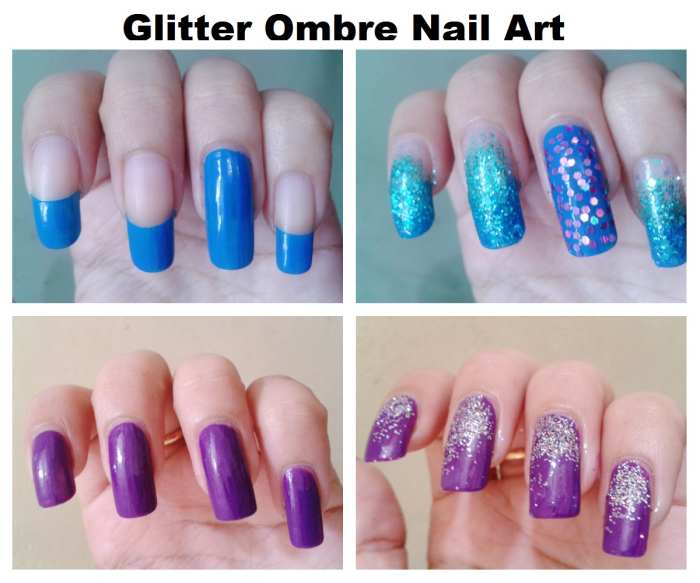
Glitter ombre nails. The base colors can be seen on the left; the final nails are on the right.
Jasmeet Kaur
Who doesn't love glitter? Instead of applying a uniform distribution of sparkles, mix things up by applying it in a gradient. For this, you can use either glitter nail polish or clear nail polish and loose glitter. You can apply both products easily with a sponge.
For the purple nails in the picture above, I used a very similar technique to that of the two-tone ombre. The base coat is a solid purple, and I created a reverse-ombre look by using the sponge to apply glitter at the base of the nail instead of the tip.
For the blue nails, I did something a little different. You'll notice that the base coat for all of the fingers except for the ring finger is a French manicure. I then used glitter to transition between the clear part of the French manicure and the blue part. To do so, I used the sponge to apply clear polish where the two colors met and then sprinkled on aqua glitter. For the ring finger, I applied pink hexagon flakes with a small dotting tool because the individual pieces are so small that they're difficult to handle with tweezers. Finally, I applied a top coat so that the glitter is sealed and secure.
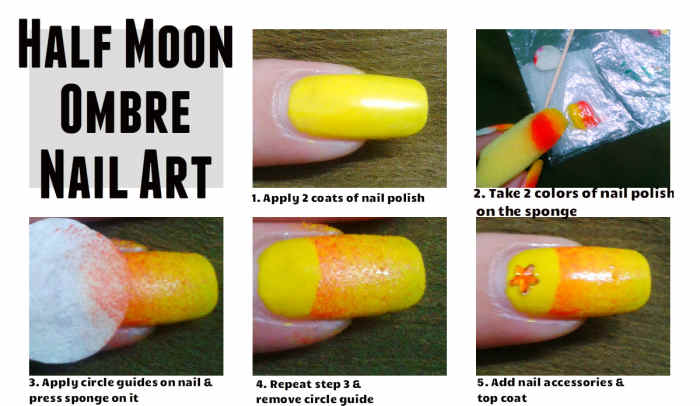
Half moon ombre nail art
Jasmeet Kaur
Half-Moon Ombre
A simple variation of the two-tone ombre, this nail art will rack in the compliments. The only addition is a circular nail guide. I have created this guide with paper tape, but you can easily find these guides in the market. If you have a French manicure tip, that will work perfectly. Here are some simple steps to follow for the nail art:
- Apply a base coat (here, I used yellow) and let it dry.
- Apply the circular guide onto your nails as shown in the photo.
- Sponge on the ombre hue (in this case, orange). Repeat this step to make a perfect finish.
- Remove the guide from your nails and apply top coat.
- Optional: You can embellish your nails with additional accessories, like the orange star I incorporated.
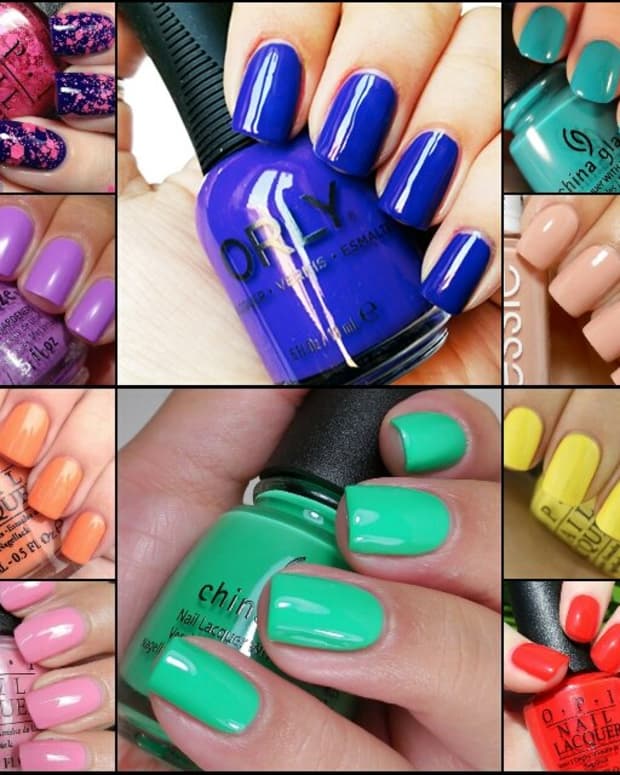
Multi-Tone Ombre
Get creative and embrace multiple colors. Try applying four or five different colors with the sponge technique. For this nail art, we need a white matte nail polish as the base. Apply two coats and let it dry.
Now, take four nail polish colors, such as pink, blue, purple, and green. Apply each with a sponge, and experiment with vertical, horizontal, and diagonal impressions.
Tip
Do not forget to seal your nail art with a top coat. It gives shine to your nails and makes the polish longer lasting.
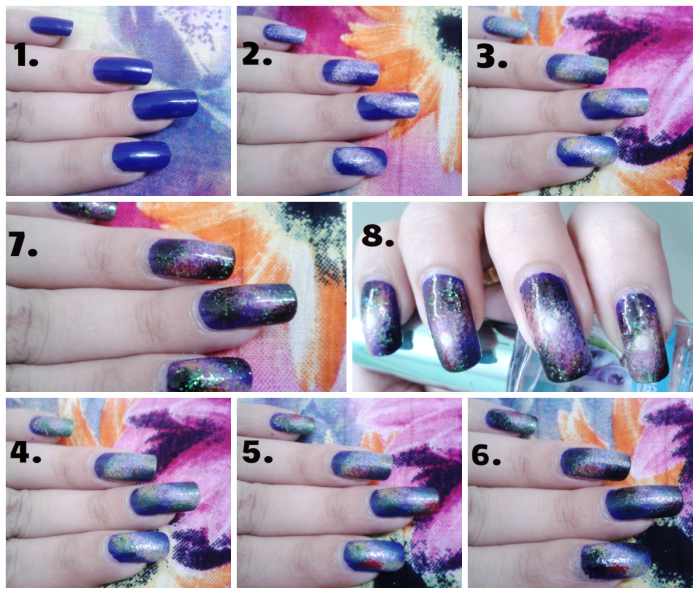
Galaxy nails painted with a sponge
Jasmeet Kaur
Galaxy Nail Art
These galaxy nails use the same sponge technique. I used multiple colors—royal blue, white, yellow, green, pink, red, and black—as well as a bit of glitter. Here are the steps:
Read More From Bellatory


- Apply one coat of royal blue nail polish. Here, we need only one coat as a base because we are going to apply several additional coats of polish with the sponge.
- Now, use the sponge to apply white and pink diagonally across the nail.
- Next, apply yellow, green, red, and black, one by one.
- Add some glitter to the wet polish.
- Now we need to give a center to our galaxy. Use a dotting tool to add a white dot in the middle of each nail.
- Finally, apply a quick-dry topcoat and our galaxy nails are ready.
- Optional: You can also make some stars with a striping brush.
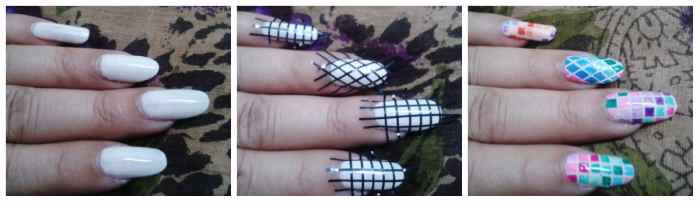
Checkered ombre nail art
Jasmeet Kaur
Checkered Ombre
Ombre, which comes from the French word for "shaded," refers to anything with a gradient, whether it's the smooth gradient achieved with a sponge or the more choppy gradient achieved by simply painting different tones of a color with a brush. This is what I did in this manicure.
Materials Needed:
- White nail polish for the base and to mix with other colors to create your various tones
- Various other colors of nail polish, such as pink, blue, green, or purple
- 1 mm-thick striping tape
- Stripes brush
- Tweezers
- Quick-dry top coat
Instructions:
- Apply a coat of white nail polish and let it dry completely—you can also use a nail-polish dryer to speed the processes.
- Next, lay the striping tape onto the nails in a grid pattern.
- Now you're set up to start adding color. Take a smooth disposable surface, such as foil paper or a plastic sheet, and transfer four blobs of nail polish onto it.
- Next, take white nail polish and mix it with the polish on the sheet to make four progressively lighter tones.
- Fill the squares of the grid on your nails with these tones to create a gradient effect.
- If you're planning to use more than one color, as I did in the picture above, repeat the previous step as needed.
- After filling all squares, carefully remove the striping tape and apply a topcoat.
There are so many variations of the nail art you can create with the help of a sponge. Have any other ideas for ombre designs? Please share them with me below. I would love to hear.
This content is accurate and true to the best of the author’s knowledge and is not meant to substitute for formal and individualized advice from a qualified professional.
Comments
Jasmeet Kaur (author) from India on August 12, 2015:
surely Blond Logic... u should try it once.
Mary Wickison from Brazil on August 11, 2015:
I have never seen this technique before. I love nail art and some years ago, I had my nails done every two weeks. I was never brave enough to do it at home, though.
I wish I had read about this soon, it looks easy and the results are great.
Shadaan Alam from India on June 09, 2013:
wow loved these beautiful nails and the tips you have given, pinned ur post.
idigwebsites from United States on June 05, 2013:
Thanks for the additional information! I'm so excited to try the other designs :)
idigwebsites from United States on May 27, 2013:
I sooo love nail art! Haven't tried with a bow though, so thanks for another wonderful tip!
cbar77 on May 21, 2013:
Hi Jasmeetk! I really like the pastel ombre nail art, especially the one with the bows. It looks so perfect!
passionate77 on April 28, 2013:
very nice and soo cute, jasmeetk, i enjoyed all the tips and pics step by step. really very nice and cool color schemes specially in summer in asia these days. great work, thanks for sharing dear!