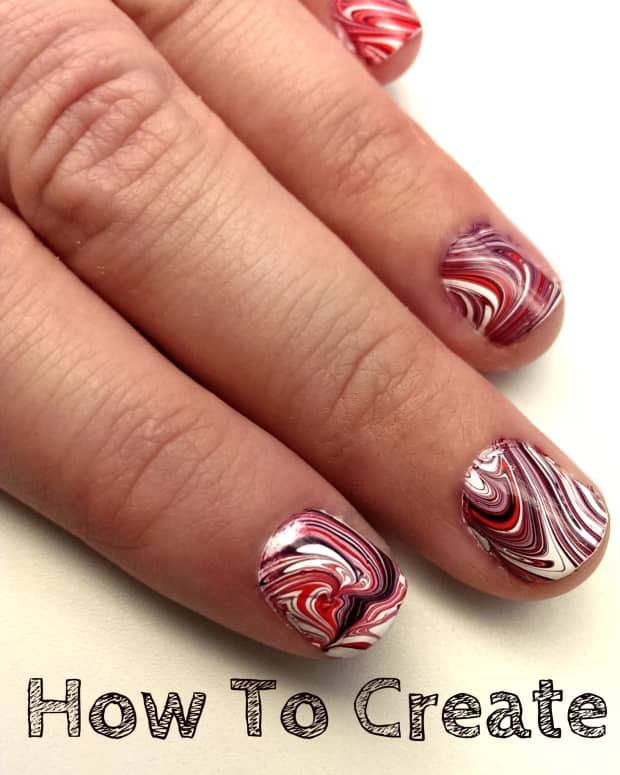
DIY Marble Nails With Sharpie Markers
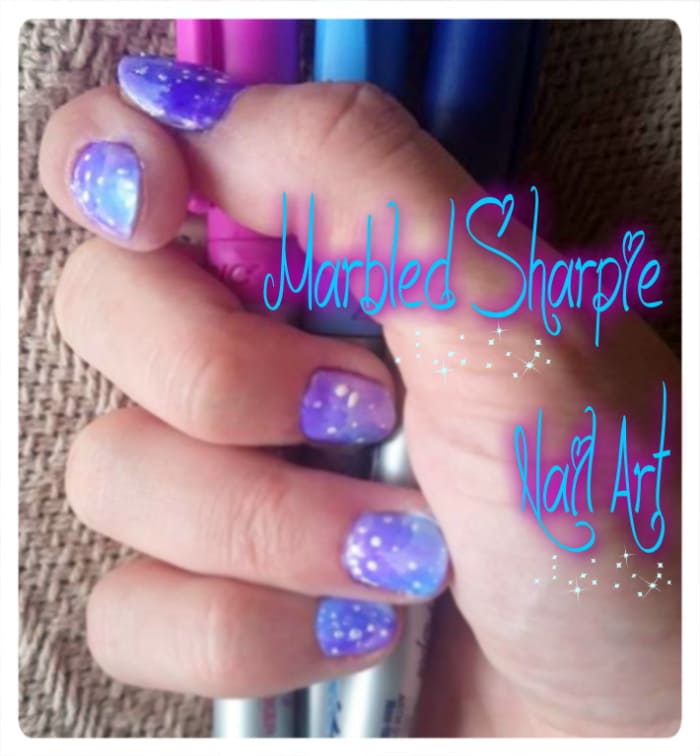
Marbled nails using sharpies and rubbing alcohol
Sharpie Nail Art Is Easy to Do
This DIY nail art tutorial will show you how to create marbled nails using sharpies. You can take the styles to the next level and use these instructions to create galaxy inspired nail art as well. This method is simpler to do than marbled nails using water because there is no mess to worry about, and it's much easier to clean up around the cuticles if you aren't as precise.
A few things you will need for this nail art are:
- White nail polish
- Nail polish remover
- Rubbing alcohol
- Sharpies in different colors
- Paintbrush
- Small glass dish
- Cotton buds (optional)
Average Cost of Supplies Needed
| Tool | Average Cost ($) |
|---|---|
White Nail Polish | $1–$5 |
Nail Polish Remover | $2 |
Paint Brush | $1 |
Sharpies (3) | $4 |
Rubbing Alcohol | $2 |
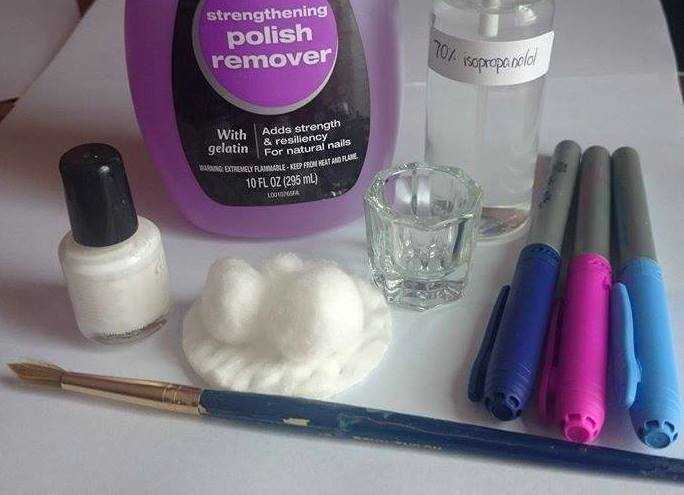
The items you will need to create this sharpie marbled look.
1. Prepping the Nails: Paint the Nails White
If you haven't already, wipe off any nail polish already on your nails and make sure your nails are free of any oils or grease. Then take white nail polish and paint them white until the nail polish is opaque (1–2 coats).
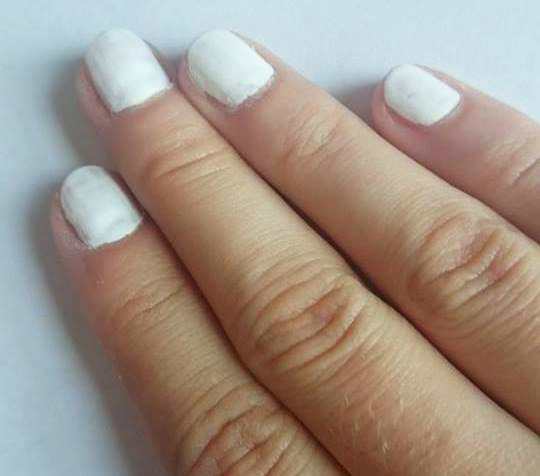
Paint the nails white using one or two coats of polish.
2. Creating the Color Using Sharpies
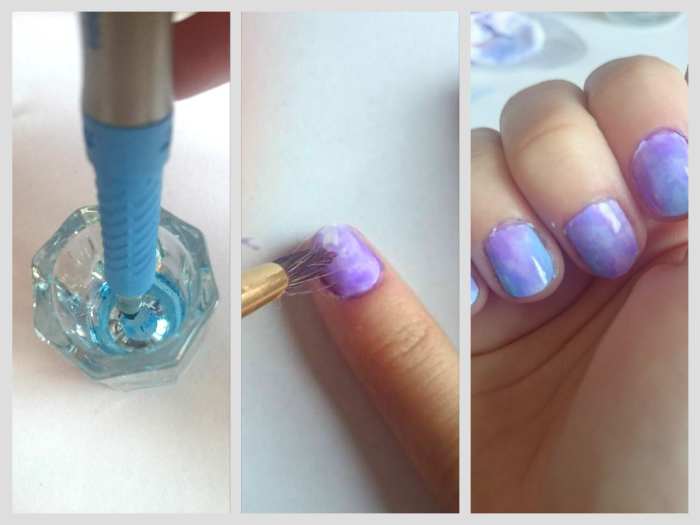
Take a sharpie marker of your color choice and draw on the bottom of a small glass dish with it. Don't worry, this will not ruin the glass, and you will be able to wipe it off completely with no damage to the dish.
Then spray 1–2 sprays of rubbing alcohol in the bottom of the glass to dissolve the color.
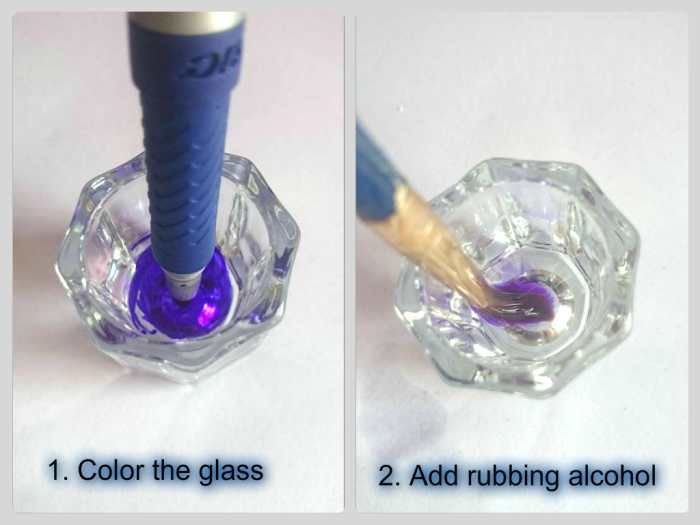
Color the glass and spritz some rubbing alcohol into the bottom of the glass, then swirl your paintbrush in it, squeeze the excess liquid onto the sides and paint.
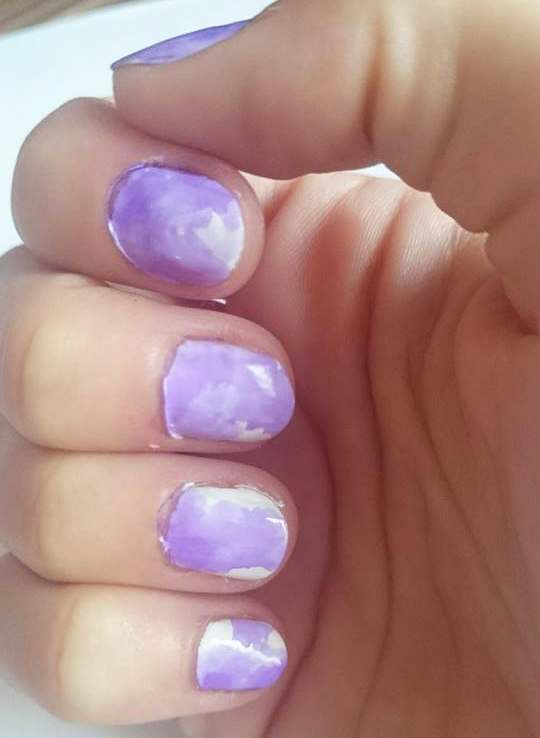
3. Paint the Liquid on Your Nails
Dip your brush in the liquid and start painting your nails in random strokes. The color will dry fast, and if you go over the same area twice or three times, the color will darken.
One coat of sharpie color
Read More From Bellatory


Paint on the Second Color
Repeat this process with the rest of the colors you have chosen.
Two different sharpie colors
After All Colors Have Been Applied
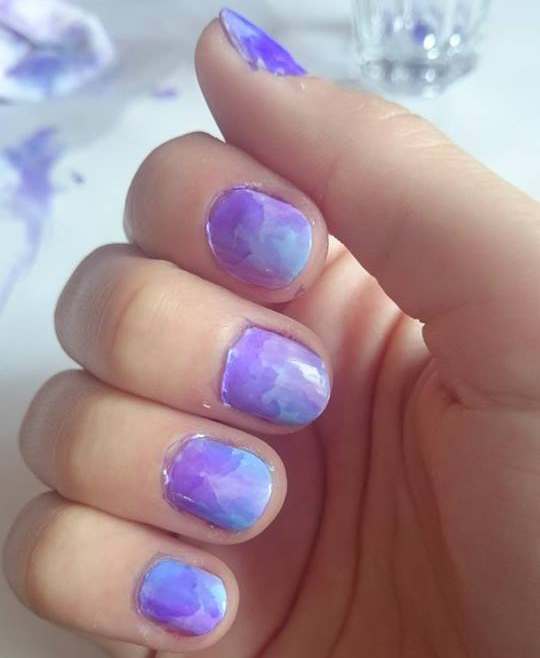
Marbled sharpie nails
4. Add Extra Details
You can stop here or you can create a "galaxy" look by dotting on some white nail polish with the brush or with a dotting tool to achieve a cool effect.
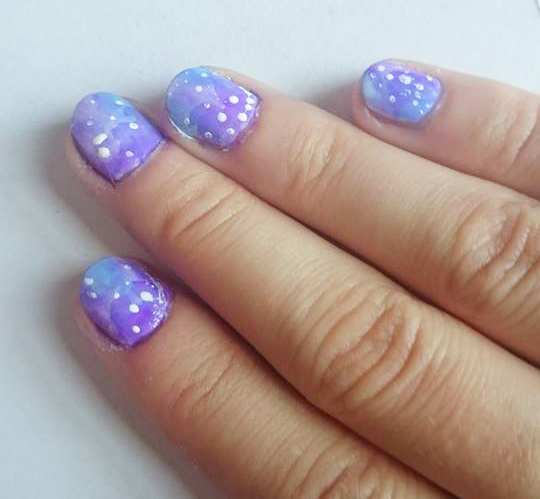
Galaxy nails
Acrylic Marbled Nails
If you want to achieve this look using acrylic nails instead, you can use the tutorial below to help you achieve a good design. With acrylic nails, it is easier to paint onto the nails first and then use a brush dipped in alcohol to spread the sharpie paint around.
Doing this method on your own nails is not as efficient since you are painting white nail polish on first. Drawing first with sharpie on your painted nails will "cure" the sharpie to your nail and make it harder to spread around with alcohol, thus giving a more blotchy appearance.
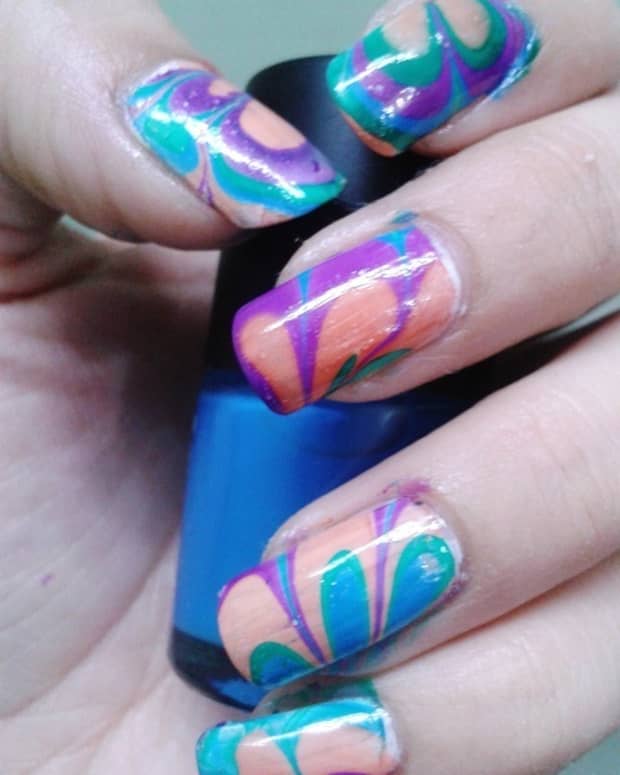
Experiment with different color combinations and come up with cool marbled nails ideas.
This content is accurate and true to the best of the author’s knowledge and is not meant to substitute for formal and individualized advice from a qualified professional.
© 2015 Deya Writes
Comments
Deya Writes (author) on September 26, 2015:
Glad to see you like it! :)
Jasmeet Kaur from India on September 26, 2015:
loved the trick. I will try it too...